1. Lubancat monitoring and detection
This chapter will briefly introduce an example of camera monitoring and detection. The user logs in to the monitoring page on the browser, and clicks the button after logging in to perform video recording and target detection. The web program uses a python-based flask framework to achieve live streaming. The image is obtained by calling the camera through opencv, and npu is used for image detection and processing.
Testing platform:lubancat 2
Board system:Debian10 (xf)
Python version:Python3.7
Opencv version:4.7.0.68
Toolkit Lite2:1.4.0
Flask:1.0.2
1.1. Dependent tools and library installation
The experimental test uses lubancat 2, the system is Debian10, and some tools and libraries are installed (some tools and systems have already been installed and will not be executed):
1 2 3 4 5 6 7 8 9 10 11 | # Installation tool
sudo apt update
sudo apt -y install git wget
# Install python related libraries, etc., use python3 by default
sudo apt -y install python3-flask python3-pil python3-numpy python3-pip
# Install opencv-python related libraries, the test is to use version 4.7.0.68, or other versions
sudo pip3 install opencv-contrib-python
# Install rknn-toolkit-lite2, refer to the previous NPU use chapter
|
1.2. Video streaming server and camera get frames
1.2.1. Deploy a video streaming server
In this example, the Flask application framework will be used to build a web page and a live video streaming server.
提示
The simple use of the flask library can refer to the previous tutorial . Or Flask official documentation。
Flask returns a Response object with a generator as input via the /video_viewer route.
Flask will be responsible for calling the generator, entering a loop, and continuously returning the frame data obtained from the camera as a response block.
And send the results of all parts to the client in chunks.
1 2 3 4 5 6 7 8 9 10 11 12 13 14 15 16 17 18 19 20 21 22 23 24 25 26 27 28 29 30 31 32 33 34 35 36 37 38 39 40 41 42 43 44 45 46 47 48 49 50 | from flask import session, render_template, request, redirect, url_for, Response, jsonify
# Import login pages etc.
from controller.modules.home import home_blu
# Import the VideoCamera class to obtain camera frames or detected frame streams, etc.
from controller.utils.camera import VideoCamera
import time
video_camera = None
global_frame = None
# Home page
@home_blu.route('/')
def index():
# Template rendering
username = session.get("username")
if not username:
return redirect(url_for("user.login"))
return render_template("index.html")
# Get video stream
def video_stream():
global video_camera
global global_frame
if video_camera is None:
video_camera = VideoCamera()
while True:
# Get a sequence of individual JPEG images
frame = video_camera.get_frame()
time.sleep(0.01)
if frame is not None:
global_frame = frame
yield (b'--frame\r\n'
b'Content-Type: image/jpeg\r\n\r\n' + frame + b'\r\n\r\n')
else:
yield (b'--frame\r\n'
b'Content-Type: image/jpeg\r\n\r\n' + global_frame + b'\r\n\r\n')
# Video stream
@home_blu.route('/video_viewer')
def video_viewer():
# Template rendering
username = session.get("username")
if not username:
return redirect(url_for("user.login"))
# Return the Response object of the generator, multipart/x-mixed-replace type, the boundary string is frame
return Response(video_stream(),
mimetype='multipart/x-mixed-replace; boundary=frame')
|
In the simple HTML page index.html, one of the image tags <img id="video" src="{{ url_for('home.video_viewer') }}">.
It will use url_for to point to the route /video_viewer, and the browser will automatically display the image from the stream, thus keeping the image element updated:
1 2 3 4 5 6 7 8 9 10 11 12 13 14 15 16 | <body>
<h1 align="center" style="color: whitesmoke;">Flask+OpenCV+Rknn</h1>
<div class="top">
<div class="recorder" id="recorder" align="center">
<button id="record" class="btn">record video</button>
<button id="stop" class="btn">pause recording</button>
<button id="process" class="btn">Turn on detection</button>
<button id="pause" class="btn">pause detection</button>
<input type="button" class="btn" value="sign out"
onclick="javascrtpt:window.location.href='{{ url_for('user.logout') }}'">
<a id="download"></a>
<script type="text/javascript" src="{{ url_for('static', filename='button_process.js') }}"></script>
</div>
</div>
<img id="video" src="{{ url_for('home.video_viewer') }}">
</body>
|
1.2.2. Get frame from camera
Get frames from the camera by importing the packaged VideoCamera class:
1 2 3 4 5 6 7 8 9 10 11 12 13 14 15 16 17 18 19 20 21 22 23 24 25 26 27 28 29 30 31 32 33 34 35 36 37 38 39 40 41 42 43 | class VideoCamera(object):
def __init__(self):
# Use opencv to open the system default camera
self.cap = cv2.VideoCapture(0)
if not self.cap.isOpened():
raise RuntimeError('Could not open camera.')
# Create RKNNLite object
self.rknn_lite = RKNNLite()
# Set frame width and height
self.cap.set(cv2.CAP_PROP_FRAME_WIDTH, 640)
self.cap.set(cv2.CAP_PROP_FRAME_HEIGHT, 640)
# ...............
# Exit the program to release resources
def __del__(self):
self.cap.release()
self.rknn_lite.release()
# Camera capture frame
def get_frame(self):
ret, self.frame = self.cap.read()
if ret:
# Image detection processing
if self.is_process:
#self.image = cv2.cvtColor(self.frame, cv2.COLOR_BGR2RGB)
self.image = cv2.cvtColor(self.frame, cv2.COLOR_BGR2RGB)
self.outputs = self.rknn_lite.inference(inputs=[self.image])
self.frame = process_image(self.image, self.outputs)
#self.rknn_frame = process_image(self.image, self.outputs)
#ret, image = cv2.imencode('.jpg', self.rknn_frame)
#return image.tobytes()
if self.frame is not None:
# Image coding compression
ret, image = cv2.imencode('.jpg', self.frame)
# Return the image as a bytes object
return image.tobytes()
else:
return None
# ...............
|
1.3. NPU processing image
Use the NPU for image detection processing. This example does not have an additional training model. It directly uses the examples/onnx/yolov5 routine in the official Toolkit Lite2 tool, which is only for experimental demonstration. Use RKNN Toolkit Lite2 to deploy the RKNN model on the board system.
提示
For the installation and use of RKNN Toolkit Lite2 on the board, you can refer to the previous tutorial . Or official github documentation。
Sample program processing flow:
1 2 3 4 5 6 7 8 9 10 11 12 13 14 15 16 17 18 19 20 21 22 23 24 25 26 27 28 29 30 31 32 33 34 35 36 37 38 39 | # Create RKNNLite object
self.rknn_lite = RKNNLite()
#...................
def load_rknn(self):
# Import RKNN model
print('--> Load RKNN model')
ret = self.rknn_lite.load_rknn(RKNN_MODEL)
if ret != 0:
print('Load RKNN model failed')
exit(ret)
# Call the init_runtime interface to initialize the running environment
print('--> Init runtime environment')
ret = self.rknn_lite.init_runtime()
if ret != 0:
print('Init runtime environment failed!')
exit(ret)
#...................
# Process the pictures acquired by the camera and set the picture size
self.cap.set(cv2.CAP_PROP_FRAME_WIDTH, 640)
self.cap.set(cv2.CAP_PROP_FRAME_HEIGHT, 640)
#Convert to RGB format
self.image = cv2.cvtColor(self.frame, cv2.COLOR_BGR2RGB)
# Call the inference interface, perform detection and reasoning on the image, and return the result
self.outputs = self.rknn_lite.inference(inputs=[self.image])
#According to the npu processing results, the image is post-processed and the processed image is returned
self.frame = process_image(self.image, self.outputs)
# Exit the program to release resources
def __del__(self):
self.cap.release()
# Use the release interface to release the RKNNLite object
self.rknn_lite.release()
|
Without npu accelerated processing, opencv can be directly used for image detection and recognition processing. Interested students can study the code by themselves, add data sets for training, or replace other models for experiments.
Use the opencv library for image processing and digital recognition functions in the experimental code directory: controller/utils/opencvtest.py.
1.4. Adapt to the specific environment
Pull the experimental code:
# Enter the following command in the terminal to use the main branch:
git clone -b main https://gitee.com/LubanCat/lubancat-flask-opencv-rknn.git
Modify the IP and port that the server monitors, and modify it according to the actual situation:
# Enter the lubancat-flask-opencv-rknn directory
cd ./lubancat-flask-opencv-rknn

# Modify the startup function parameters in the main.py file
vim main.py

# The default setting is host="0.0.0.0", which is the ip of the default network port
app.run(threaded=True, host="0.0.0.0", port=5000)

# According to the board environment, set the specific ip
app.run(threaded=True, host="192.168.103.121",port=5000)
# Now the IP address of the server listening is 192.168.103.121, and the port is 5000.
The tutorial test uses ov5648, mipi csi interface. In actual use, you need to confirm the camera number (usually /dev/video0):
1、First confirm the camera number:
# Enter the Python3 terminal:
python3

# Import opencv library package
import cv2

# Enter the following command:
cap = cv2.VideoCapture(0)
cap.isOpened()
# If True is printed in the window, the device number is available

# After determining the number, release the camera resource
cap.release()
If any error occurs, please increase the number of the camera in turn and try to find the available device number.
The upper limit of number increment is the number of video devices, which can be checked by ls /dev/video* command.
2、Modify the experimental code to adapt to your own camera:
# Enter the following command in the terminal:
# Enter the code directory of the opencv operation camera in the lubancat-flask-opencv-rknn directory:
cd ./controller/utils/

# Modify the VideoCamera(object) function in the camera.py file:
vim camera.py

# Change the function parameter 0 in the self.cap = cv2.VideoCapture(0) statement to the device number corresponding to your camera, or the device file ("/dev/video0")
self.cap = cv2.VideoCapture(0)
1.5. Test experiment
After modifying the content of the tutorial in the previous section, we can run the experimental code to view the experimental phenomenon.
# In the project code directory lubancat-flask-opencv-rknn, execute the following command:
sudo python3 main.py
The following experimental phenomena can be seen:

The prompt message printed by the program tells us the address of the server and the default network port ip http://0.0.0.0:5000 to start monitoring the system.
To exit the program, press CTRL+C.
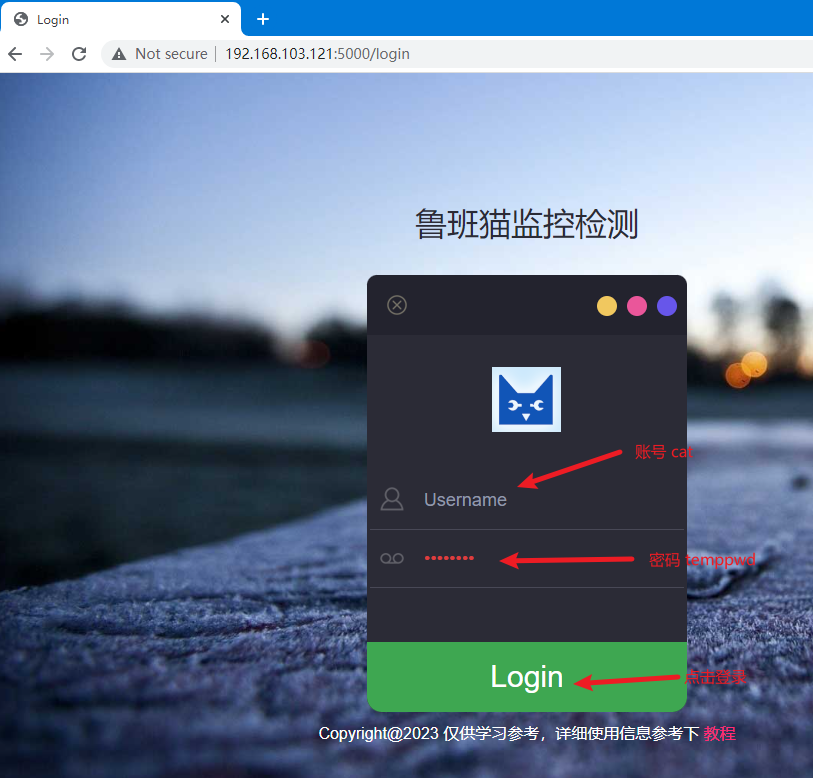
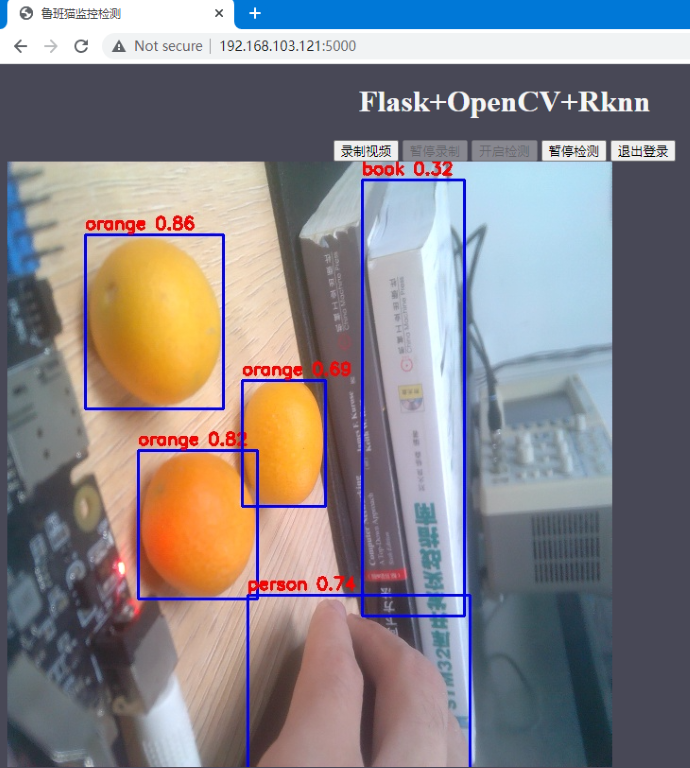
Here, observe the experimental phenomenon by entering the URL in the browser: http://192.168.103.121:5000
The experimental phenomenon is shown in the figure:

After the login is complete, enter the monitoring interface, click
Start Detectionto enter the detection state.

One frame image acquisition time test.
Use python’s time module to calculate the running time of the program to simply test the time required to obtain a frame of image and the time required after npu processing. Add the running time calculation to the program:
1 2 3 4 5 6 7 8 9 10 11 12 13 14 15 16 17 18 19 20 21 | # Get video stream
def video_stream():
global video_camera
global global_frame
if video_camera is None:
video_camera = VideoCamera()
while True:
start_time = time.time()
frame = video_camera.get_frame()
end_time = time.time()
print('get_frame cost %f second' % (end_time - start_time))
#time.sleep(0.01)
if frame is not None:
global_frame = frame
yield (b'--frame\r\n'
b'Content-Type: image/jpeg\r\n\r\n' + frame + b'\r\n\r\n')
else:
yield (b'--frame\r\n'
b'Content-Type: image/jpeg\r\n\r\n' + global_frame + b'\r\n\r\n')
|
The test environment is as follows: lubancat 2, Lubancat monitoring and detection sample program, using the debian10 system, the default system configuration, using the yolov5 routine model in the Toolkit Lite2 tool, the following test data is for reference only.
When running the program normally without turning on the npu detection image, it takes about 65ms for a frame of image, of which the fastest is 23ms, and the slowest is 121ms
Turn on npu to process images, NPU defaults to 600Mhz, run: it takes about 345ms to obtain a frame of image (including the time for obtaining camera images, preprocessing images, npu processing images, image post-processing frames, etc.)
Set the NPU frequency to 900Mhz test: it takes about 314ms to acquire a frame of image
# lubancat2  npu set 900Mhz:
echo 900000000 > /sys/class/devfreq/fde40000.npu/userspace/set_freq
Summary
The Lubancat monitoring and detection example implements simple monitoring display and target detection functions, but the effect is not optimal. Only for simple learning reference, possible optimization:
Adjust the number of frames displayed in the video, how many pictures are processed at a time is more reasonable, and use multi-threading for image processing.
Confirm the specific usage scenarios, select appropriate models and algorithms, data collection, model adjustment and training.
Support multiple camera display, etc.
