2. NPU
NPU is a processing unit dedicated to neural networks. It is designed to accelerate neural network algorithms in artificial intelligence fields such as machine vision and natural language processing. As the range of applications for AI is expanding, it currently provides functions in various fields, including face tracking, gesture and body tracking, image classification, video surveillance, automatic speech recognition (ASR), and advanced driver assistance systems (ADAS).
LubanCat-RK series boards use Rockchip rk3566 and RK3568 processors. Both rk3568 and rk3566 have built-in NPU modules, up to 1TOPS, support integer 8, integer 16 convolution operations, and support deep learning frameworks: TensorFlow, TF-lite, Pytorch, Caffe, ONNX, etc.
The official RKNN SDK and RKNN-Toolkit2 tools are provided, and the SDK provides a programming interface for the chip platform with RKNPU. The Rockchip NPU platform uses the RKNN model, and the RKNN model can be converted using the RKNN-Toolkit2 software development kit, and deployed to the board using RKNN-Toolkit-Lite2.
This chapter will briefly introduce the use of RKNN-Toolkit2 on PC (Ubuntu system) for model conversion, model inference, performance evaluation, etc., and use RKNN Toolkit Lite2 to deploy on the board.
重要
The test environment of the tutorial in this chapter: Lubancat RK series board, the mirror system is Debian10 (Python 3.7.3, OpenCV 4.7.0.68), and the PC environment uses ubuntu20.04 (python3.8.10). When the tutorial was written, RKNN-Toolkit2 was version 1.4.0, the board npu driver was 0.7.2, rknnrt was 1.4.0, and the adb tool was 1.0.40.
2.1. RKNN-Toolkit2
The Toolkit-lite2 tool is used on the PC platform and provides a python interface to simplify the deployment and operation of the model. Through this tool, users can conveniently complete the following functions: model conversion, quantization function, model reasoning, performance and memory evaluation, quantization accuracy analysis, and model encryption function.
The current version of RKNN-Toolkit2 is applicable to the system Ubuntu18.04 (x64) and above, more dependencies and usage information can be found here “RKNN Toolkit2 Quick Start Guide”
RKNN-Toolkit2 files can be downloaded directly from the official github url
Pull or download from Netdisc (Extraction codehslu),In 1-Embedfire Open Source Book_Tutorial Documentation->Reference Code. (The obtained RKNN-Toolkit2 file contains RKNN Toolkit Lite2)
2.1.1. RKNN-Toolkit2 installation
Environment installation (PC ubuntu20.04):
#Install the python tool, ubuntu20.04 is installed with python3.8.10 by default
sudo apt update
sudo apt-get install python3-dev python3-pip python3.8-venv gcc

#Install related libraries and packages
sudo apt-get install libxslt1-dev zlib1g-dev libglib2.0 libsm6 \
libgl1-mesa-glx libprotobuf-dev gcc
Install RKNN-Toolkit2:
#Create a directory, because the installed package of ubuntu 20.04 used in the test may be different from the package version required to install and run RKNN-Toolkit2.
#In order to avoid other problems, use python venv to isolate the environment.
mkdir project-Toolkit2 && cd project-Toolkit2
sudo python3 -m venv .toolkit2_env
# Activation into the environment
source .toolkit2_env/bin/activate

#Pull the source code, or copy RKNN-Toolkit2 to this directory
git clone https://github.com/rockchip-linux/rknn-toolkit2.git

#It may be very slow when using pip3 to install packages, set the source
pip3 config set global.index-url https://mirror.baidu.com/pypi/simple

#Install dependent libraries, according to rknn-toolkit2\doc\requirements_cp38-1.4.0.txt
pip3 install numpy
pip3 install -r doc/requirements_cp38-1.4.0.txt

#Install rknn_toolkit2
pip3 install packages/rknn_toolkit2-1.4.0_22dcfef4-cp38-cp38-linux_x86_64.whl
Check whether the installation is successful:
(.toolkit2_env) llh@-:~/project-Toolkit2$ python
Python 3.8.10 (default, Jun 22 2022, 20:18:18)
[GCC 9.4.0] on linux
Type "help", "copyright", "credits" or "license" for more information.
>>> from rknn.api import RKNN
>>>
2.1.2. Model Transformation and Model Inference
In the RKNN-Toolkit2 file, there are routines of various functions under the example directory, enter the ../examples/onnx/yolov5 directory. This Demo shows the process of converting the onnx model to the RKNN model on the PC, then exporting, reasoning, deploying to the NPU platform to run, and retrieving the results.
Excuting an order:
# Switch to the examples/onnx/yolov5 directory
cd examples/onnx/yolov5
# Model Transformation and Model Inference
python test.py
After running the export successfully, the yolov5s.rknn file will be generated in the current directory, which will be used in the next Toolkit Lite2 section.
Running the yolov5 routine above will also perform model inference, and will output the result picture (out.jpg) in the current directory.
2.1.3. Performance and Memory Evaluation
In addition to simulating reasoning tests, RKNN-Toolkit2 can also perform simple board-connected debugging. The usb interface of the lubancat board does not have functions such as usb debug, and cannot be directly debugged by usb adb, but it can be debugged by using the network adb connection.
The adbd and rknn_server services need to be started on the connected board debugging board. The adb server on the PC needs to be connected to adbd, so that the client can communicate with the device. rknn_server is a background proxy service running on the board, which is used to receive the protocol transmitted by the PC through USB, then execute the interface corresponding to the board runtime, and return the result to the PC.
# Copy the file to the board (you can use scp sftp nfs, etc., the file is in the supporting routine or see the reference link below, and get it from the runtime\RK356X\Linux\rknn_server directory of RKNPU2)

# Add executable permission
cd  ../usr/bin
chmod +x rknn_server restart_rknn.sh start_rknn.sh

# Start rknn_server
restart_rknn.sh

# View the status of the service adbd, it is active
sudo systemctl status adbd.service
sudo /usr/bin/adbd &
The board and PC are connected under a local area network, and the supporting program of this tutorial is used for testing:
# Install adb on PC
sudo apt install adb
# open adb server
adb start-server
# Connect the board, according to the actual IP of the board, the default port is 5555
adb connect 192.168.103.115

# Check the connected device and confirm the device_id when initializing the runtime
adb devices
cd examples/onnx/yolov5

# Run the program, debug with the board
python test.py
Simple test results:
W __init__: rknn-toolkit2 version: 1.4.0-22dcfef4
--> Config model
done
--> Loading model
done
--> Building model
Analysing : 100%|███████████████████████████████████████████████| 142/142 [00:00<00:00, 2940.26it/s]
Quantizating : 100%|█████████████████████████████████████████████| 142/142 [00:00<00:00, 336.83it/s]
W build: The default input dtype of 'images' is changed from 'float32' to 'int8' in rknn model for performance!
                    Please take care of this change when deploy rknn model with Runtime API!
W build: The default output dtype of 'output' is changed from 'float32' to 'int8' in rknn model for performance!
                    Please take care of this change when deploy rknn model with Runtime API!
W build: The default output dtype of '327' is changed from 'float32' to 'int8' in rknn model for performance!
                    Please take care of this change when deploy rknn model with Runtime API!
W build: The default output dtype of '328' is changed from 'float32' to 'int8' in rknn model for performance!
                    Please take care of this change when deploy rknn model with Runtime API!
done
--> Export rknn model
done
--> Init runtime environment
W init_runtime: Flag perf_debug has been set, it will affect the performance of inference!
I NPUTransfer: Starting NPU Transfer Client, Transfer version 2.1.0 (b5861e7@2020-11-23T11:50:36)
D RKNNAPI: ==============================================
D RKNNAPI: RKNN VERSION:
D RKNNAPI:   API: 1.4.0 (bb6dac9 build: 2022-08-29 16:17:01)(null)
D RKNNAPI:   DRV: rknn_server: 1.3.0 (121b661 build: 2022-04-29 11:11:47)
D RKNNAPI:   DRV: rknnrt: 1.4.0 (a10f100eb@2022-09-09T09:07:14)
D RKNNAPI: ==============================================
done
===================================================================================================================
                            Performance
        #### The performance result is just for debugging, ####
        #### may worse than actual performance!            ####
===================================================================================================================
Total Weight Memory Size: 7312768
Total Internal Memory Size: 7782400
Predict Internal Memory RW Amount: 134547200
Predict Weight Memory RW Amount: 7312768
ID   OpType           DataType Target InputShape                                   OutputShape            DDR Cycles     NPU Cycles     Total Cycles   Time(us)       MacUsage(%)    RW(KB)         FullName
0    InputOperator    UINT8    CPU    \                                            (1,3,640,640)          0              0              0              19             \              1200.00        InputOperator:images
1    Conv             UINT8    NPU    (1,3,640,640),(32,3,6,6),(32)                (1,32,320,320)         1493409        691200         1493409        11956          9.64           4409.25        Conv:Conv_0
2    exSwish          INT8     NPU    (1,32,320,320)                               (1,32,320,320)         2167674        0              2167674        5408           \              6400.00        exSwish:Sigmoid_1_2swish
3    Conv             INT8     NPU    (1,32,320,320),(64,32,3,3),(64)              (1,64,160,160)         1632022        921600         1632022        4153           36.99          4818.50        Conv:Conv_3
4    exSwish          INT8     NPU    (1,64,160,160)                               (1,64,160,160)         1083837        0              1083837        2849           \              3200.00        exSwish:Sigmoid_4_2swish
5    Conv             INT8     NPU    (1,64,160,160),(32,64,1,1),(32)              (1,32,160,160)         813640         102400         813640         1455           11.73          2402.25        Conv:Conv_6
6    exSwish          INT8     NPU    (1,32,160,160)                               (1,32,160,160)         541919         0              541919         1456           \              1600.00        exSwish:Sigmoid_7_2swish
........(omitted)
142  Conv             INT8     NPU    (1,128,80,80),(255,128,1,1),(255)            (1,255,80,80)          824352         408000         824352         1040           65.38          2433.88        Conv:Conv_198
143  OutputOperator   INT8     CPU    (1,255,80,80),(1,80,80,256)                  \                      0              0              0              1011           \              3200.00        OutputOperator:output
144  OutputOperator   INT8     CPU    (1,255,40,40),(1,40,40,256)                  \                      0              0              0              216            \              800.00         OutputOperator:327
145  OutputOperator   INT8     CPU    (1,255,20,20),(1,20,20,256)                  \                      0              0              0              178            \              220.00         OutputOperator:328
Total Operator Elapsed Time(us): 117367

===================================================================================================================
In the above test, we can see that quantization is enabled, and eval_perf is called to evaluate the performance of the model, and obtain the overall time consumption of the test model and the time consumption of each layer. The above is a simple connection debugging.
For more functional test routines of rknn-toolkit2, refer to https://github.com/rockchip-linux/rknn-toolkit2/tree/master/examples/functions.
2.2. RKNN Toolkit Lite2
RKNN Toolkit Lite2 provides a Python programming interface for the Rockchip NPU platform to deploy the RKNN model on the board.
2.2.1. Install RKNN Toolkit Lite2 on the board
Toolkit-lite2 is currently applicable to Debian10/11 (aarch64) system, more dependencies and usage information can be found at “RKNN Toolkit Lite2 User Guide”
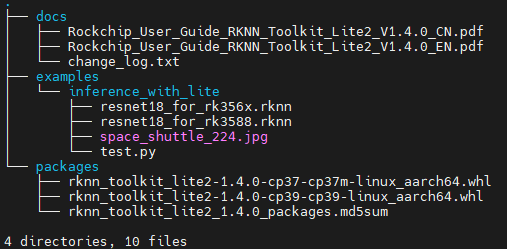
To obtain RKNN Toolkit Lite2, you can obtain it directly from the official github, or in the supporting routine, transfer the file to the board, or directly git to the board. The obtained Toolkit Lite2 directory structure is as follows:

Environment installation (take LubanCat 2, Debian10 as an example):
sudo apt update

#Install other python tools
sudo apt-get install python3-dev python3-pip gcc

#Install related dependencies and packages
sudo apt-get install -y python3-opencv
sudo apt-get install -y python3-numpy
sudo apt -y install python3-setuptools
pip3 install wheel
Toolkit Lite2 tool installation:
# Go to the rknn_toolkit_lite2/packages directory, select the whl file of Debian10 ARM64 with python3.7.3 to install:
pip3 install rknn_toolkit_lite2-1.4.0-cp37-cp37m-linux_aarch64.whl
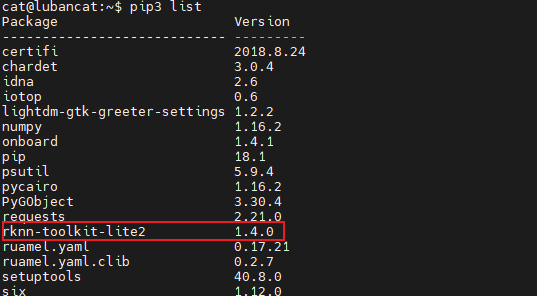
Successful installation:

2.2.2. Board side deployment reasoning
重要
librknnrt.so is a board-side runtime library, which is required for operation. There is librknnrt.so library in the default image /usr/lib directory, but it needs to be updated. You can pull it from the official github, or check the supporting routines, and copy librknnrt.so to the system /usr/lib/ directory.
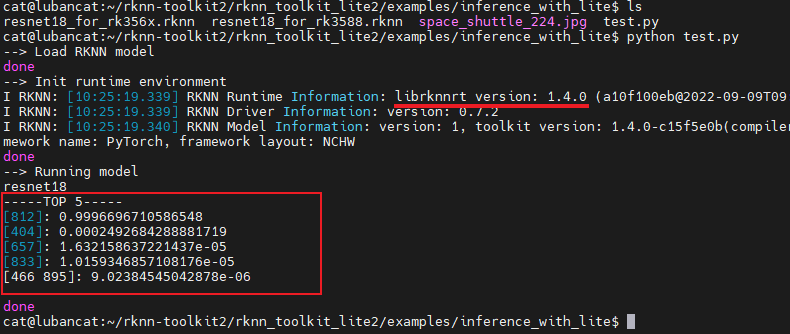
Run the Demo of RKNN Toolkit Lite2, enter the obtained Toolkit Lite2 directory, and execute the command in the ../examples/inference_with_lite directory:

Modify the examples/onnx/yolov5 routine in the Toolkit Lite2 tool, simply modify test.py, and use RKNN Toolkit Lite2 to deploy. Import the yolov5s.rknn converted from the previous RKNN-Toolkit2 (refer to the supporting routine for the modified source file):
cat@lubancat:~/yolov5$ python test.py
--> Load RKNN model
done
--> Init runtime environment
I RKNN: [10:29:36.521] RKNN Runtime Information: librknnrt version: 1.4.0 (a10f100eb@2022-09-09T09:07:14)
I RKNN: [10:29:36.521] RKNN Driver Information: version: 0.7.2
I RKNN: [10:29:36.524] RKNN Model Information: version: 1, toolkit version: 1.4.0-22dcfef4(compiler version: 1.4.0 (3b4520e4f@2022-09-05T20:52:35)), target: RKNPU lite, target platform: rk3568, framework name: ONNX, framework layout: NCHW
done
--> Running model
done
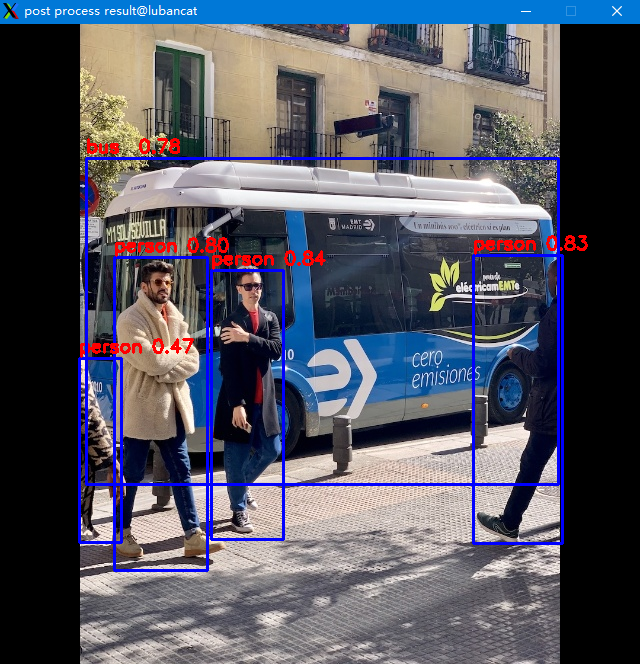
class: person, score: 0.8352155685424805
box coordinate left,top,right,down: [211.9896697998047, 246.17460775375366, 283.70787048339844, 515.0830216407776]
class: person, score: 0.8330121040344238
box coordinate left,top,right,down: [473.26745200157166, 231.93780636787415, 562.1268351078033, 519.7597033977509]
class: person, score: 0.7970154881477356
box coordinate left,top,right,down: [114.68497347831726, 233.11390662193298, 207.21904873847961, 546.7821505069733]
class: person, score: 0.4651743769645691
box coordinate left,top,right,down: [79.09242534637451, 334.77847719192505, 121.60038471221924, 518.6368670463562]
class: bus , score: 0.7837686538696289
box coordinate left,top,right,down: [86.41703361272812, 134.41848754882812, 558.1083570122719, 460.4184875488281]

(post process result:1896): dbind-WARNING **: 10:31:30.000: Error retrieving accessibility bus address: org.freedesktop.DBus.Error.ServiceUnknown: The name org.a11y.Bus was not provided by any .service files
cat@lubancat:~/yolov5$ ls
bus.jpg  dataset.txt  onnx_yolov5_0.npy  onnx_yolov5_1.npy  onnx_yolov5_2.npy  out.jpg  test.py  yolov5s.onnx  yolov5s.rknn
If it runs normally, it can be displayed (or view the output image out.jpg):

提示
The default supporting routine ../yolov5/test.py does not use cv2.imshow() to display pictures.
2.4. Reference
RKNPU2 related documents and source addresses:https://github.com/rockchip-linux/rknpu2
RKNN-toolkit2 related documents and source addresses:https://github.com/rockchip-linux/rknn-toolkit2
