
18. wifi
Video introduction to this chapter:

“15-Wireless Network Card Connecting WiFi and Bluetooth”
https://www.bilibili.com/video/BV1Y24y1A7xH/
LubanCat-RK series boards only have the following models with onboard wifi chips.
LubanCat-Zero-W
LubanCat-1N
Onboard RTL8821cu, drive mode is usb.
If you want to use the wireless function, you can also use an external usb wireless network card to support it. There are a variety of wireless network cards pre-supported on the board. You can check the list of my support below.
18.1. LubanCat wireless network card support list
You can go to 《Module Support List》 to view.
If you need to adapt to other types of network cards, you need to set and adjust the kernel driver or transplant the network card driver.
18.2. Static configuration
You can check the following chapter “Network Connection and Configuration”
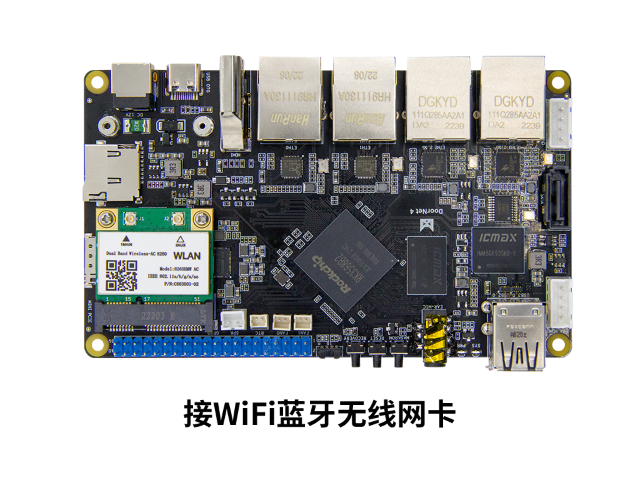
18.3. PCIe network card connection diagram
For the specific connection method, please go to 《MINI PCI-E Interface》 <https://doc.embedfire.com/linux/rk356x/quick_start/zh/latest/quick_start/interface/mini-pcie/mini-pcie.html> _ to view.
LubanCat-1
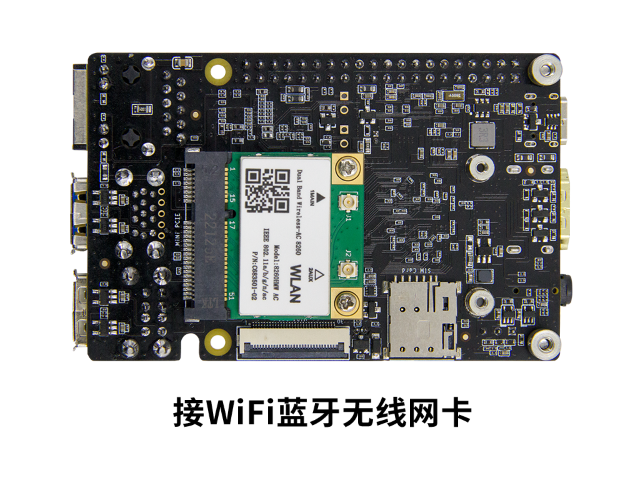
LubanCat-2
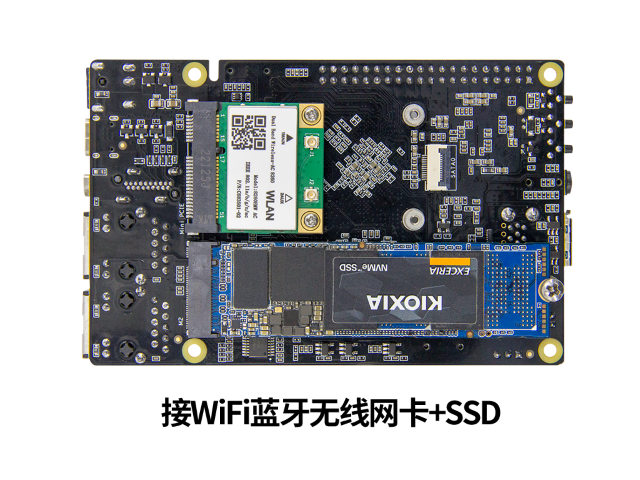
LubanCat-2N
18.4. Desktop system configuration wifi
You can go to “Desktop WiFi Connection” to view
18.5. Command line to connect wifi router
There are many ways to configure wifi from the command line. Here are some commonly used wifi tools.
nmtui: graphical NetworkManager network configuration
nmcli: (NetworkManager Command Line) is an official tool used by the system – desktop wifi control is provided by this tool. Features: easy to use
wpa_cli (a network tool in the open source community) is a wifi tool used by more people. Features: a lot of information, simple and quick configuration
18.5.1. nmtui
You can go to “Command Line Graphical Connection” to view.
18.5.2. nmcli
1 2 3 4 5 6 7 8 9 10 11 12 | # List available wifi access points, list can be omitted
sudo nmcli dev wifi list
# Connect to the hotspot PPP. After the connection is successful, the configuration file will be automatically generated. To connect again in the future, you can use the command nmcli connectio up mySSID.
sudo nmcli dev wifi connect PPP password '00000000' ifname wlan0
#If the connection is successful, you can use it if you want to connect again next time.
sudo nmcli dev wifi connect PPP
#More nmcli commands can be used to view
nmcli help
nmcli OBJECT help
|
nmcli command composition
nmcli [OPTIONS] OBJECT { COMMAND | help }
1 2 3 4 5 6 7 8 9 10 11 12 13 14 15 16 17 18 19 20 21 22 23 24 25 26 27 28 29 | OPTIONS
-o[verview] overview mode (hide default values)
-t[erse] terse output
-p[retty] pretty output
-m[ode] tabular|multiline output mode
-c[olors] auto|yes|no whether to use colors in output
-f[ields] <field1,field2,...>|all|common specify fields to output
-g[et-values] <field1,field2,...>|all|common shortcut for -m tabular -t -f
-e[scape] yes|no escape columns separators in values
-a[sk] ask for missing parameters
-s[how-secrets] allow displaying passwords
-w[ait] <seconds> set timeout waiting for finishing operations
-v[ersion] show program version
-h[elp] print this help
#OBJECT can be abbreviated
OBJECT
g[eneral] NetworkManager's general status and operations
n[etworking] overall networking control
r[adio] NetworkManager radio switches
c[onnection] NetworkManager's connections
d[evice] devices managed by NetworkManager
a[gent] NetworkManager secret agent or polkit agent
m[onitor] monitor NetworkManager changes
Command can be obtained through nmcli OBJECT help
|
Some commonly used commands are listed below
Order |
Effect |
|---|---|
nmcli n |
Shows whether NetworkManager takes over network settings |
nmcli n on |
Set up NetworkManager to take over the network |
nmcli n off |
Cancel NetworkManager takeover of the network |
nmcli c status |
View connection brief information |
nmcli c show |
View connection details |
nmcli c up/down ifname |
Enable/disable the specified connection (ifname network card) |
nmcli c show(s) ifname |
View the connection details of the ifname NIC |
nmcli c delete(de) ens33 |
Delete specified connection |
nmcli d status |
View device brief information |
nmcli d show |
View device details |
nmcli d sh ens33 |
Display detailed information about a specific device |
nmcli d connect(c) ens33 |
Connect device |
nmcli d disconnect(c) ens33 |
Disconnect device |
1 2 3 4 5 6 7 | #First list the configuration of the connection. eth0 is now connected to Wired connection 1.
root@lubancat:~# nmcli c s
NAME UUID TYPE DEVICE
Wired connection 1 35ecb023-3194-3edb-bf90-4198f82329a8 ethernet eth0
Wired connection 2 45f86cca-f8df-376e-8aad-37e10d2a65ce ethernet --
aEBF_Guest fb1d506e-6dc7-4c5b-a4ce-339f3349d26d wifi wlan0
|
Then modify Wired connection 1
1 2 3 4 5 6 7 8 9 10 11 12 13 | #Static ip setting
sudo nmcli c modify 'aEBF_Guest' [ + | - ]option, option value # or
sudo nmcli c m 'aEBF_Guest' ipv4.address 192.168.103.172/24 # Modify the IP address and subnet mask
sudo nmcli c m 'aEBF_Guest' ipv4.method manual # Modify to static configuration, the default is auto
sudo nmcli c m 'aEBF_Guest' ipv4.gateway 192.168.103.254 # Modify the default gateway
sudo nmcli c m 'aEBF_Guest' ipv4.dns 8.8.8.8 # Modify DNS
sudo nmcli c m 'aEBF_Guest' +ipv4.dns 114.114.114.114 # Add a DNS
sudo nmcli c m 'aEBF_Guest' ipv6.method disabled # Disable IPv6
sudo nmcli c m 'aEBF_Guest' connection.autoconnect yes # boot
Note that ipv4.address must be modified before ipv4.method can be modified!
Replace the value of the option with empty quotes "" to set the option back to the default value (using ipv4.method as an example):
|
Detailed Documentation Links
18.5.3. wpa_cli
1 2 3 4 5 6 7 8 9 10 11 12 13 14 15 16 17 18 19 20 21 22 23 24 25 26 27 28 29 30 31 32 33 34 35 36 37 38 39 | #Enable wifi
wpa_supplicant -B -i wlan0 -c /etc/wpa_supplicant/wpa_supplicant.conf
#Enter the dedicated console, select wlan0 by default
wpa_cli
#Add a network and get the network id number
add_network
#Suppose the id number is 2
#Set the wifi name to be connected
set_network 2 ssid "PPP"
#Set the security of wifi: wpa
set_network 2 key_mgmt WPA-PSK
#Set the password required to connect
set_network 2 psk "88888888"
#Enable wifi
enable_network 2
#Save wifi information
save_config
#List all wifi and serial numbers in the list
list_networks
#Select the wifi you want to connect to according to the serial number
select_network 2
#View connected WiFi
status
#Quit
quit
#Obtain IP automatically
dhclient wlan0
|
Statement |
Function |
Example |
|---|---|---|
quit |
Exit mode |
quit |
scan |
Scan wifi |
scan |
scan_results |
View scan results |
scan_results |
new_password |
Change new password |
new_password 1 “password” |
disale_network |
Forbid WiFi |
disale_network 2 |
list_networks |
List all wifi and serial numbers in the list |
list_networks |
select_network |
Select the wifi you want to connect to according to the serial number |
select_network 2 |
remove_network |
Remove wifi you don’t want |
remove_network 2 |
disconnect |
Stop wifi connection |
disconnect |
reconnect |
Reconnect wifi |
reconnect |
help |
View more options |
help |
Of course, you can also directly modify the configuration file /etc/wpa_supplicant/wpa_supplicant.conf
It can be added according to the format, and then configured using the wpa_cli tool.
1 2 3 4 5 6 7 8 | ctrl_interface=/var/run/wpa_supplicant
update_config=1
network={
ssid="PPP"
psk="88888888"
key_mgmt=WPA-PSK
}
|
18.5.4. Turn on the wireless hotspot
注解
The network card with MINI PCI-E interface is not yet compatible with the function of wireless hotspot.
18.5.4.1. nmcli
(NetworkManager Command Line)
1 2 3 4 5 6 7 8 9 10 11 12 13 14 15 16 17 18 19 20 21 22 23 | Hotspot-72Mbps WIFI4
#Using this method can only create WIFI4 hotspots, the theoretical rate can reach 72Mbps, the measured rate is 50Mbps, and the conversion is about 6MB/s.
#5g
sudo nmcli device wifi hotspot ifname wlan0 con-name AP-5G ssid LubanCat-AP-5G band a channel 36 password 88888888
#2.4g
sudo nmcli device wifi hotspot ifname wlan0 con-name AP-2.4G ssid LubanCat-AP-2.4G band bg channel 6 password 88888888
#band wireless protocol bg-2.4G a-5G
#channel channel It can be modified and used by Baidu Science Popularization, and can be downloaded and viewed in the wifi analysis of "Network Speed Manager".
#wireless name - ssid
#password - password
#con-name Connection name, if it is created successfully for the first time, it can be used directly
sudo nmcli device wifi hotspot
#View hotspot information and password
sudo nmcli device wifi show-password
#If you need to connect to the external network, that is, the device can connect to the Internet through wifi, you need to set forwarding (assuming that the network port can connect to the Internet)
echo 1 > /proc/sys/net/ipv4/ip_forward
#If eth1 is connected to the Internet, you can replace eth0 with eth1
iptables -t nat -A POSTROUTING -o eth0 -j MASQUERADE
|
18.5.4.2. hostapd
Using this method may have poor stability and may sometimes disconnect The following are the theoretical rates of wifi hotspots at two frequencies - 2.4G - 72Mbps - 5G - 150Mps(802.11.n)single antenna max.-150Mps
Measured speed
2.4G - 50Mbps About 6MB/s
5G - 120Mbps About 15MB/s
18.5.4.2.1. install dependencies
1 2 | #Download the tools hostapd and dhcpd
sudo apt install hostapd isc-dhcp-server
|
18.5.4.2.2. Create configuration file
2.4G detailed configuration
2G.conf5G detailed configuration
5G.confDetailed explanation of each detailed data in hostapd configuration
hostapd.conf
Modify the /etc/hostapd/hostapd.conf file
1 2 3 4 5 6 7 8 9 10 11 12 13 14 15 16 17 18 19 20 21 22 23 24 25 26 27 28 29 30 31 32 33 34 35 36 37 38 39 40 41 | sudo vi /etc/hostapd/hostapd.conf
#Simplified version (5G)
interface=wlan0
ctrl_interface=/var/run/hostapd
ssid=LuBanCat-5G
channel=36
wpa=2
wpa_passphrase=password
driver=nl80211
beacon_int=100
hw_mode=a
ieee80211n=1
wme_enabled=1
ht_capab=[SHORT-GI-20][SHORT-GI-40][HT40+]
wpa_key_mgmt=WPA-PSK
wpa_pairwise=CCMP
max_num_sta=8
wpa_group_rekey=86400
#Simplified version (2.4G)
interface=wlan0
ctrl_interface=/var/run/hostapd
ssid=LuBanCat-2.4G
channel=6
wpa=2
wpa_passphrase=password
driver=nl80211
beacon_int=100
hw_mode=g
ieee80211n=1
wme_enabled=1
ht_capab=[SHORT-GI-20][SHORT-GI-40][HT40+]
wpa_key_mgmt=WPA-PSK
wpa_pairwise=CCMP
max_num_sta=8
wpa_group_rekey=86400
|
Revise /etc/dhcp/dhcpd.conf
1 2 3 4 5 6 7 8 9 10 | # Add the following at the end:
subnet 192.168.0.0 netmask 255.255.255.0
{
range 192.168.0.2 192.168.0.10;
option routers 192.168.0.1;
option domain-name-servers 192.168.0.1,114.114.114.114,8.8.8.8;
}
Among them, 114.114.114.114 is the national common DNS address, and 8.8.8.8 is the global common DNS address.
|
18.5.4.2.3. Setup script
Used to close sta mode, open ap mode and close ap mode, open sta mode
Close sta mode, open ap mode
1 2 3 4 5 6 7 8 9 10 11 12 13 14 15 16 17 18 19 20 21 | #Create script
vi ap-start.sh
#Give permission
sudo chmod +x ap-start.sh
#!/bin/bash
bash -c "echo 1 > /proc/sys/net/ipv4/ip_forward"
# Enable firewall NAT forwarding (if this machine uses eth1 to access the Internet, change eth0 to eth1)
iptables -t nat -A POSTROUTING -o eth0 -j MASQUERADE
# Turn off NetworkManager's control of the wireless network card
nmcli d disconnect wlan0
# Set up and activate the wireless network card
ifconfig wlan0 192.168.0.1 netmask 255.255.255.0
# Unlock the wireless device, you can use rfkill list to view the unlocking result.
rfkill unblock wlan
# Sleep for 6 seconds, wait for rfkill to unlock and take effect
sleep 6s
# Start dhcpd and hostapd, if hostapd cannot start, please check the log hostapd.log, check these two processes ps -ef|egrep "dhcpd|hostapd"
nohup hostapd /etc/hostapd/hostapd.conf >/home/cat/hostapd.log 2>&1 &
dhcpd wlan0 -pf /var/run/dhcpd.pid
ps -ef|head -n1 && ps -ef|egrep "dhcpd|hostapd"
|
Close ap mode, open sta mode
1 2 3 4 5 6 7 8 9 10 11 | #Create script
vi ap-stop.sh
#Give permission
sudo chmod +x ap-stop.sh
#!/bin/bash
killall hostapd dhcpd
bash -c "echo 0 > /proc/sys/net/ipv4/ip_forward"
nmcli d connect wlan0
nmcli d disconnect wlan0
nmcli d connect wlan0
|
When we open the ap mode, there need to be 3 processes, otherwise it will fail to open.
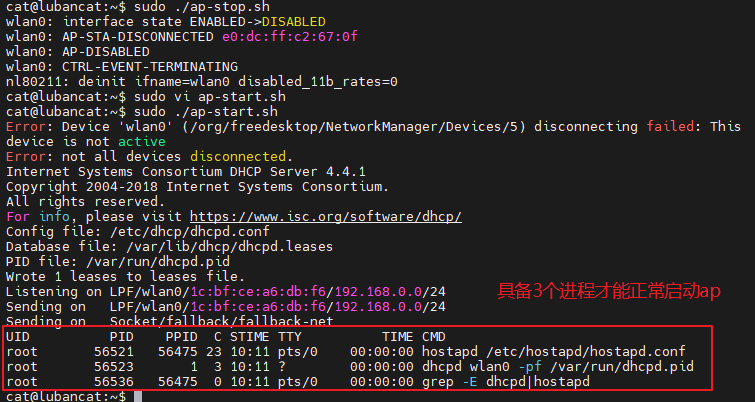
If it fails you can use
1 2 | cat /home/cat/hostapd.log
#check why it failed
|
You can find the problem on Baidu according to the reason of failure.