20. bluetooth
本章配套视频介绍:

《15-无线网卡连接WiFi和蓝牙》
https://www.bilibili.com/video/BV1Y24y1A7xH/
LubanCat-RK3562/RK3566/RK3568系列板卡只有以下型号板载支持蓝牙功能:
LubanCat-Zero-W
LubanCat-1N
LubanCat-1金手指、btb底板
如果想要让没有板载蓝牙的板卡具有蓝牙功能,可以通过插入免驱USB蓝牙适配器, 或者同时支持蓝牙和wifi的无线网卡,以下USB网卡可以即插即用:
RTL8821CU
RTL8822BU
如果遇到其他网卡,插入后无法识别或使用,需要修改内核或者移植驱动,野火不保证适配任意网卡,建议用野火适配了的。
20.1. 桌面系统配置wifi
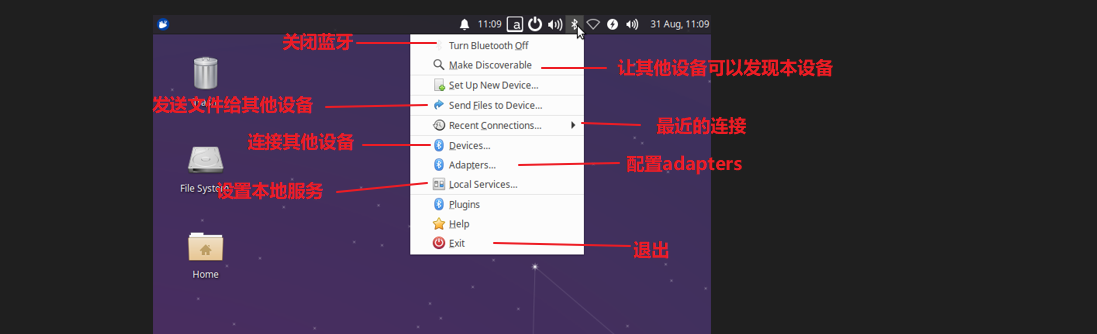
默认蓝牙是打开的状态,点击蓝牙的图标,如下图。
点击 Devices ,如下图。
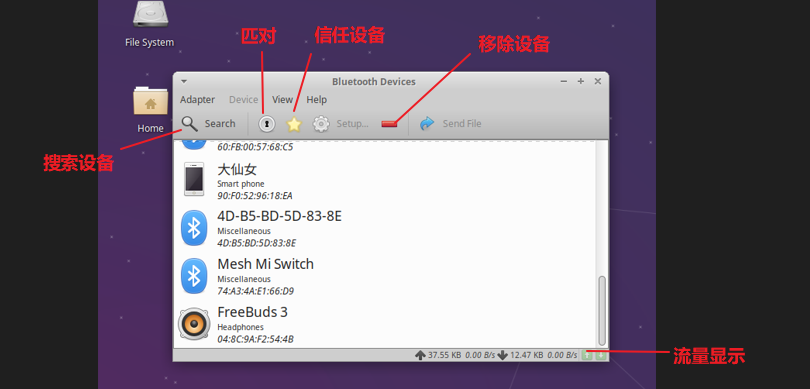
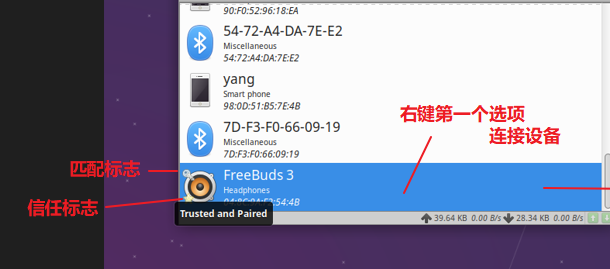
先点击信任设备,然后再点击配对,右上角会有配对的弹窗,点击允许配对,如下图。
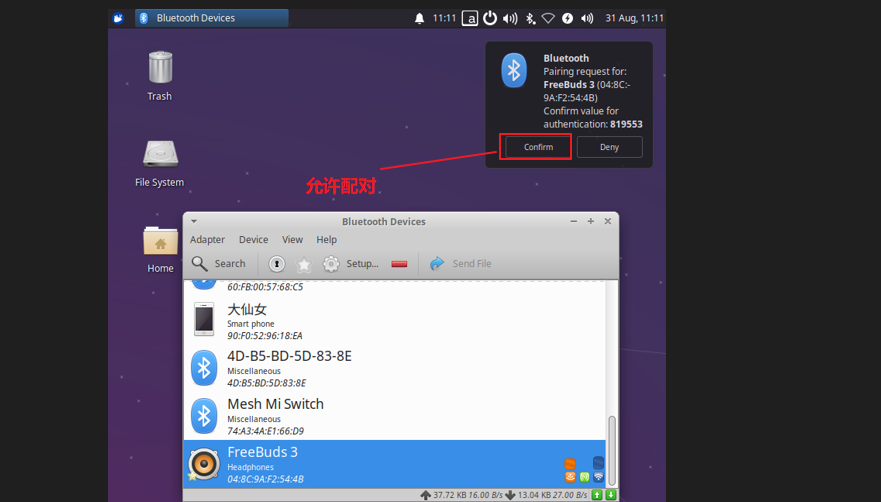
配对成功后,设备需要连接,右键选择第一个选项连接设备,如下图。
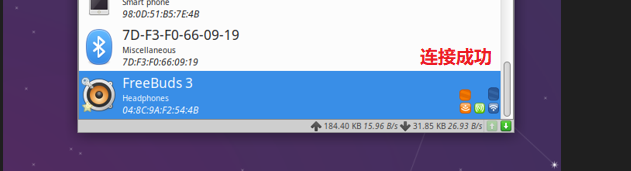
连接成功后,设备的右边会有连接的标志,下次开机的时候会自动连接之前连接过的设备, 如果连接的是蓝牙耳机,可以打开音乐播放,如下图。
20.2. 命令行配置蓝牙
使用命令行配置蓝牙,需要使用工具—-bluetoothctl。
1 2 3 4 5 6 7 8 9 10 11 12 13 14 15 16 17 18 19 20 21 22 23 24 25 26 27 | # 进入bluetoothctl命令行
bluetoothctl
# 进入bluetoothctl命令行后,类似:[bluetooth]#
# Controller代表arm板上的蓝牙设备,Device代表蓝牙耳机
# 按如下步骤初始化蓝牙设备,并连接蓝牙耳机
# 查看帮组
help
power on
agent on
default-agent
# 启动扫描
scan on
# 假如蓝牙耳机地址为:04:8C:9A:F2:54:4B
trust 04:8C:9A:F2:54:4B
# 配对
pair 04:8C:9A:F2:54:4B
# 连接
connect 04:8C:9A:F2:54:4B
# 查看蓝牙耳机信息
info 04:8C:9A:F2:54:4B
# 断开连接
disconnect 04:8C:9A:F2:54:4B
# 不想自动连接上蓝牙耳机,可以删除配对信息
remove 04:8C:9A:F2:54:4B
|
更多关于命令行蓝牙连接,可参考 https://blog.csdn.net/chenjk10/article/details/90317028
20.3. 蓝牙串行通信
首先安装相关工具。
1 2 3 4 | #安装工具
sudo apt update
sudo apt install bluez util-linux
sudo apt install bluez bluez-tools bluez-firmware
|
20.3.1. 查看蓝牙信息
1 2 3 4 5 6 7 8 9 10 11 12 13 14 15 16 17 18 19 20 | #执行命令
hciconfig -a
#打印信息如下
hci0: Type: Primary Bus: USB
BD Address: 2C:C3:E6:63:42:57 ACL MTU: 1021:8 SCO MTU: 255:12
UP RUNNING PSCAN
RX bytes:4845 acl:0 sco:0 events:434 errors:0
TX bytes:55369 acl:0 sco:0 commands:434 errors:0
Features: 0xff 0xff 0xff 0xfe 0xdb 0xfd 0x7b 0x87
Packet type: DM1 DM3 DM5 DH1 DH3 DH5 HV1 HV2 HV3
Link policy: RSWITCH HOLD SNIFF PARK
Link mode: SLAVE ACCEPT
Name: 'lubancat'
Class: 0x3c0000
Service Classes: Rendering, Capturing, Object Transfer, Audio
Device Class: Miscellaneous,
HCI Version: 4.2 (0x8) Revision: 0x75b8
LMP Version: 4.2 (0x8) Subversion: 0xf098
Manufacturer: Realtek Semiconductor Corporation (93)
|
20.3.2. 修改配置文件
修改配置文件/etc/systemd/system/dbus-org.bluez.service
1 | sudo vim /etc/systemd/system/dbus-org.bluez.service
|
修改如下,/usr/libexec/bluetooth/bluetoothd这个路径不同系统可能会不一样,按原本的路径即可。
1 2 | ExecStart=/usr/libexec/bluetooth/bluetoothd -C
ExecStartPost=/usr/bin/sdptool add SP
|
20.3.3. 重启蓝牙服务
1 2 | sudo systemctl daemon-reload
sudo /etc/init.d/bluetooth restart
|
20.3.4. 取消确认蓝牙pin码(非必须)
1 | /usr/bin/bt-agent -c NoInputNoOutput &
|
20.3.5. 配置蓝牙可以被发现
1 | sudo hciconfig hci0 piscan
|
20.3.6. 连接蓝牙设备
1 | sudo rfcomm watch hci0 &
|
在前面使用 hciconfig -a 命令可以看到蓝牙的名字叫lubancat,地址是2C:C3:E6:63:42:57(不同蓝牙会不一样)。打开手机上的蓝牙软件,比如笔者使用的是——蓝牙调试宝,一般在手机应用商店可以下载。
打开软件,可以搜索到蓝牙设备,然后进行连接,连接成功,终端会打印提示信息:
1 2 | Connection from A8:C5:6F:0D:ED:AE to /dev/rfcomm0
Press CTRL-C for hangup
|
此时/dev目录下也有一个rfcomm0设备,可以通过下面命令查看:
1 2 | #执行命令
ls /dev/rfcomm0
|
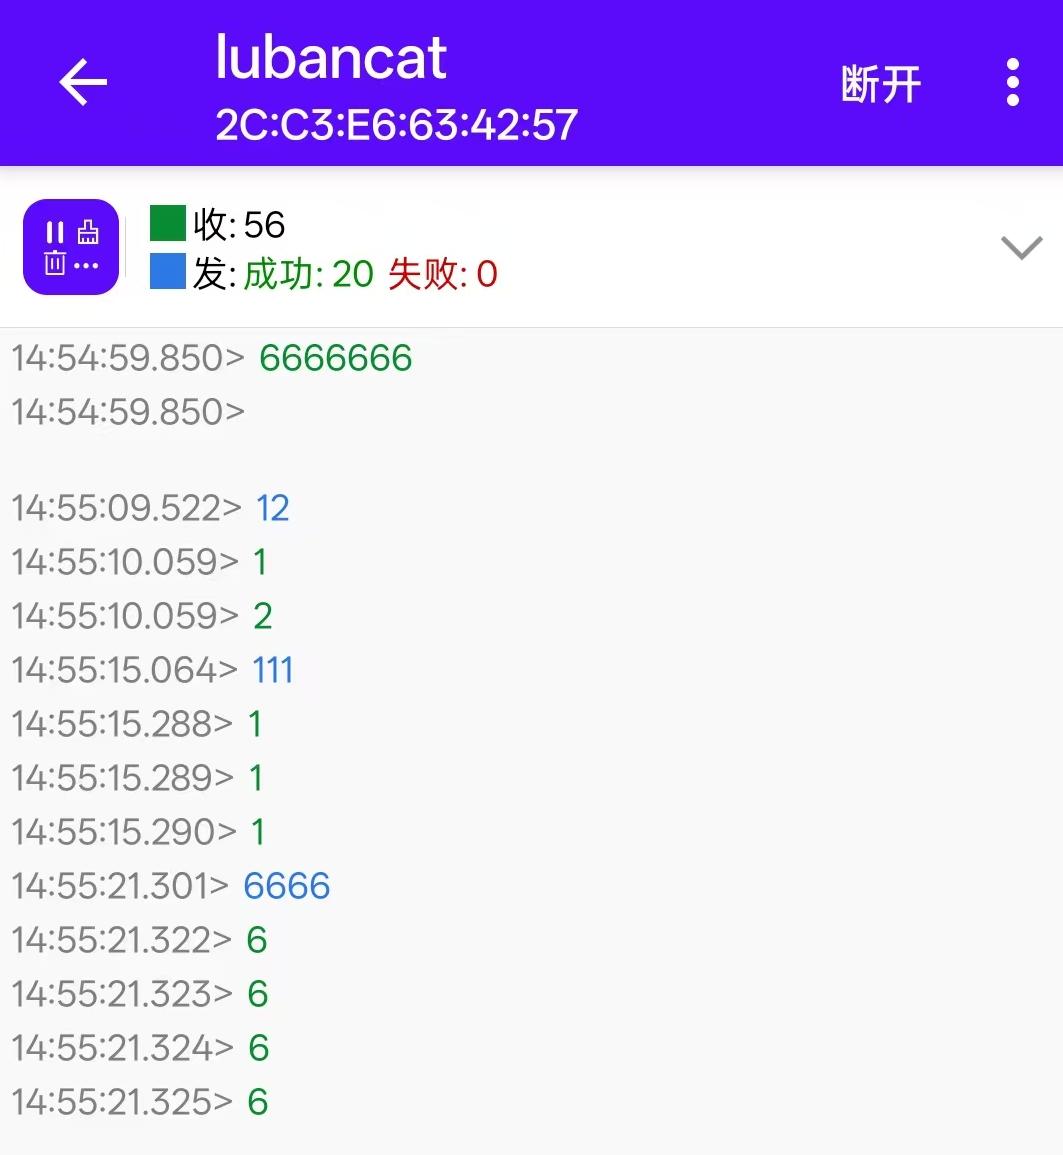
我们可以通过下面命令发送一些数据到手机的蓝牙调试工具上:
1 | echo "6666666" > /dev/rfcomm0
|
可以看到手机的蓝牙调试工具上已经收到了相关的数据。
当然手机也可以发送数据到开发板上,比如我们发送一些ASCII码字符串到开发板上, 然后在终端通过cat命令去读取这些数据,可以看到通信是正常的:
1 2 3 4 5 6 7 | #执行命令
cat /dev/rfcomm0
#打印信息
12
111
6666
|