9. 在Debian上部署web服务器
平台:野火imx6ull开发板
系统:Debian
使用工具:Nginx、PHP
实现在Debian上通过Nginx与PHP搭建Web服务器,验证Nginx与PHP可以在开发板上使用。
9.1. Nginx
Nginx是一个高性能的HTTP和反向代理web服务器,同时也提供了IMAP/POP3/SMTP服务。它具有非常好的稳定性,拥有丰富的功能集,以及对系统资源的消耗极低。
9.2. PHP
PHP即 “超文本预处理器”,是一种通用开源脚本语言。PHP是在服务器端执行的脚本语言,与C语言类似,是常用的网站编程语言。PHP独特的语法混合了C、Java、Perl以及 PHP 自创的语法,利于学习,使用广泛,主要适用于Web开发领域。
9.3. 安装
9.3.1. 更新软件源
此步骤不一定是要做的,如果你是新刷的系统,那么就需要更新一下,如果你在之前的操作都更新过了,那么这也不需要去更新它。
sudo apt-get update
sudo apt-get upgrade
9.3.2. 安装Nginx
sudo apt-get -y install nginx
9.5. 配置Nginx使用PHP
/etc/nginx/sites-enabled/default 文件是Nginx的配置文件,在安装完成后就已经存在的,并且有默认的配置,而且PHP相关的配置也是默认在里面的,只不过被注释了,只需要打开即可:
sudo nano /etc/nginx/sites-enabled/default
配置完成的代码如下,如果不知道改哪一句,就直接复制粘贴过去替换掉就好了:
server {
    listen 80 default_server;
    listen [::]:80 default_server;

    # SSL configuration
    #
    # listen 443 ssl default_server;
    # listen [::]:443 ssl default_server;
    #
    # Note: You should disable gzip for SSL traffic.
    # See: https://bugs.debian.org/773332
    #
    # Read up on ssl_ciphers to ensure a secure configuration.
    # See: https://bugs.debian.org/765782
    #
    # Self signed certs generated by the ssl-cert package
    # Don't use them in a production server!
    #
    # include snippets/snakeoil.conf;

    root /var/www/html;

    # Add index.php to the list if you are using PHP
    index index.html index.htm index.nginx-debian.html;

    server_name _;

    location / {
        # First attempt to serve request as file, then
        # as directory, then fall back to displaying a 404.
        #try_files $uri $uri/ =404;
        try_files $uri /index.php$is_args$args;
    }

    # pass PHP scripts to FastCGI server
    # 主要修改这下面的代码
    #
    location ~ \.php$ {
        include snippets/fastcgi-php.conf;
    #
    #   # With php-fpm (or other unix sockets):
        fastcgi_pass unix:/run/php/php7.3-fpm.sock;
    #   # With php-cgi (or other tcp sockets):
    #   fastcgi_pass 127.0.0.1:9000;
    }

    # deny access to .htaccess files, if Apache's document root
    # concurs with nginx's one
    #
    location ~ /\.ht {
        deny all;
    }
}
9.6. 创建index.php
简单编写一个PHP文件,放在 /var/www/html/ 目录下,这个目录是Nginx部署的的网站默认路径,通过Nginx的配置文件可以修改成其他目录,但每次修改配置后都要重新加载Nginx。
index.php文件内容如下:
<?php
    phpinfo();
?>
它主要是调用了 phpinfo() 这个函数,它会列举出来很多有关自己系统的有用信息,例如系统相关的属性、名称、预定义变量、已经加载的
PHP 模块和配置信息。
9.7. 重新加载Nginx
每次修改配置后都要重新加载Nginx,才能生效,如果配置文件的配置不正确,或者语法出现错误,则会加载失败,就需要去检查配置文件的代码是否正确。
sudo systemctl reload nginx
9.8. 访问web服务器
首先开发板要插入网线或者连接到wifi,使用 ifconfig 命令查看开发板当前的IP地址,比如我的IP地址就是 192.168.0.231 。
ifconfig

eth1: flags=4163<UP,BROADCAST,RUNNING,MULTICAST>  mtu 1500
        inet 192.168.0.231  netmask 255.255.255.0  broadcast 192.168.0.255
        inet6 fe80::8813:d1ff:fec4:d5b6  prefixlen 64  scopeid 0x20<link>
        ether 8a:13:d1:c4:d5:b6  txqueuelen 1000  (Ethernet)
        RX packets 2820772  bytes 271315620 (258.7 MiB)
        RX errors 1  dropped 0  overruns 0  frame 1
        TX packets 372530  bytes 75563693 (72.0 MiB)
        TX errors 0  dropped 0 overruns 0  carrier 0  collisions 0
打开浏览器,输入你自己的IP地址 192.168.0.231 ,然后回车,就可以看到一个网页了,这里面显示的就是我们的web服务器的内容,比如开发板的系统、名字、PHP相关的信息等:
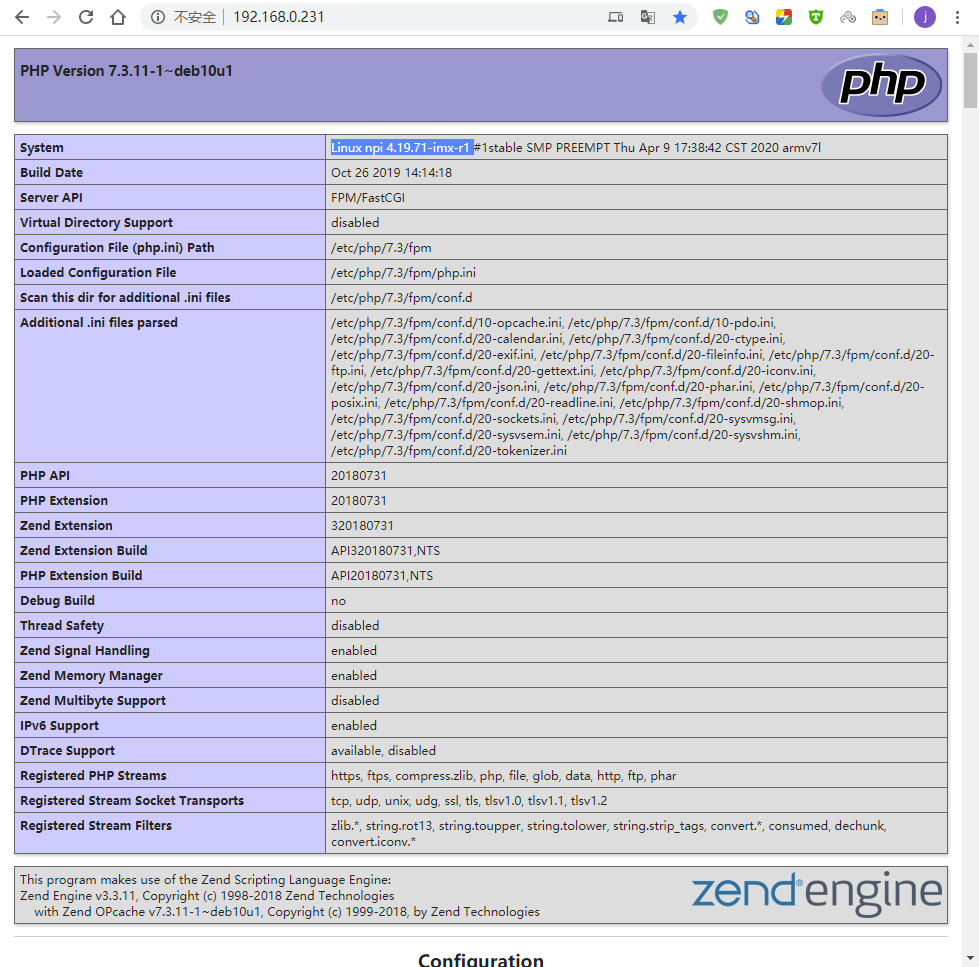
using_php001