11. 文件存储与读取
在Linux中有一句话叫 一切皆文件 。
Linux 中所有内容都是以文件的形式保存和管理的: 普通文件(比如txt文本文件,pdf文件,PNG/JPG,MP3/MP4等等)是文件, 目录(文件夹)是文件, 硬件设备(键盘、监视器、硬盘、打印机)是文件, 套接字(socket)、管道(pipe)等资源也都是文件。
这些文件在Qt中都能够使用相关的类,特定的方法来读写操作。首先我们来看看文件相关的知识。
11.1. 文件
所谓文件,我们可以理解为存储在磁盘上的数据,这些数据在计算机中表示为01序列,也就是二进制。 为了方便计算机里的运算、书写以及统计,2、4、8、16、32、64这类进制数也就应运而生。 我们将四个位的二进制数组合在一起就是一个十六进制,0-F 分别表示 0000-1111。
不管是01序列还是十六进制对于我们人而言,要想识别一连串进制数的含义都比较困难, 于是人就凭借自己的智慧想到了用特定的进制数来表示一个字符,比如规定 00110000 来表示字符 0 01000001 来表示字符 A ,这就是ASCII码的产生,也逐渐形成了一个约定——字节(即8个二进制位)。
下面为ASCII码对照表,图片来自网上。

将这些特定的进制数组合就能表达出更丰富的含义,同时也很容易被识别,从一串二进制数到可识别的字符,我们称为字符编码。
在人类的发展历程上,产生了非常多的具有特定含义的字符,比如中文的汉字,甲骨文。 而在上面的ASCII码对照表中没有将一串二进制数识别为汉字的标准,于是就产生了GB2312,BIG5等等中文字符编码和字符集。 同样其他国家也产生了相应的标准,随着计算机发展、网络连接,各个国家都接入了遍布全球的互联网,不同的标准就会造成混乱,比如乱码。 于是聪明的人们又想到用同一套字符编码和字符集来解决这个问题,于是就有了UTF-8和Unicode。
有了字符编码,计算机中的数据就很容易解析和识别,这并不意味着计算机就直接存储着我们能够识别字符,而依然是01序列。 因此我们在读取文件时最开始得到的数据就是01序列,在读取之后再对01序列进行解码、解析。为了方便解析,我们直接通过文件类型来区分文件。 比如txt后缀的文件通常就是以某种文字编码的文本,MP3、JPG等就是符合特定二进制编码的文件, 修改文件后缀名并不会直接改变文件内部数据和格式,而仅仅只是指明当前操作系统对文件的操作方式。
类Unix操作系统,如Linux就是将设备当作特殊文件来处理的,普通文件和设备文件都是由字节序列而构成的信息载体。
11.1.1. 文件操作类
在Qt中存在这很多与文件相关的类,通过这些类我们可以十分轻松的操作文件。
11.1.1.1. QIODevice
QIODevice是一个抽象类,它为支持读写数据块的设备提供了通用的实现和规范的抽象接口。 它规定在读取文件、访问设备之前,必须调用open()来设置正确的OpenMode(例如ReadOnly或ReadWrite)。 然后,我们可以使用write()或putChar()写入数据到文件和设备,并通过调用read(),readLine()或readAll()进行读取。 使用完设备后,还需调用close()。
QIODevice区分两种类型的设备:随机访问设备(支持使用seek()搜索任意位置,可以通过调用pos()获得文件中的当前位置,QFile和QBuffer是随机访问设备的示例) 和顺序设备(顺序设备不支持寻找任意位置,必须一次性读取数据)。
QIODevice在使用的时候,当有新数据可读取时,QIODevice发出readyRead()信号; 每次将有效负载数据写入设备时,QIODevice都会发出bytesWritten()信号。
11.1.1.2. QBuffer
QBuffer类为QByteArray提供QIODevice接口, 默认情况下,创建QBuffer时会创建一个内部QByteArray缓冲区,我们可以通过QIODevice提供的通用接口来操作该缓冲区。
11.1.1.3. QDataSteam
QDataStream类提供序列化二进制数据到QIODevice。 序列化是指将数据按照某种特定的二进制编码进行解析或存储,当然也可以读取/写入未编码的原始二进制数据。
1 2 3 4 5 6 7 8 9 10 11 12 13 14 15 16 17 18 19 20 21 22 23 24 25 26 27 28 29 30 31 32 | void MainWindow::on_btn_QDataStream_write_clicked()
{
static int writeCount=0;
QFile file(m_datastreampath);
ui->lineEdit->setText(m_datastreampath);
if(file.open(QIODevice::WriteOnly))
{
QDataStream out(&file);
out << ui->textEdit->toPlainText();
out << ++writeCount;
file.close();
}
}
void MainWindow::on_btn_QDataStream_read_clicked()
{
QFile file(m_datastreampath);
ui->lineEdit->setText(m_datastreampath);
if(file.open(QIODevice::ReadOnly))
{
QDataStream in(&file);
QString str;
int writeCount;
in >> str >> writeCount;
file.close();
ui->textEdit->clear();
ui->textEdit->append(str);
ui->textEdit->append(QString::number(writeCount));
}
}
|
11.1.1.4. QTextSteam
QTextStream类提供了用于读取和写入文本的便捷接口,QTextStream可以在QIODevice,QByteArray或QString上运行。 使用QTextStream的流运算符,您可以方便地读写单词,线条和数字。 为了生成文本,QTextStream支持用于字段填充和对齐的格式化选项以及数字的格式化。
QTextStream内部使用基于Unicode的缓冲区,并且QTextStream使用QTextCodec自动支持不同的字符集。 默认情况下,QTextCodec::codecForLocale()用于读取和写入,但是您也可以通过调用setCodec()来设置编解码器. QTextStream还支持自动Unicode检测,启用此功能(默认行为)后,QTextStream将检测UTF-16或UTF-32 BOM(字节顺序标记),并在读取时切换到适当的UTF编解码器。 QTextStream默认情况下不编写BOM,但是您可以通过调用setGenerateByteOrderMark(true)来启用它。当QTextStream直接在QString上运行时,将禁用编解码器。
1 2 3 4 5 6 7 8 9 10 11 12 13 14 15 16 17 18 19 20 21 22 23 24 25 26 27 28 29 30 31 32 33 34 35 | void MainWindow::on_btn_QTextStream_write_clicked()
{
static int writeCount=0;
QFile file(m_textstreampath);
ui->lineEdit->setText(m_textstreampath);
if (file.open(QFile::WriteOnly | QFile::Truncate))
{
QTextStream out(&file);
out << ui->textEdit->toPlainText() << "\r\n";
out << "writeCount:" << ++writeCount << "\r\n";
file.close();
}
}
void MainWindow::on_btn_QTextStream_read_clicked()
{
QFile file(m_textstreampath);
ui->lineEdit->setText(m_textstreampath);
if (file.open(QFile::ReadOnly | QFile::Truncate))
{
QTextStream in(&file);
QString line;
ui->textEdit->clear();
while (in.readLineInto(&line)){
ui->textEdit->append(line);
}
file.close();
}
}
void MainWindow::on_cBox_Codec_currentIndexChanged(const QString &arg1)
{
QTextCodec::setCodecForLocale(QTextCodec::codecForName(arg1.toLocal8Bit()));
}
|
11.1.1.5. QFile
QFile是用于读取和写入文本以及二进制文件和资源的I/O设备。
QFile直接进行文件读写。
1 2 3 4 5 6 7 8 9 10 11 12 13 14 15 16 17 18 19 20 21 22 23 24 | void MainWindow::on_btn_QFile_write_clicked()
{
QFile file(m_filepath);
ui->lineEdit->setText(m_filepath);
if (!file.open(QIODevice::WriteOnly | QIODevice::Text))
return;
file.write(ui->textEdit->toPlainText().toLocal8Bit());
file.close();
}
void MainWindow::on_btn_QFile_read_clicked()
{
QFile file(m_filepath);
ui->lineEdit->setText(m_filepath);
if (!file.open(QIODevice::ReadOnly | QIODevice::Text))
return;
QString str = file.readAll();
file.close();
ui->textEdit->clear();
ui->textEdit->append(str);
}
|
QFile进行设备文件读写,控制LED灯。
1 2 3 4 5 6 7 8 9 10 11 12 13 14 15 16 | void RgbLightMonitor::ChangeRgbLightValue()
{
#ifdef __arm__
QStringList strLights = QStringList() << "red" << "green" << "blue";
QString strLight = QString("/sys/class/leds/%1/brightness").arg(strLights.at(m_nCurrentLight));
QFile file(strLight);
if (!file.open(QIODevice::ReadWrite | QIODevice::Truncate)) {
qDebug() << "open Leds failed!" << strLight;
return;
}
QTextStream in(&file);
in << m_lightObjs.value(m_nCurrentLight)->m_nValue;
file.close();
#endif
}
|
11.1.2. 文件夹相关类
上面我们了解到了文件的概念,计算机种存储着大量的文件和数据,为了方便管理就引入了文件系统。 文件系统实现对磁盘空间的统一管理,一方面文件系统对磁盘空间进行统一规划,另外一方面文件系统提供给普通用户人性化的接口,我们通过文件系统就能够对文件进行增删改查。
Windows默认采用NTFS文件系统,而Ext是 GNU/Linux 系统中标准的文件系统。
文件系统对文件的管理通常是利用文件夹来实现的。 简单点说文件夹就是一种特殊的文件,内容就是文件列表和文件的索引信息。
11.1.2.1. QFileInfo
QFileInfo类提供与系统无关的文件信息, QFileInfo提供有关文件在文件系统中的名称和位置(路径),以及文件的权限和文件类型,文件的大小和上次修改/读取的时间也通过接口获取。 QFileInfo可以指向具有相对或绝对文件路径的文件。
1 2 3 4 5 6 7 8 9 10 11 12 13 14 15 16 17 18 19 20 21 22 23 24 25 26 27 28 | void MainWindow::on_btn_QFileInfo_file_clicked()
{
QString curPath=QDir::currentPath();//获取应用程序的路径
QString dlgTitle="选择文件"; //对话框标题
QString filter="文本文件(*.txt);;图片文件(*.jpg *.gif *.png);;所有文件(*.*)"; //文件过滤器
QString filename=QFileDialog::getOpenFileName(this,dlgTitle,curPath,filter);
if (filename.isEmpty())
return;
QFileInfo fileinfo(filename);
if(!fileinfo.exists())
return;
if(fileinfo.isSymLink())
{
fileinfo.setFile(fileinfo.symLinkTarget());
}
ui->textEdit->clear();
ui->textEdit->append("文件名:"+fileinfo.baseName()+" "+"文件格式:"+fileinfo.completeSuffix()+" "+"文件大小:"+QString::number(fileinfo.size()));
ui->textEdit->append("绝对路径:"+fileinfo.absoluteFilePath());
ui->textEdit->append("文件所有者:"+fileinfo.owner()+" "+"所有者ID:"+QString::number(fileinfo.ownerId())+" "+"文件所属组:"+fileinfo.group()+" "+"所属组ID:"+QString::number(fileinfo.groupId()));
ui->textEdit->append("文件权限:"+QString::number(fileinfo.permissions()));
ui->textEdit->append("文件创建时间:"+fileinfo.birthTime().toString("yyyy-MM-dd hh:mm:ss"));
ui->textEdit->append("上次修改时间:"+fileinfo.lastModified().toString("yyyy-MM-dd hh:mm:ss"));
ui->textEdit->append("上次读取时间:"+fileinfo.lastRead().toString("yyyy-MM-dd hh:mm:ss"));
ui->textEdit->append("元数据更时间:"+fileinfo.metadataChangeTime().toString("yyyy-MM-dd hh:mm:ss"));
}
|
11.1.2.2. QDir
Dir用于操纵路径名,访问有关路径和文件的信息以及操纵底层文件系统。
创建文件夹
1 2 3 4 5 6 7 8 9 10 11 12 13 14 15 16 17 18 19 20 21 22 23 24 25 26 27 28 | void MainWindow::on_btn_creatdir_clicked()
{
QString curPath=QDir::currentPath();//获取应用程序的路径
QString dlgTitle="选择文件夹"; //对话框标题
QString dirpath=QFileDialog::getExistingDirectory(this,dlgTitle,curPath);
if (dirpath.isEmpty())
return;
dlgTitle="新建文件夹";
QString str="新建文件夹";
QString defaultstr="NEWDIR";
QLineEdit::EchoMode echoMode=QLineEdit::Normal;
bool choose=false;
QString dirinput = QInputDialog::getText(this, dlgTitle,str, echoMode,defaultstr, &choose);
if (choose)
{
if(dirinput.isEmpty())
return;
}
QDir *dir = new QDir;
if(!dir->exists(dirpath+"/"+dirinput))
{
dir->mkdir(dirpath+"/"+dirinput);
}
}
|
遍历文件夹
1 2 3 4 5 6 7 8 9 10 11 12 13 14 15 16 17 18 19 20 21 | void MainWindow::on_btn_dirinfo_clicked()
{
QString curPath=QDir::currentPath();//获取应用程序的路径
QString dlgTitle="选择文件夹"; //对话框标题
QString dirpath=QFileDialog::getExistingDirectory(this,dlgTitle,curPath);
if (dirpath.isEmpty())
return;
QDir dir(dirpath);
QStringList files = dir.entryList();
ui->textEdit->clear();
foreach(QString path,files)
{
QFileInfo info(path);
if(!info.baseName().isEmpty())
{
ui->textEdit->append("文件名:"+info.baseName()+" "+"绝对路径:"+info.absoluteFilePath());
}
}
}
|
11.1.2.3. QTemporaryFile和QTemporaryDir
QTemporaryFile用于安全地创建唯一的临时文件,该文件本身是通过调用open()创建的。 临时文件的名称保证是唯一的(即,保证您不会覆盖现有文件),并且随后在销毁QTemporaryFile对象时将删除该文件。 这样可避免将数据存储在临时文件中的应用程序破坏数据。
同样,QTemporaryDir用于安全地创建唯一的临时目录。
11.1.2.4. QFileSystemWatcher
QFileSystemWatcher通过观察指定路径的列表来监视文件系统中文件和目录的更改。 当文件已被修改,重命名或从磁盘中删除就会发送 fileChanged() 。 类似地,当目录或其内容被修改或删除时,会发出directoryChanged()信号。
1 2 3 4 5 6 7 8 9 10 11 12 13 14 15 16 17 18 19 20 21 22 23 24 25 | void MainWindow::on_btn_Watch_clicked()
{
QString curPath=QDir::currentPath();//获取应用程序的路径
QString dlgTitle="选择文件夹"; //对话框标题
QString dirname=QFileDialog::getExistingDirectory(this,dlgTitle,curPath);
if (dirname.isEmpty())
return;
QFileSystemWatcher *fileSystemWatcher = new QFileSystemWatcher(this);
fileSystemWatcher->addPath(dirname);
connect(fileSystemWatcher,SIGNAL(directoryChanged(const QString &)),this, SLOT(handDirChanged(const QString &)));
connect(fileSystemWatcher,SIGNAL(fileChanged(const QString &)),this, SLOT(handFileChanged(const QString &)));
}
void MainWindow::handFileChanged(const QString &path)
{
QString dlgTitle="information";
QString str="文件改变:"+path;
QMessageBox::information(this, dlgTitle, str,QMessageBox::Yes);
}
void MainWindow::handDirChanged(const QString &path)
{
QString dlgTitle="information";
QString str="文件夹改变:"+path;
QMessageBox::information(this, dlgTitle, str,QMessageBox::Yes);
}
|
11.2. 文件读写
上面提到了很多Qt中有关文件、文件夹操作的相关的类, 下面我们来看一些实际应用,比如日志文件读写,文件的加密解密等等。
11.2.1. Qt中的调试技术
每当开发人员需要将调试或跟踪信息写到设备,文件,字符串或控制台时,经常使用QDebug来跟踪定位异常。 除此以外还有部分环境变量,命令行辅助调试。
Qt包含用于写警告和调试文本的全局宏。
qDebug() 用于编写自定义调试输出。
qInfo() 用于参考消息。
qWarning() 用于报告应用程序中的警告和可恢复的错误。
qCritical() 用于编写严重错误消息和报告系统错误。
qFatal() 用于在退出前不久写入致命错误消息。
这些宏的Qt实现打印到Unix/X11和macOS下的stderr输出。对于Windows,如果是控制台应用程序,则文本将发送到控制台;否则,文本将发送到调试器。
对于打印消息我们可以通过设置QT_MESSAGE_PATTERN环境变量来包含其他信息,例如下面的格式设置:
QT_MESSAGE_PATTERN = “ [%{type}]%{appname}(%{file}:%{line})-%{message}”
该格式记录在qSetMessagePattern()中,我们也可以使用qInstallMessageHandler()来安装自己的消息处理程序, 例程中会将打印的消息记录到日志文件中。
11.2.1.1. 日志文件
1 2 3 4 5 6 7 8 9 10 11 12 13 14 15 16 17 18 19 20 21 22 | void mylog(QtMsgType type, const QMessageLogContext &context, const QString &msg)
{
static QMutex mutex;
QMutexLocker lock(&mutex);
QString log;
switch(type)
{
case QtDebugMsg:
log = QString("%1").arg(msg);
break;
case QtWarningMsg:
log = QString("%1").arg(msg);
break;
case QtCriticalMsg:
log = QString("%1").arg(msg);
break;
case QtFatalMsg:
log = QString("%1").arg(msg);
}
Log::instance()->SaveLog(log);
}
|
首先我们定义了一个mylog函数,用来接收打印信息,通过qInstallMessageHandler()来重定向打印数据到mylog。 在mylog中调用Log::instance()->SaveLog(log)来存储为日志文件。
qInstallMessageHandler(mylog);
Log类利QSharedPointer来实现单例,参考
1 2 3 4 5 6 7 8 9 10 11 12 13 14 15 16 17 18 19 20 21 | void Log::SaveLog(QString log)
{
logstr=log;
if(allow)
emit sendLog(log);
QString logfile = QString("%1/%2_%3.txt").arg(logpath).arg(logname).arg(QDATE);
if (this->logfile != logfile) {
this->logfile = logfile;
if (file->isOpen()) {
file->close();
}
file->setFileName(logfile);
file->open(QIODevice::WriteOnly | QIODevice::Append | QFile::Text);
}
QTextStream logStream(file);
logStream << log << "\n";
}
|
在Log类中使用QFile和QTextStream向日志追加输出内容。
11.2.1.2. 运行时间
RunTime依旧采用单例模式,在RunTime中定义了一个定时器,定时向文件中写入数据来记录程序启动时间运行时间,参考。
1 2 3 4 5 6 7 8 9 10 11 12 13 14 15 16 17 18 19 20 21 22 23 24 25 26 27 28 29 30 31 32 33 34 35 36 37 38 39 | void RunTime::SaveRuntime()
{
QString filestr = QString("%1/%2_%3.txt").arg(runtimepath).arg(runtimename).arg(QDate::currentDate().year());
QFile file(filestr);
if (file.size() == 0)
{
CreateRuntimeFile();
AppendRuntime();
return;
}
if (file.open(QFile::ReadWrite))
{
QStringList runtimelog;
while (!file.atEnd()) {
runtimelog.append(file.readLine());
}
QString lastline=runtimelog.last();
QStringList list=lastline.split("\t");
if(list.count()>5)
{
list[3]=QDATETIME_NOW;
QDateTime endtime=QDateTime::fromString(list[3],"yyyy-MM-dd hh:mm:ss");
QDateTime starttime=QDateTime::fromString(list[1],"yyyy-MM-dd hh:mm:ss");
qint64 runtime_s = starttime.secsTo(endtime);
list[5]=QString::number(runtime_s);
QString str=list.join("\t")+"\r\n";
runtimelog[runtimelog.count() - 1] = str;
file.resize(0);
QTextStream filestream(&file);
filestream << runtimelog.join("");
file.close();
}
}
}
|
11.2.2. 文件加密解密
11.2.2.1. 简单加密解密算法
分别封装了两个类EncryptionKEY和DecryptKEY,在这两个类中封装了几种常见的加密解密的算法。
1 2 3 4 5 6 7 8 9 10 11 12 13 14 15 16 17 18 19 20 21 22 23 24 25 26 27 28 29 30 31 32 33 34 35 36 37 38 39 40 41 42 43 44 45 46 47 48 49 50 51 52 53 54 55 | QString EncryptionKEY::EncodeMD5(QString str)
{
return QCryptographicHash::hash(str.toLatin1(),QCryptographicHash::Md5).toHex();
}
QString EncryptionKEY::EncodeSHA1(QString str)
{
return QCryptographicHash::hash(str.toLatin1(),QCryptographicHash::Sha1).toHex();
}
QString EncryptionKEY::EncodeBase64(QString str)
{
return str.toLocal8Bit().toBase64();
}
QString EncryptionKEY::EncodeUpprtANDLower(QString str)
{
for(int i=0; i<str.count();i++)
{
if(str.at(i).isUpper())
str[i]=str.at(i).toLower();
else if(str.at(i).isLower())
str[i]=str.at(i).toUpper();
}
return str;
}
QString EncryptionKEY::EncodeXOR(QString str, const QChar key)
{
for(int i = 0; i < str.count(); i++) {
str[i] = str.at(i).toLatin1() ^ key.toLatin1();
}
return str;
}
QString DecryptKEY::DecodeBase64(QString str)
{
QByteArray temp = str.toLocal8Bit();
return QString::fromLocal8Bit(temp.fromBase64(temp));
}
QString DecryptKEY::DecodeUpprtANDLower(QString str)
{
for(int i=0; i<str.count();i++)
{
if(str.at(i).isUpper())
str[i]=str.at(i).toLower();
else if(str.at(i).isLower())
str[i]=str.at(i).toUpper();
}
return str;
}
QString DecryptKEY::DecodeXOR(QString str, const QChar key)
{
for(int i = 0; i < str.count(); i++) {
str[i] = str.at(i).toLatin1() ^ key.toLatin1();
}
return str;
}
|
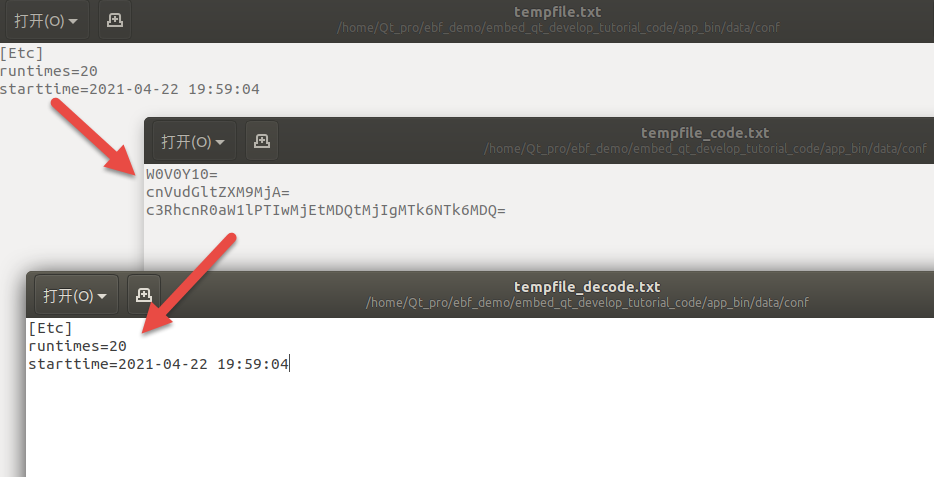
按行读取某个文件,将读取内容进行加密,并保存到另外一个文件; 读取加密之后的文件,调用解密算法进行解密,并保存结果。
在实际应用中,比如密钥文件用来加密解密软件等等。
1 2 3 4 5 6 7 8 9 10 11 12 13 14 15 16 17 18 19 20 21 22 23 24 25 26 27 28 29 30 31 32 33 34 35 | void MainWindow::fileEncode(QString filepath, QString codefilepath)
{
QFile file(filepath);
QFile codefile(codefilepath);
if (file.open(QFile::ReadOnly | QFile::Text) && codefile.open(QFile::WriteOnly | QFile::Text))
{
QTextStream in(&file),out(&codefile);
QString line,temp;
while (in.readLineInto(&line)){
temp = EncryptionKEY::instance()->EncodeBase64(line);
out << temp << "\r\n";
}
file.close();
codefile.close();
}
}
void MainWindow::fileDecode(QString codefilepath, QString filepath)
{
QFile codefile(codefilepath);
QFile file(filepath);
if (codefile.open(QFile::ReadOnly | QFile::Text) && file.open(QFile::WriteOnly | QFile::Text))
{
QTextStream in(&codefile),out(&file);
QString line,temp;
while (in.readLineInto(&line)){
temp = DecryptKEY::instance()->DecodeBase64(line);
out << temp << "\r\n";
}
codefile.close();
file.close();
}
}
|
fileEncode("conf/tempfile.txt", "conf/tempfile_code.txt");
fileDecode("conf/tempfile_code.txt", "conf/tempfile_decode.txt");
11.2.3. 获取网络文件
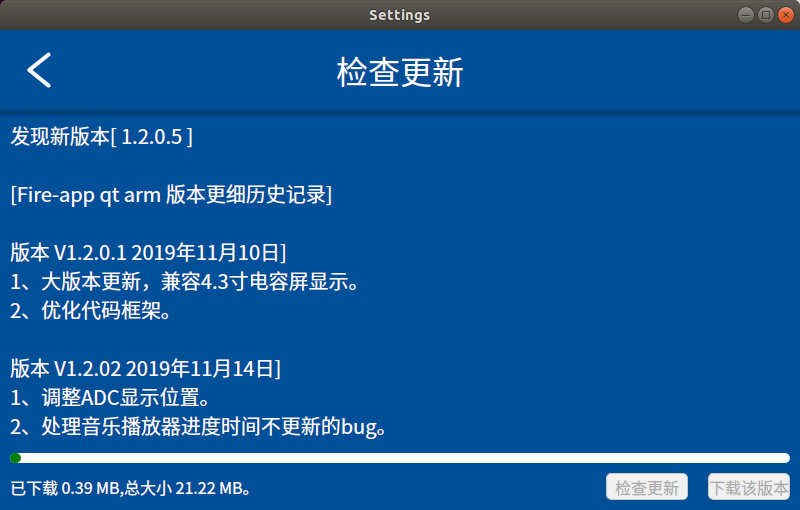
11.2.3.1. 在线更新野火app
1 2 3 4 5 6 7 8 9 10 11 12 13 14 15 16 17 18 19 | void DownloadNetworkManager::downloadFile(const QUrl &url)
{
m_url = url;
m_bCheckVersion = false;
// 获取当前的时间戳,设置下载的临时文件名称
QDateTime dateTime = QDateTime::currentDateTime();
QString date = dateTime.toString("yyyyMMdd_hhmmss-zzz");
m_strFileTemp = qApp->applicationDirPath() + QString("/download/%1.tmp").arg(date);
QNetworkRequest request;
request.setUrl(url);
request.setHeader(QNetworkRequest::ContentTypeHeader, "application/x-www-form-urlencoded");
m_pReply = this->get(request);
connect(m_pReply, SIGNAL(downloadProgress(qint64, qint64)),
this, SIGNAL(downloadProgress(qint64, qint64)));
connect(m_pReply, SIGNAL(readyRead()), this, SLOT(sltReadFiles()));
}
|
11.3. 配置文件
用户通常希望应用程序跨会话记住其设置(窗口大小和位置,选项等)。 此信息通常存储在Windows上的系统注册表中,以及macOS和iOS上的属性列表文件中。 在Unix系统上,在没有标准的情况下,许多应用程序(包括KDE应用程序)都使用INI文本文件。
11.3.1. ini文件
QSettings类提供与平台无关的持久性应用程序设置,它能够让我们以可移植的方式保存和恢复应用程序设置。 它还支持自定义存储格式。
下面是用Config类对QSettings进行封装的读写ini文件的方法:
1 2 3 4 5 6 7 8 9 10 11 12 13 14 15 16 17 | void Config::SaveSetting(const QString &group, const QString &name, const QVariant &value)
{
QSettings settings(m_strSettingsFile, QSettings::IniFormat);
settings.beginGroup(group);
settings.setValue(name, value);
settings.endGroup();
}
QVariant Config::ReadSetting(const QString &group, const QString &name, const QVariant &value)
{
QSettings settings(m_strSettingsFile, QSettings::IniFormat);
settings.beginGroup(group);
QVariant keyValue = settings.value(name, value);
settings.endGroup();
return keyValue;
}
|
调用SaveSetting读取Etc组的runtimes记录的值,将该值加1之后再用ReadSetting写回ini文件。
Config::instance()->SaveSetting("Etc", "runtimes",Config::instance()->ReadSetting("Etc", "runtimes").toInt()+1);
除了通用平台平台的ini文件,QSettings还支持Windows注册表的读写,下面是封装的方法。
1 2 3 4 5 6 7 8 9 10 11 12 13 | #if defined(Q_OS_WIN32)
void Config::SaveRegistry(const QString &position, const QString &name, const QVariant &value)
{
QSettings settings(position, QSettings::NativeFormat);
settings.setValue(name, value);
}
QVariant Config::ReadRegistry(const QString &position, const QString &name, const QVariant &value)
{
QSettings settings(position, QSettings::NativeFormat);
QVariant keyValue = settings.value(name, value);
return keyValue;
}
#endif
|
调用方法
#if defined(Q_OS_WIN32)
    Config::instance()->SaveRegistry("HKEY_CURRENT_USER\\Software\\EBF_QT","APPNAME",QString("ebf_tutorial"));
    qDebug() <<  Config::instance()->ReadRegistry("HKEY_CURRENT_USER\\Software\\EBF_QT","APPNAME").toString();
#endif
11.3.2. 系统信息
除了上面的文件,例程还封装了一个类用于获取系统信息。
1 2 3 4 5 6 7 8 9 10 11 12 13 14 15 16 17 18 19 20 21 22 | /*
* @brief 获取cpu名称
* @return cpu名称
*/
QString BaseInfo::GetcpuName()
{
QString cpu_name = "";
#if defined(Q_OS_WIN32)
QProcess p(0);
p.start("wmic cpu get Name");
p.waitForStarted();
p.waitForFinished();
cpu_name = QString::fromLocal8Bit(p.readAllStandardOutput());
cpu_name = cpu_name.remove("Name").trimmed();
#elif defined(Q_OS_LINUX)
cmd->start("bash");//启动终端(Windows下改为cmd)
cmd->waitForStarted();//等待启动完成
cmd->write("cat /proc/cpuinfo\n");//向终端写入“ls”命令,注意尾部的“\n”不可省略
#endif
return cpu_name;
}
|
11.4. 例程说明
野火提供的Qt Demo已经开源,仓库地址在:
文档所涉及的示例代码也提供下载,仓库地址在:
本章例程在 embed_qt_develop_tutorial_code/Editor
本章共有四个例程:File、Config、Setting、Edito。
11.4.1. 编程思路
Property
File用于演示Qt相关类的使用;
Property
Config用于演示文件读写;
Property
Setting为野火demo的设置功能相关的代码;
Property
Editor为一个多文本编辑器。
11.4.2. 代码讲解
示例使用TabWidget作为主窗口, 当我们新建一个文本编辑区QTextEdit时,就调用addTab(),把编辑器加载到窗口 同时声明了QList<QTextEdit *>容器,用QList来保存所有编辑器。
当我们进行保存等其他一些操作的时候,总是去找TabWidget的当前激活窗口,并通过当前tab的objectName, 在QList容器中找当前到对应的QTextEdit,再对其内容进行操作。
1 2 3 4 5 6 7 8 9 10 11 12 13 14 15 16 | QTextEdit* MainWindow::Find_Current_Text_Edit()
{
if(ui->tabWidget_list->count()==0)
return nullptr;
QWidget *text_Edit = ui->tabWidget_list->currentWidget();
QString object = text_Edit->objectName();
foreach(QTextEdit *Edit, editList)
{
if(Edit->objectName()==object)
{
return Edit;
}
}
return nullptr;
}
|
当结束编辑时,移除TabWidget的使用也删除QList中的对应项。
文件拖放实现代码如下:
1 2 | void dragEnterEvent(QDragEnterEvent *event);
void dropEvent(QDropEvent *event);
|
1 2 3 4 5 6 7 8 9 10 11 12 13 | void MainWindow::dragEnterEvent(QDragEnterEvent *event)
{
event->acceptProposedAction();
}
void MainWindow::dropEvent(QDropEvent *event)
{
QList<QUrl> urls = event->mimeData()->urls();
foreach(QUrl url,urls)
{
qDebug()<<url;
Action_Open(url.toLocalFile());
}
}
|
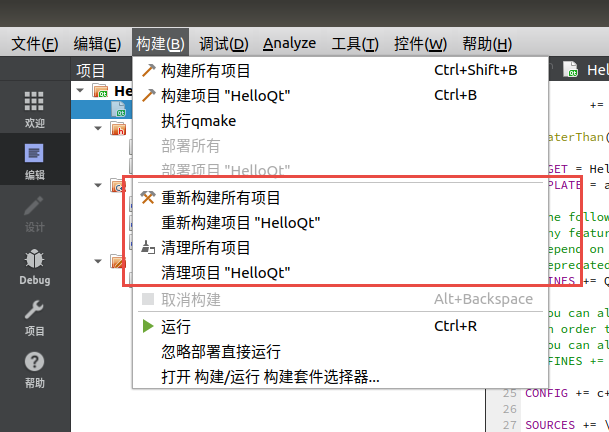
11.4.3. 编译构建
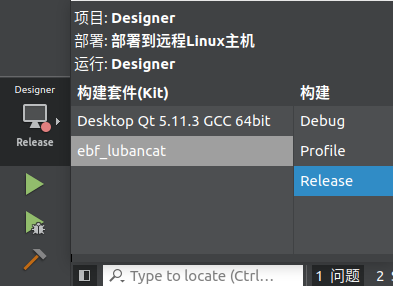
Ubuntu 选择 Desktop Qt 5.11.3 GCC 64bit 套件,编译运行
LubanCat 选择 ebf_lubancat,只编译
提示
当两种构建套件进行切换时,请重新构建项目或清除之前项目。针对我们的工程还需要手动重新构建QtUI和Skin。
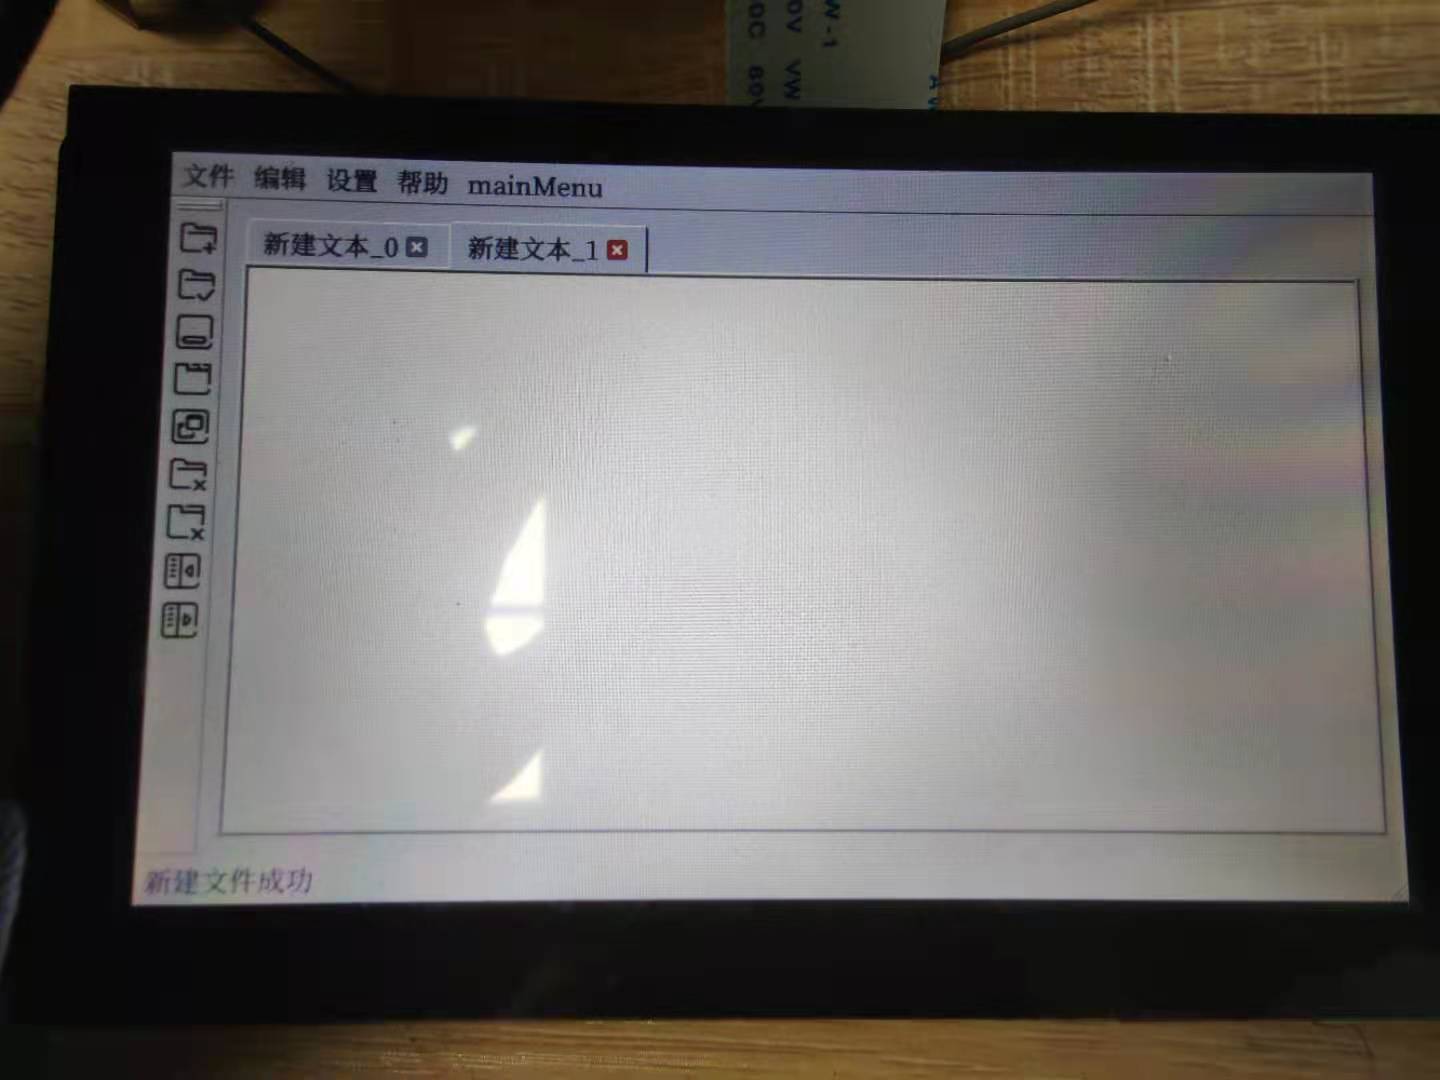
11.4.4. 运行结果

11.4.4.2. LubanCat实验
通过SCP或者NFS将编译好的程序拷贝到LubanCat上
NFS环境搭建 参考这里
SCP命令如下:
# scp传输文件
# scp 文件名 服务器上的某个用户@服务器ip:/文件保存路径
scp filename server_user_name@192.168.0.205:server_file_path
# 从服务器拉取文件
# scp 服务器上的某个用户@服务器ip:/服务器文件存放路径 拉取文件保存路径
scp server_user_name@192.168.0.229:server_file_path local_path
编译好的程序在 embed_qt_develop_tutorial_code/app_bin/data/editor 目录中,通过scp命令将编译好的程序拉到LubanCat。
scp root@192.168.0.174:/home/embed_qt_develop_tutorial_code/app_bin/data/Editor /usr/local/qt-app/
在LubanCat运行程序,使用run_myapp.sh配置好环境,并执行 Editor 。
sudo /usr/local/qt-app/run_myapp.sh /usr/local/qt-app/Editor