Buildroot根文件系统的构建
什么是Buildroot?
Buildroot是Linux平台上一个开源的嵌入式Linux系统自动构建框架。整个Buildroot是由Makefile脚本和Kconfig配置文件构成的。你可以和编译Linux内核一样,通过buildroot配置,menuconfig修改,编译出一个完整的可以直接烧写到机器上运行的Linux系统软件。
安装一些依赖文件
1 | sudo apt-get install zlib1g-dev unzip gcc g++ aptitude lib32stdc++6-4.8-dbg make build-essential libncurses5 libncurses5-dev u-boot-tools traceroute -y
|
安装交叉编译工具链
可以到官网下载 https://releases.linaro.org/components/toolchain/binaries/7.5-2019.12/arm-linux-gnueabihf/
也可以使用我们提供的工具包
交叉编译器下载
找一个自己熟悉的位置放置,我放在 /home/lhf 文件夹下
解压 tar -vxf gcc-linaro-7.5.0-2019.12-x86_64_arm-linux-gnueabihf.tar
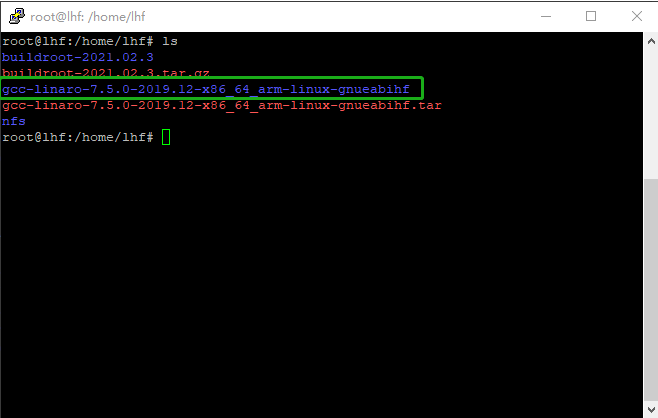
进入工具链文件夹 gcc-linaro-7.5.0-2019.12-x86_64_arm-linux-gnueabihf 获取路径 pwd 我的路径为 /home/lhf/gcc-linaro-7.5.0-2019.12-x86_64_arm-linux-gnueabihf 该路径需要记录一下,等会设置工具链的时候需要使用
1 2 3 | cd gcc-linaro-7.5.0-2019.12-x86_64_arm-linux-gnueabihf
pwd
/home/lhf/gcc-linaro-7.5.0-2019.12-x86_64_arm-linux-gnueabihf
|
Buildroot构建
我们可以到官网地址下:https://buildroot.org/ 打开后如图
选择DOWNLOAD

我们选择长期支持版本(LTS),两个压缩格式,选择其中一个即可

也可使用我们提供的源码包
Buildroot下载
构建根文件系统
1 2 3 | tar -vxf buildroot-2021.02.3.tar.gz
cd buildroot-2021.02.3
make menuconfig
|
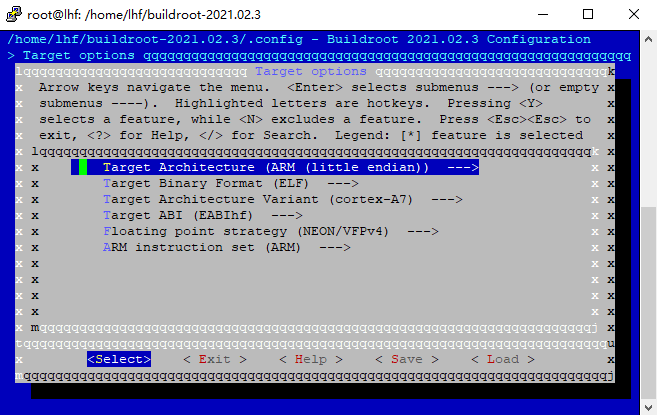
配置Target options
1 2 3 4 5 6 7 | Target options
-> Target Architecture = ARM (little endian)
-> Target Binary Format = ELF
-> Target Architecture Variant = cortex-A7
-> Target ABI = EABIhf
-> Floating point strategy = NEON/VFPv4
-> ARM instruction set = ARM
|
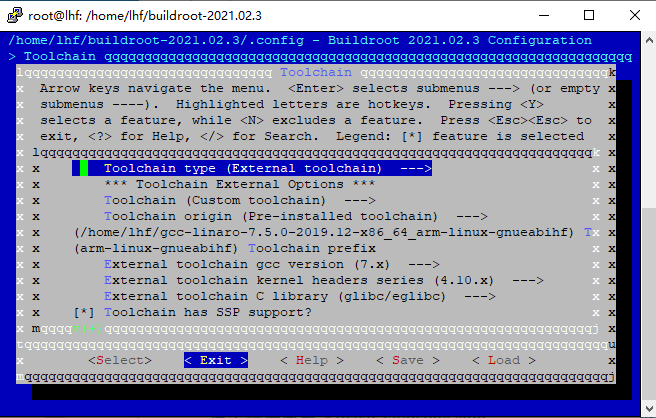
配置Toolchain
1 2 3 4 5 6 7 8 9 10 11 12 13 | Toolchain
-> Toolchain type = External toolchain
-> Toolchain = Custom toolchain //选择用户的交叉编译器
-> Toolchain origin = Pre-installed toolchain
-> Toolchain path =/home/lhf/gcc-linaro-7.5.0-2019.12-x86_64_arm-linux-gnueabihf //这里填入我们上面获得的交叉编译器路径
-> Toolchain prefix = arm-linux-gnueabihf //前缀
-> External toolchain gcc version = 7.x
-> External toolchain kernel headers series = 4.10.x
-> External toolchain C library = glibc/eglibc
-> [*] Toolchain has SSP support? (NEW) //选中
-> [*] Toolchain has RPC support? (NEW) //选中
-> [*] Toolchain has C++ support? //选中
-> [*] Enable MMU support (NEW) //选中
|
配置System configuration
1 2 3 4 5 6 7 | System configuration
-> System hostname = Embedfire_imx6ull //平台名字
-> System banner = Welcome to embedfire i.mx6ull //欢迎语
-> Init system = BusyBox //使用 busybox
-> /dev management = Dynamic using devtmpfs + mdev //使用 mdev
-> [*] Enable root login with password (NEW) //使能登录密码
-> Root password = root //登录密码为 root
|

配置Filesystem images
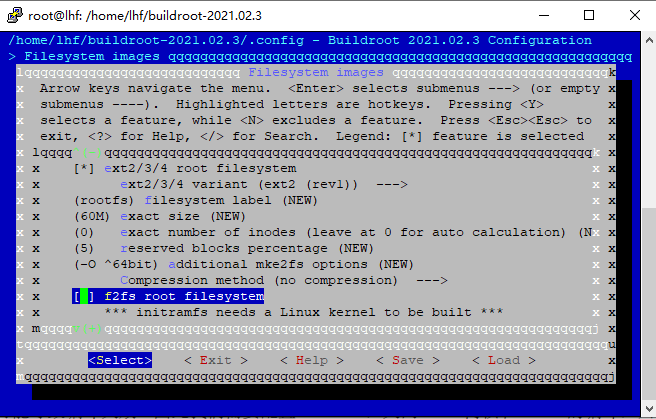
这个选项是配置将编译生成什么格式的根文件系统,可以做如下配置
1 2 3 4 | -> Filesystem images
-> [*] ext2/3/4 root filesystem //如果是 EMMC 或 SD 卡的话就用 ext3/ext4
-> ext2/3/4 variant = ext4 //选择 ext4 格式
-> [*] ubi image containing an ubifs root filesystem //如果使用 NAND 的话就用 ubifs
|
对于本教程,我们需要配置也可以。我们是使用nfs挂载网络根文件系统
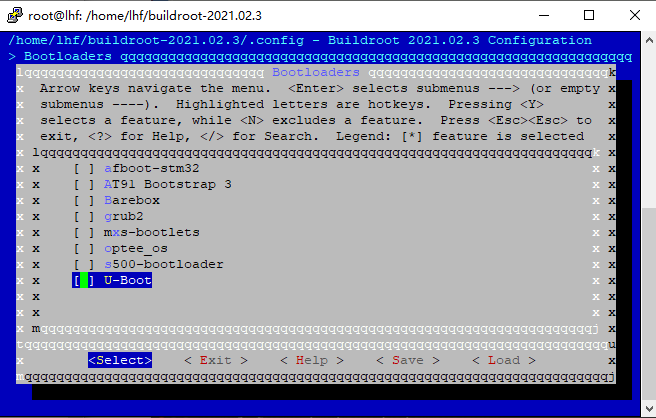
关闭kernel和uboot的编译
Buildroot不仅能构建根文件系统,还可以编译kernel和uboot,但是这些源码是从官网下载的,很可能是没包含各芯片厂商的驱动文件。所以我们关闭kernel和uboot编译即可,kernel和uboot的教程可参考
1 2 | -> Kernel
-> [ ] Linux Kernel //取消 Linux Kernel 选项!
|

1 2 | -> Bootloaders
-> [ ] U-Boot //取消 U-Boot 选项!
|
编译Buildroot
执行 sudo make
1 | sudo make
|
需要注意的是buildroot下载的源码网速会比较慢,我们可以自己手动下载再放到buildroot源码目录下的 dl 文件夹中
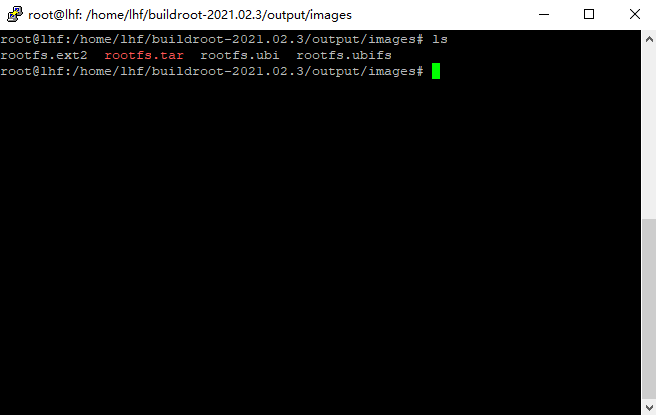
编译完成后文件在 ./output/images 文件夹中 rootfs.tar 为本教程需要的文件
搭建NFS网络系统
先更新一下apt包 sudo apt-get update
1 | sudo apt-get update
|
安装 NFS服务器端 sudo apt-get install nfs-kernel-server
1 | sudo apt-get install nfs-kernel-server
|
创建NFS共享目录 mkidr ~/nfs
1 | mkidr ~/nfs
|
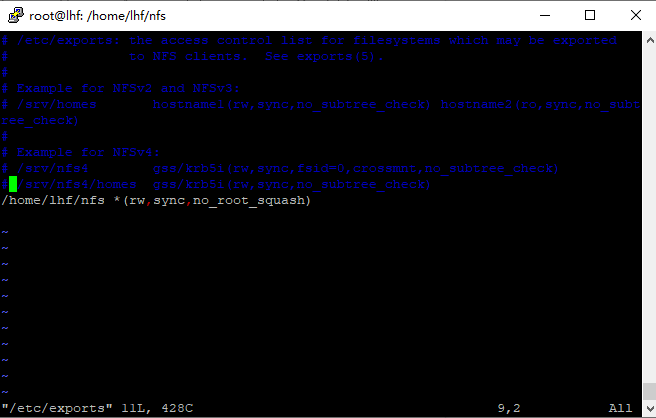
编辑指定目录 sudo vim /etc/exports
1 | sudo vim /etc/exports
|
添加入下代码 /home/你的用户名/nfs *(rw,sync,no_root_squash)
1 | /home/你的用户名/nfs *(rw,sync,no_root_squash)
|
给目录添加权限 sudo chmod -R 777 ~/nfs && sudo chown root:root ~/nfs/ -R
1 | sudo chmod -R 777 ~/nfs && sudo chown root:root ~/nfs/ -R
|
启动 NFS 服务 /etc/init.d/nfs-kernel-server restart
1 | /etc/init.d/nfs-kernel-server restart
|
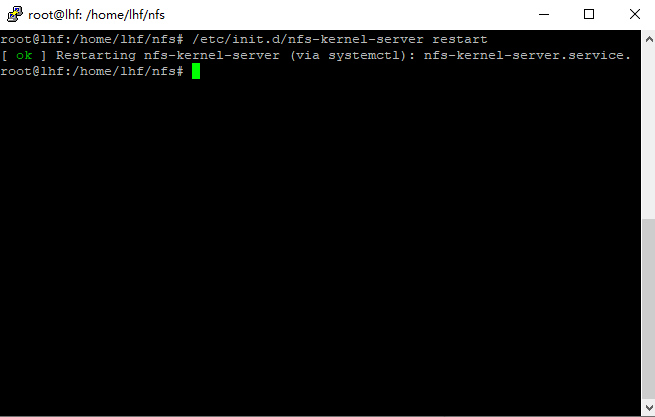
如图就是启动成功了
我们把刚得到的rootfs.tar 解压到nfs目录下
1 2 | cp /home/lhf/buildroot-2021.02.3/output/images/rootfs.tar /home/lhf/nfs
tar -vxf /home/lhf/nfs/rootfs.tar -C /home/lhf/nfs
|
先看一下我们NFS主机的地址 ifconfig 我这里地址为 192.168.0.139
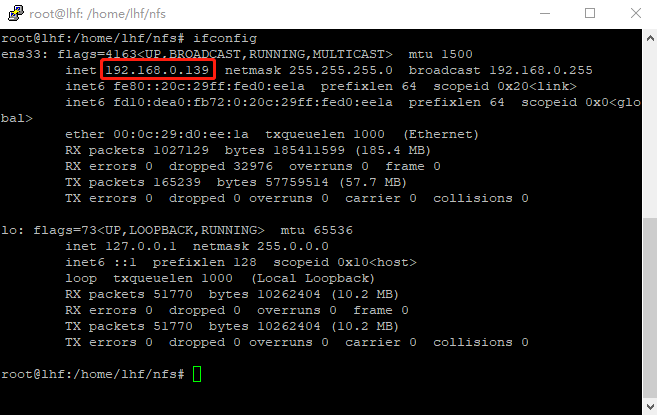
再看一下网关地址 traceroute baidu.com 第一条地址一般为网关地址,我这里为 192.168.0.1

我们在局域网中找一个没有用到的地址,我这里为 192.168.0.142 要根据你们的网段来更改 **192.168.0**的部分
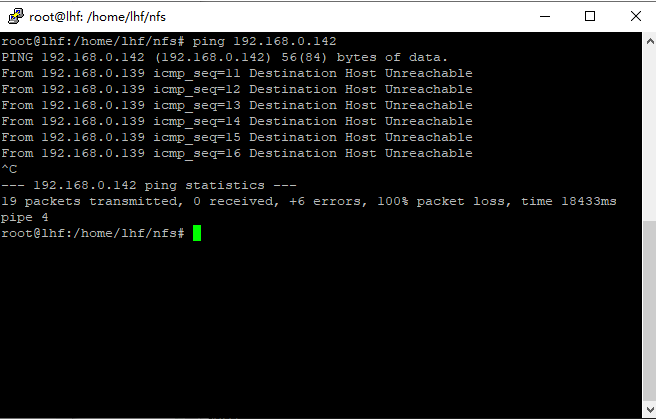
没有ping通,很大概率没有设备在使用这个地址 192.168.0.142
设置Uboot环境参数
上电快速按回车进入Uboot
1 2 3 4 5 6 | setenv gatewayip '192.168.0.1'
setenv netmask '255.255.255.0'
setenv ipaddr '192.168.0.142'
setenv serverip '192.168.0.139'
setenv args_mmc_old 'setenv bootargs console=tty1 console=ttymxc0,115200 root=/dev/nfs nfsroot=192.168.0.139:/home/lhf/nfs rw ip=192.168.0.142:192.168.0.139:192.168.0.254:255.255.255.0::eth0:off'
saveenv
|
我们试一下开发板能否ping通到主机 ping 192.168.0.139

发现可以ping的通,我们试试能否自动挂载上我们的根文件系统用命令 reset 重启
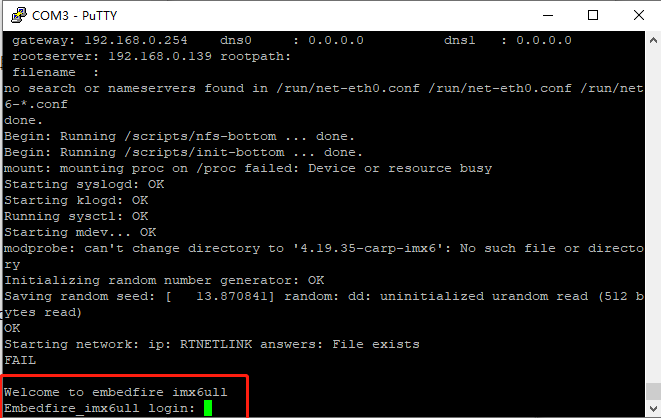
这样就成功挂载上我们的根文件系统了。账号密码都为 root
我们发现我们的命令行在任何目录下都是 # 修改 **/etc/profile**文件来让其显示具体路径
1 | vi /etc/profile
|
做如图修改
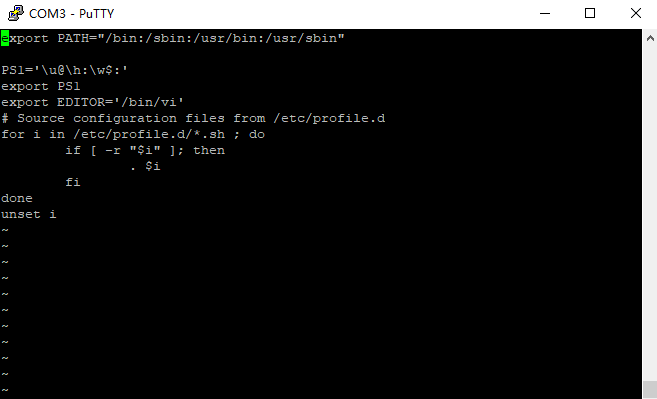
1 2 3 4 5 6 7 8 9 10 11 | export PATH="/bin:/sbin:/usr/bin:/usr/sbin"
PS1='\u@\h:\w$:'
export PS1
export EDITOR='/bin/vi'
# Source configuration files from /etc/profile.d
for i in /etc/profile.d/*.sh ; do
if [ -r "$i" ]; then
. $i
fi
done
unset i
|
然后重启即可
1 | reboot
|
如图

