2. System image burning
Three steps are required to run the board: burning the system, starting the system and logging in to the system.
LubanCat-RK series boards with emmc are programmed with system images by default when leaving the factory. If you do not need to burn a new image, you can skip this chapter.
The system image of the LubanCat-RK series board contains a variety of root file systems. We can choose the corresponding image to download according to our needs.
注意
The system image is the core of the LubanCat-RK board. It includes the linux kernel, basic programs, etc., and is necessary to run the LubanCat-RK board. So we need to install the image for the board before running it.
2.1. Image acquisition
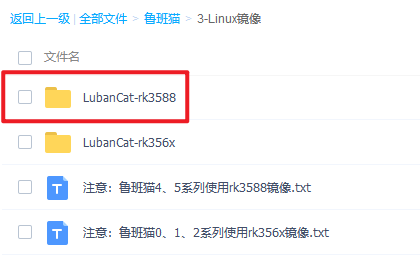
Visit Baidu Netdisk resource introduction page to obtain the system image: 3-Linux镜像
2.1.1. Image naming rules
lubancat-(Processor model)-(Root file system)-(Desktop type)-(Update time)_update
2.1.1.1. Processor model
rk3588 : LubanCat board using rk3588 processor, such as LubanCat-4 board
2.1.1.2. Root file system
debian11 : Indicates that the root file system used by the system is debian11.
2.1.1.3. Desktop type
gnome : Use the desktop version of the gnome suite image.
lite : Command line version, no desktop.
2.1.1.4. Updated
The format of the update date is yyyymmdd_update which is year month day_update.
2.1.1.5. For example
Let’s take the general image of LubanCat-rk3588 debian11 as an example.
lubancat-rk3588-debian11-gnome-20230807_update
Applicable models of the board: boards suitable for LubanCat using the rk3588 processor
Root file system: debian11
System category: gnome·Desktop version
Update date: August 7, 2023
2.2. Windows platform burning image
2.2.1. Burn image to eMMC
2.2.1.1. Tool acquisition and installation
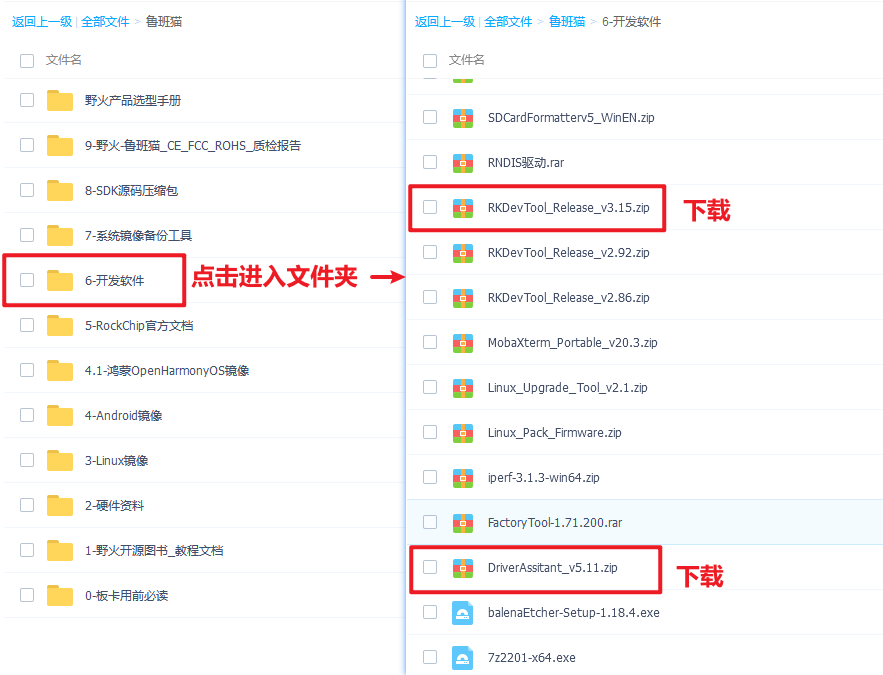
Burning the image to eMMC requires the use of the burning tool RKDevTool and the driver DriverAssitant.
Note: To burn the ubuntu22.04 image of lubancat4, you need to use the burning tool in the ubuntu22.04 image directory and follow the image flashing method in this directory.
Click to enter the link: 百度网盘镜像 Extraction code: hslu
2.2.1.1.1. Install DriverAssitant
Unzip the DriverAssitant software compressed package and double-click DriverInstall.exe to enter the driver installation interface.
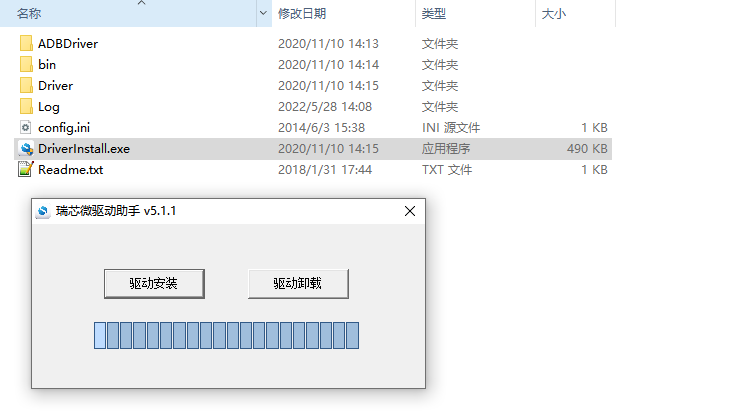
Click Driver Installation to start installing the driver. If you are not sure whether an older version of the driver has been installed before, you can first click Driver Uninstall to remove the old version of the driver, and then click Driver Installation.
2.2.1.1.2. Install RKDevTool
Rockchip’s dedicated USB burning tool, Windows platform, can use the USB interface to download the system image to the board.
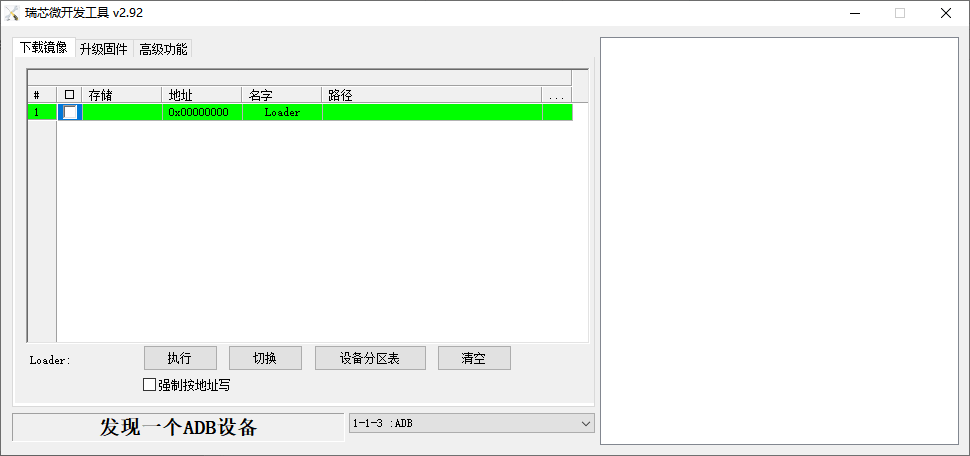
After decompressing the compressed package, you can use it without installation. Double-click RKDevTool.exe to enter the software interface.
The software mainly has three parts, namely downloading images, upgrading firmware and advanced functions.
2.2.1.2. Recovery Mode burning image
This mode is suitable for boards that the system can run normally.
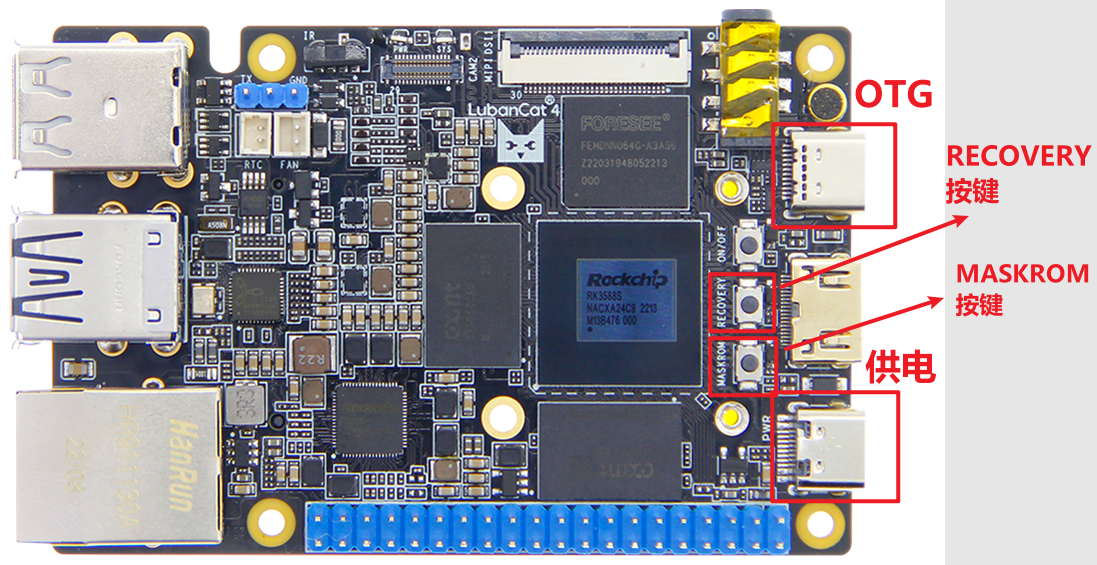
We open the RKDevTool burning tool and set the board to enter burning mode.
1 2 3 4 5 6 | 1. Prepare two Type-C cables, one for image burning and one for power supply
2. Disconnect all connections that may provide power to the board, such as power cords, USB cables, etc.
3. Use a Type-C cable to connect one end to the OTG interface of the board and the other end to the USB interface of the computer, then open the software RKDevTool
4. Press and hold the RECOVERY button, and then use the power supply Type-C to connect the board to power on the board.
5. Wait for the software prompt to find a LOADER device (as shown in the figure below), then release the button
6. If unsuccessful, repeat steps 2-5.
|
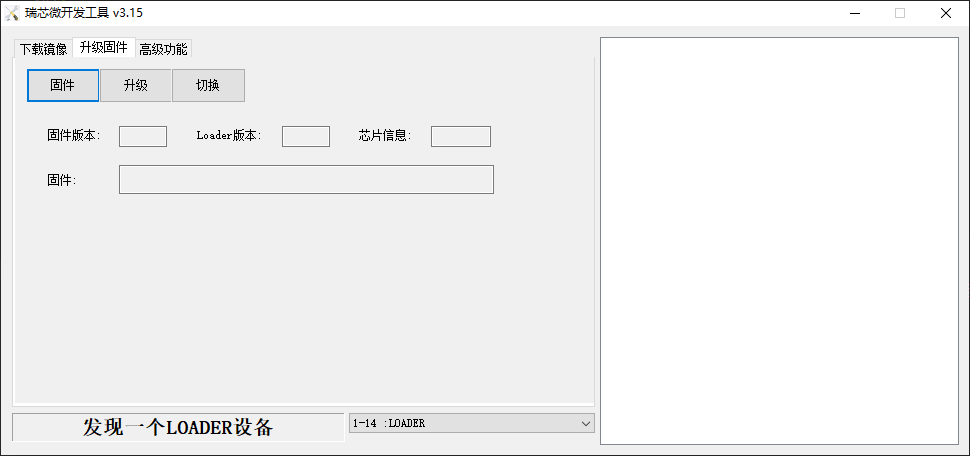
Then you can click Firmware to select the image to be burned, and then click Open

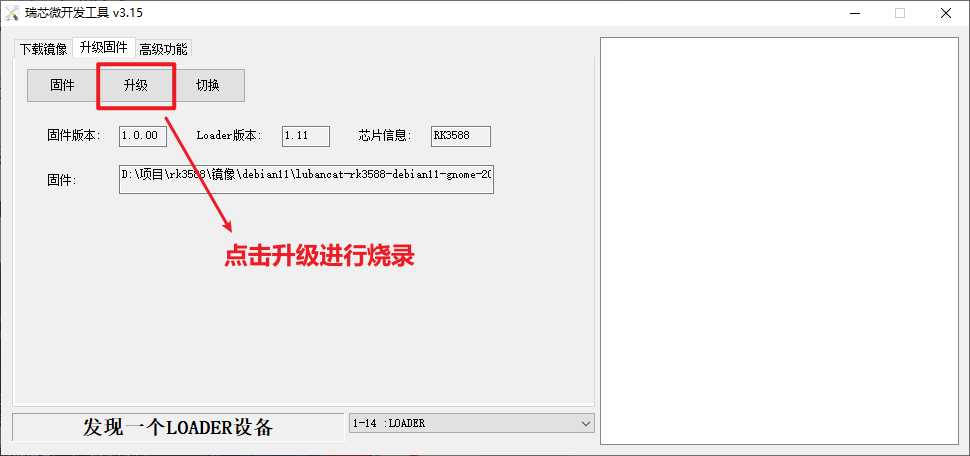
Wait for the firmware to be loaded, then click Upgrade to start burning the firmware.
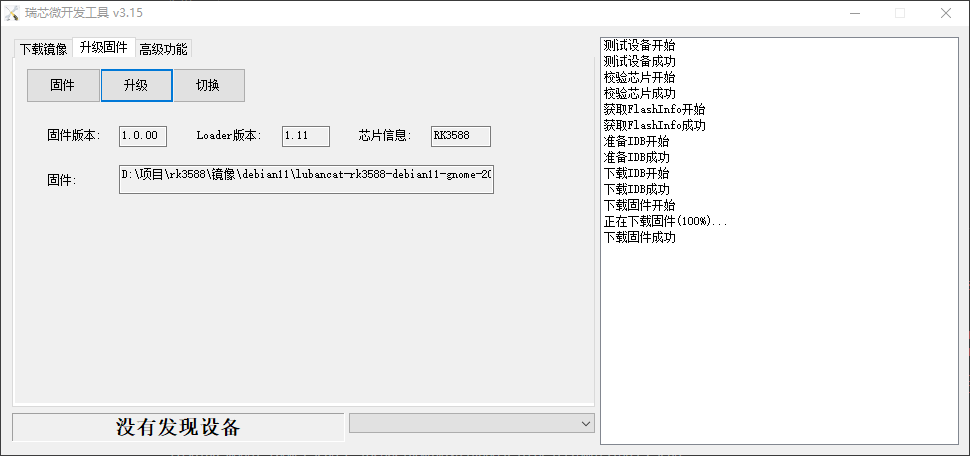
The image is burned successfully, as shown below
2.2.1.3. Burning image in MASKROM mode
This mode is suitable for The board has not been programmed with the system or the programmed system is damaged and cannot run (adaptable to all conditions)

We open the RKDevTool burning tool and set the board to enter burning mode.
1 2 3 4 5 6 | 1. Prepare two Type-C cables, one for image burning and one for power supply
2. Disconnect all connections that may provide power to the board, such as power cords, USB cables, etc.
3. Use a Type-C cable to connect one end to the OTG interface of the board and the other end to the USB interface of the computer, then open the software RKDevTool
4. Press and hold the MASKROM button, and then use the power supply Type-C to connect the board to power on the board.
5. Wait for the software prompt to find a MASKROM device (as shown in the picture below), then release the button
6. If unsuccessful, repeat steps 2-5.
|
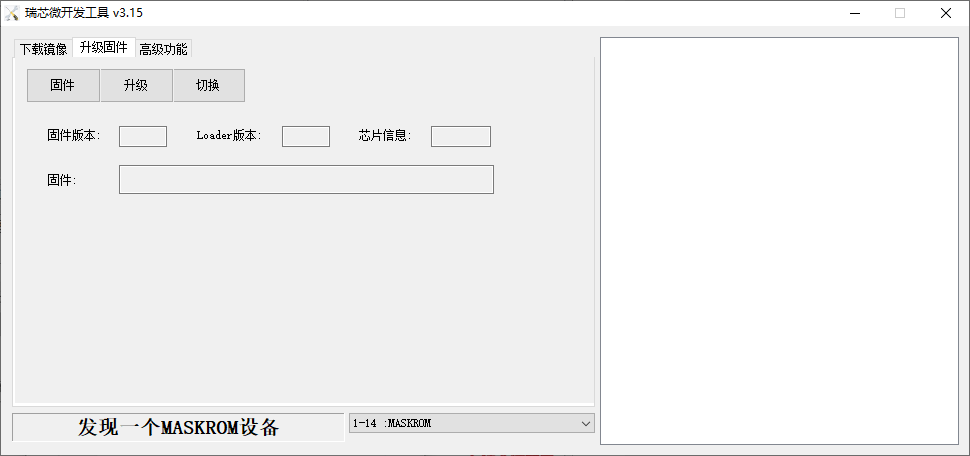
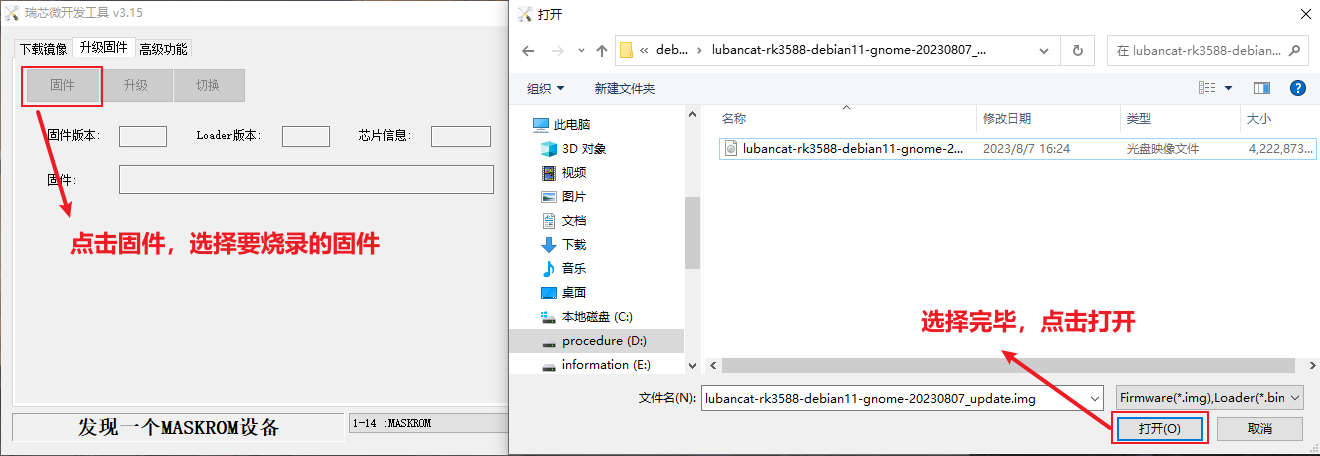
Then you can click Firmware to select the image to be burned, such as update.img and open it.
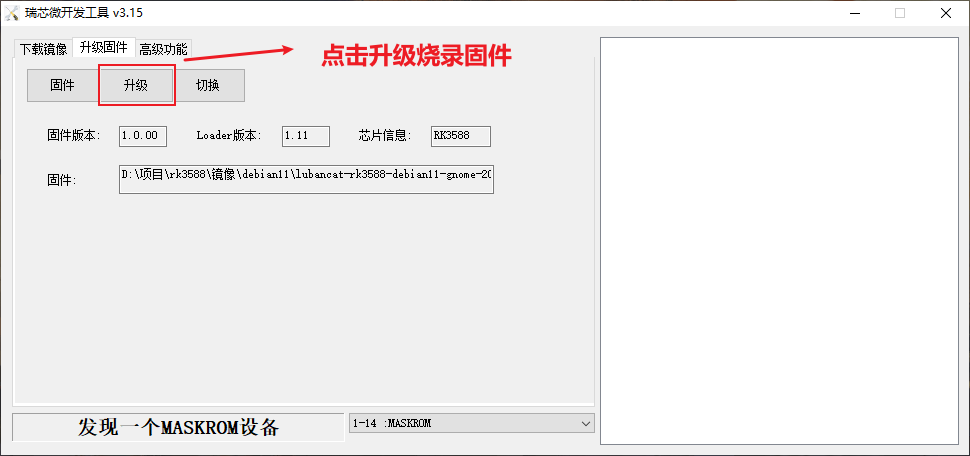
Wait for the firmware to be loaded, then click Upgrade to start burning the firmware.
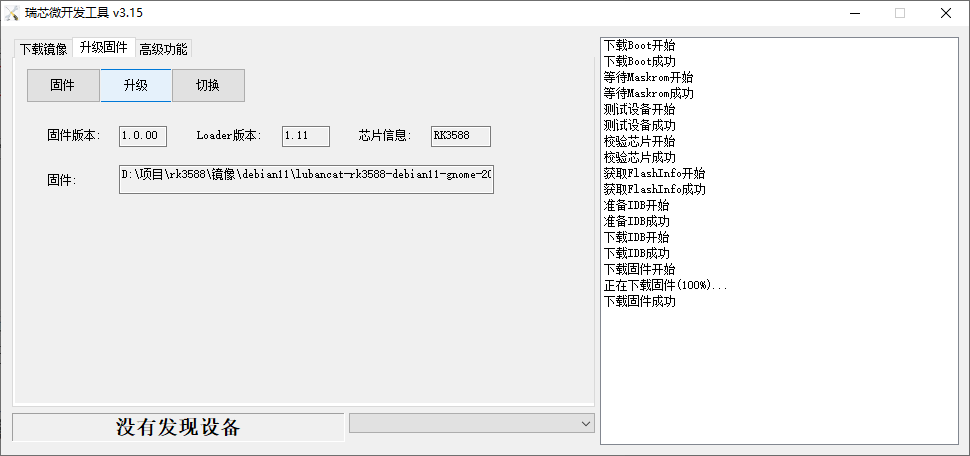
The image is burned successfully, as shown below:
2.2.2. Burn image to SD card
Burning the image to the SD card requires special burning software and an SD card reader.
2.2.2.1. Install SDDiskTool
Burning the image to eMMC requires the use of the burning tool SD_Firmware_Tool.exe
Click to enter the link: Baidu Netdisk image Extraction code: hslu
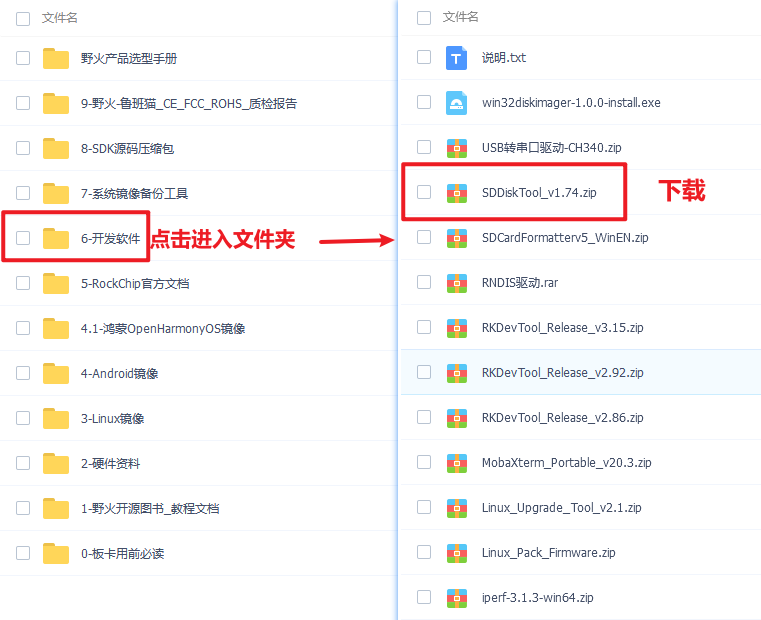
After decompressing the compressed package, you can use it without installation. Double-click SD_Firmware_Tool.exe to enter the software interface.
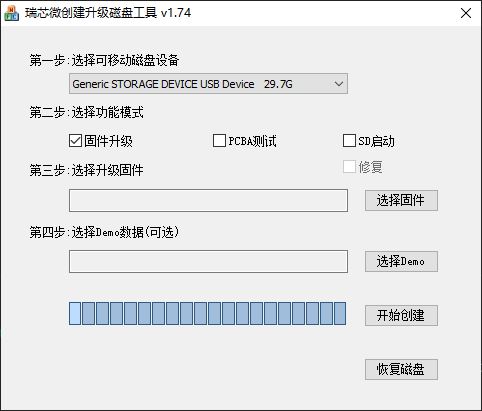
2.2.2.2. Burn image
Open the executable file SD_Firmware_Tool.exe that burned SDDiskTool and insert the SD card.
First select the correct SD card to be burned, and then select the function mode to SD boot. Then select the image to be burned, and finally click to start creating the burning image to the SD card.
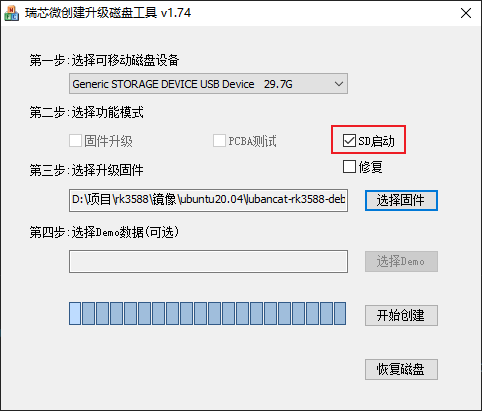
Wait patiently for the SD card to be burned completely. When the image size is larger, the burning time will be longer accordingly.
注意
When you click to start creating, there will be a certain probability that an error message will be reported saying that it cannot be burned. You can close the error window and start creating again.
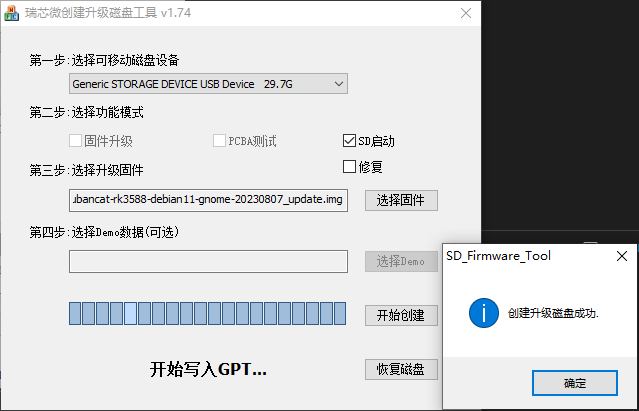
Burning is successful, as shown below:
2.3. Other burning methods
“[Embedded] Embedded Linux Image Construction and Deployment - Based on LubanCat-RK Series Boards”
2.4. FAQs
- Q1: What is the difference between MASKROM mode burning and Recovery mode burning?
A1:The principle of recovery mode burning is that the board detects that the pin is pressed during uboot startup, and then enters the burning mode. The prerequisite for recovery mode burning is that the image is complete (mostly used in Android mode). MASKROM mode burning is when the chip detects that the pin is pressed during startup, and then enters the burning mode. MASKROM mode burning is suitable for most scenarios.
