
3. Starting the system and system login
There are three steps required to initially run the board: burning the system, starting the system and logging in to the system.
Let me explain to you how to start the system and log in to the system.
Starting the system requires correctly connecting the storage device and performing operations such as power-on and startup. For details, please refer to the following summaries of this article.
System login can use serial port login or SSH login. If we have access to the screen, we can enter the desktop system directly through the manager displayed on the screen.
3.1. How to start the board
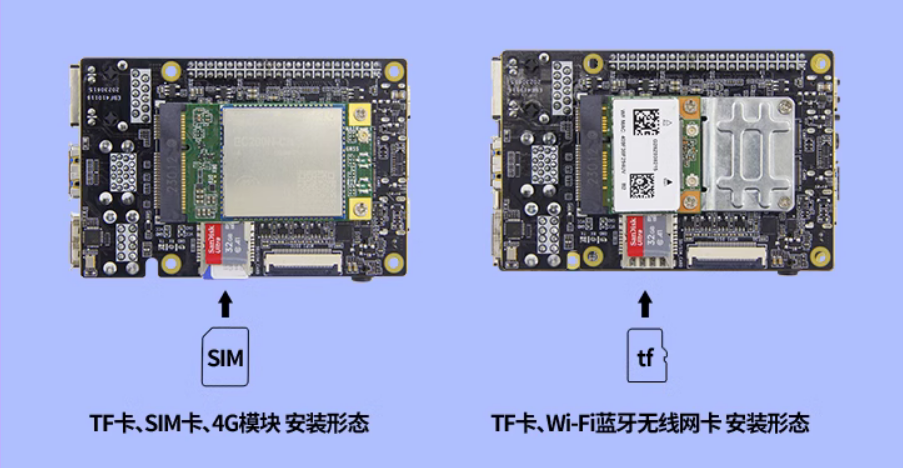
LubanCat-RK3588 series boards support multiple boot methods. On our matching boards, we mainly use eMMC and SD cards to boot.
For boards without onboard eMMC, only the SD card can be used to boot. When the system image is burned into the SD card, it will be booted from the SD card.
For boards with onboard eMMC and a TF card slot, both eMMC and SD card boot methods are supported.
When the SD card has an image, the SD card will be used first for startup.
When the SD card does not have an image and emmc has an image, use the emmc image to start.
If there is no image in the sd card and emmc, it will not start.
3.2. Start attention
The Linux system image is burned into the emmc or SD card, and the board will run automatically when powered on.
The following are the startup considerations for the board:
Correctly connect the peripherals on the board according to your own board, and use the matching screws to secure them firmly. Especially devices that do not support hot swap (mipi display, mipi camera, pcie-wifi network card, pcie-4G network card, hard drive, etc.). Unplugging and plugging in while powered on may damage the device and prevent it from working properly.
When using a display, please note that the MIPI screen interface does not support hot swapping. There are two forms of HDMI interfaces, one is the standard HDMI interface and the other is micro-HDMI. The two interfaces cannot be directly connected, and a conversion interface is needed to convert the connection. If it is a monitor with a VGA or DP interface, it can also be displayed by using an adapter.
The board supports mouse and keyboard, and can be connected to the board through the USB interface if necessary.
Use the power supply to power the board. Note: The marked power supply specifications are the minimum specifications. If there are many peripherals connected, please use a power supply with the same voltage and higher power.
注意
When the image is started for the first time after burning, the machine will be configured. It will automatically restart a minute or two after powering on, and the system will run normally.
3.3. Serial terminal login
3.3.1. Serial connection
We can use Dupont Line to connect and use.
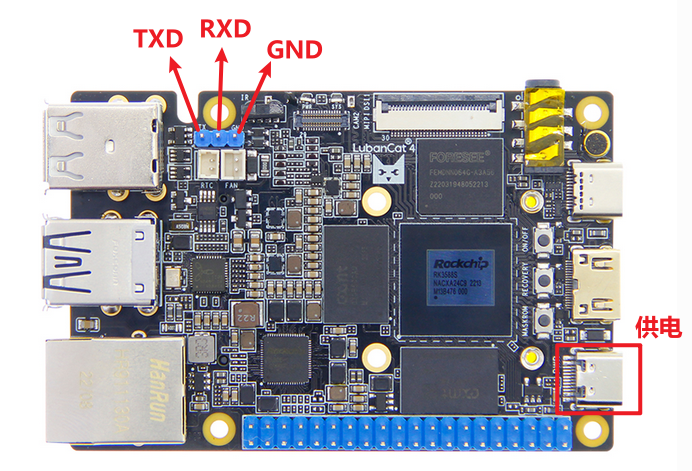
1 2 3 4 5 6 | #Wire to Wire
Board ----- Serial port module
GND ------ GND
TXD ------ RXD
RXD ------ TXD
|
3.3.2. Software preparation
MobaXterm installation and use
Download link: https://mobaxterm.mobatek.net/download.html
MobaXterm for detailed usage of terminal software, please refer to the document:
“Linux basics and application development practical guide - based on i.MX6ULL series”
Except for different parameter configurations, the usage methods are the same.
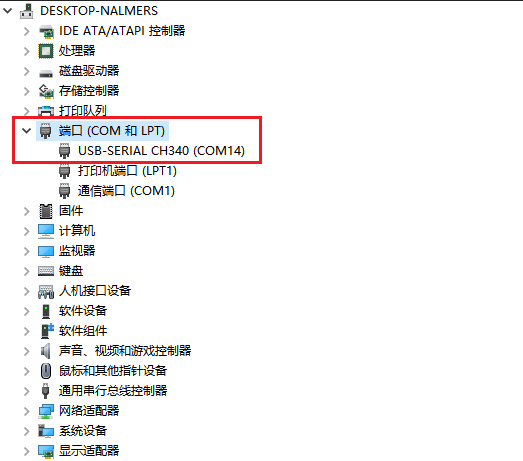
You can see that my port uses COM14 (if not, you need to install the corresponding serial port driver yourself)
Then open the MobaXterm software, click the icon sessions to pop up the session setting, and select Serial.
We select the correct serial port, set the baud rate to 1500000, and turn off flow control. The specific settings are as shown in the figure below.
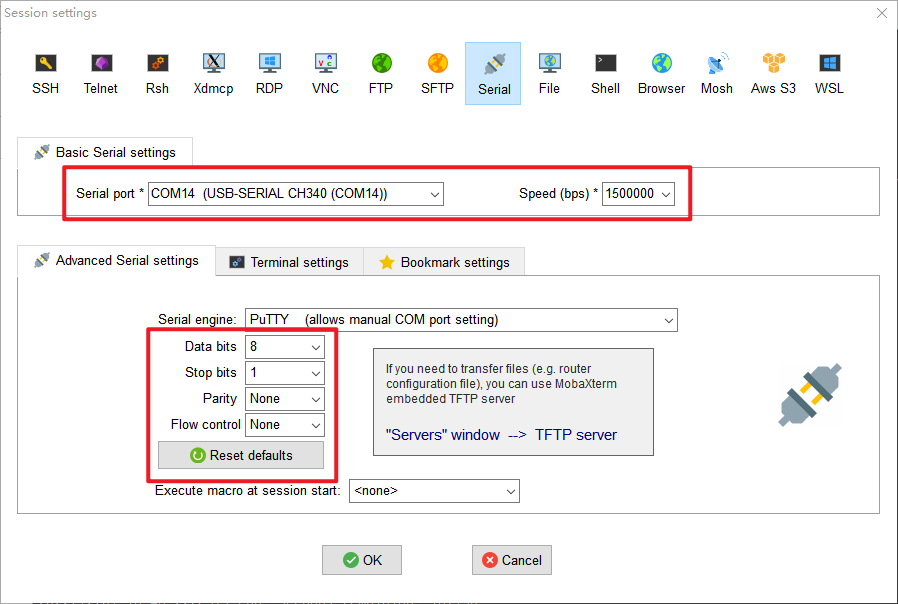
Select your own serial port, and then configure your own software as shown above.
Then click OK to enter the communication. The board has not been turned on yet, so there is no response.
3.3.4. Power on
注意
The first boot after burning will perform a restart. This is normal and the board is being configured.
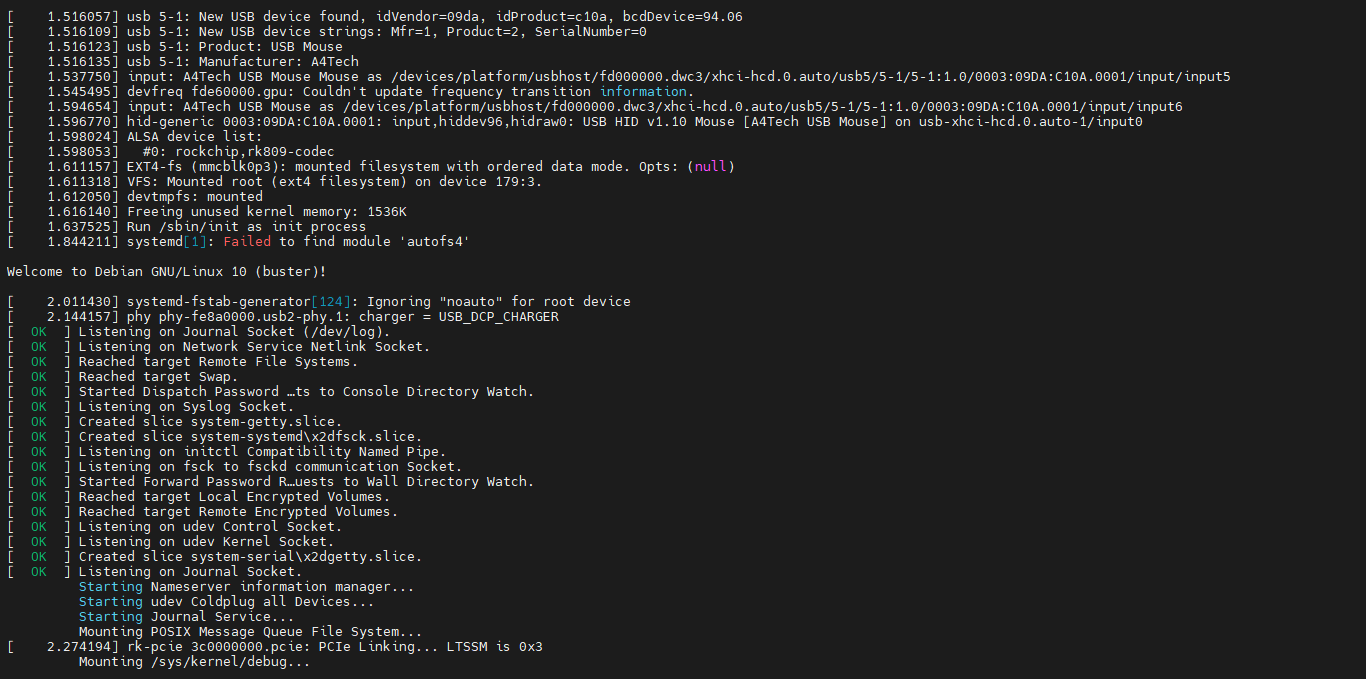
After turning on the computer, you will see a lot of printed information. This is normal and a sign that the system is running.
After waiting for a while, you can log in, as shown below:
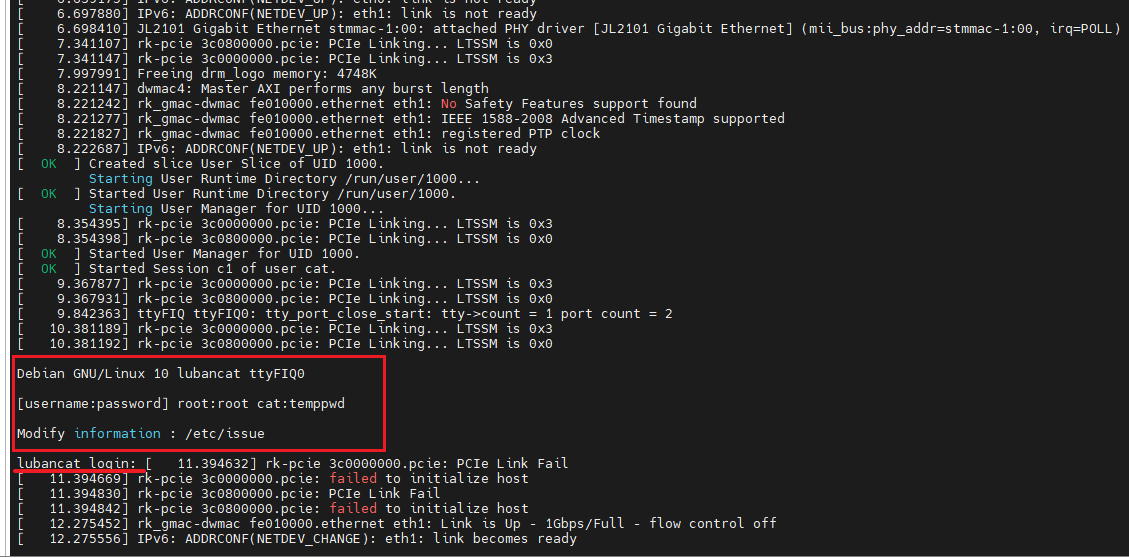
注解
You can enter the login interface when you see the text that appears on the picture. Sometimes there may be some errors, but this does not affect our use.
Login requires username and password.
1 2 3 | User - username -- password
root - root -- root
general user - cat -- temppwd
|
First enter the username (case sensitive), then enter the password (there will be no text prompt when entering the password, so you need to pay attention to the Chinese input method and capitalization).
If the username and password are correct, you will enter the terminal.
To change the username, use the usermod command, and to change the password, use the passwd command.
3.4. Automatic login configuration
3.4.1. Desktop automatic login (cat user)
Debian System configuration file
/etc/gdm3/daemon.confUbuntu System configuration file
/etc/gdm3/custom.conf
Open the configuration file according to the installed system and modify the following content.
1 2 3 4 5 | # Configure automatic login to turn on and modify the content of the file.
AutomaticLoginEnable = true
# Configure automatic login users
AutomaticLogin = cat
|
Restart the service or restart the device to take effect.
1 | sudo systemctl restart gdm3.service
|
3.4.2. Desktop automatic login (root user)
Debian System configuration file
/etc/gdm3/daemon.confUbuntu System configuration file
/etc/gdm3/custom.conf
Open the configuration file according to the installed system and modify the following content.
1 2 3 4 5 | # Configure automatic login to turn on and modify the content of the file
AutomaticLoginEnable = true
# Configure automatic login users
AutomaticLogin = root
|
Open
/etc/pam.d/gdm-autologinFind the following line
1 | auth required pam_succeed_if.so user != root quiet_success
|
Add ‘#’ before this line
1 | #auth required pam_succeed_if.so user != root quiet_success
|
Restart the service or restart the device to take effect.
1 | sudo systemctl restart gdm3.service
|
3.4.3. Turn off automatic desktop login
Debian System configuration file
/etc/gdm3/daemon.confUbuntu System configuration file
/etc/gdm3/custom.conf
Open the configuration file and modify the following content according to the installed system.
1 2 | # If automatic login is configured to be turned off, the contents of the file will be modified.
AutomaticLoginEnable = false
|
Restart the service or restart the device to take effect.
1 | sudo systemctl restart gdm3.service
|
3.4.4. Open the serial port terminal and log in automatically
If you want the serial terminal to log in automatically, you only need to modify the /lib/systemd/system/serial-getty@.service file. Take the automatic login of the root user after powering on as an example.
1 2 | # Open the service file of the serial port
vi /lib/systemd/system/serial-getty\@.service
|
Find the following sentences.
1 2 | # ExecStart=-/sbin/agetty --autologin root --noclear %I $TERM
ExecStart=-/sbin/agetty -o '-p -- \\u' --keep-baud 115200,38400,9600 %I $TERM
|
Modify it to:
1 2 | ExecStart=-/sbin/agetty --autologin root --noclear %I $TERM
# ExecStart=-/sbin/agetty -o '-p -- \\u' --keep-baud 115200,38400,9600 %I $TERM
|
If you want to automatically log in as the cat user, you only need to replace the root above with cat.
3.4.5. Turn off serial terminal automatic login
1 2 | # Open the service file of the serial port
vi /lib/systemd/system/serial-getty\@.service
|
Find the following sentences:
1 2 | ExecStart=-/sbin/agetty --autologin root --noclear %I $TERM
# ExecStart=-/sbin/agetty -o '-p -- \\u' --keep-baud 115200,38400,9600 %I $TERM
|
Modify it to:
1 2 | # ExecStart=-/sbin/agetty --autologin root --noclear %I $TERM
ExecStart=-/sbin/agetty -o '-p -- \\u' --keep-baud 115200,38400,9600 %I $TERM
|
After the modification is completed, restart.