8. GPIO控制
GPIO是General Purpose I/O的缩写,即通用输入输出端口,简单来说就是MCU/CPU可控制的引脚, 这些引脚通常有多种功能,最基本的是高低电平输入检测和输出,部分引脚还会与主控器的片上外设绑定, 如作为串口、I2C、网络、电压检测的通讯引脚。
Linux提供了GPIO子系统驱动框架,使用该驱动框架即可灵活地控制板子上的GPIO。
8.1. 使用gpio sysfs接口控制IO
在Linux中,最常见的读写GPIO方式就是用GPIO sysfs interface, 是通过操作 /sys/class/gpio 目录下的 export 、 unexport 、gpio{N}/direction, gpio{N} /value (用实际引脚号替代{N})等文件实现的,经常出现shell脚本里面。 在kernel 4.8开始,加入了libgpiod的支持;而原有基于sysfs的访问方式,将被逐渐放弃。
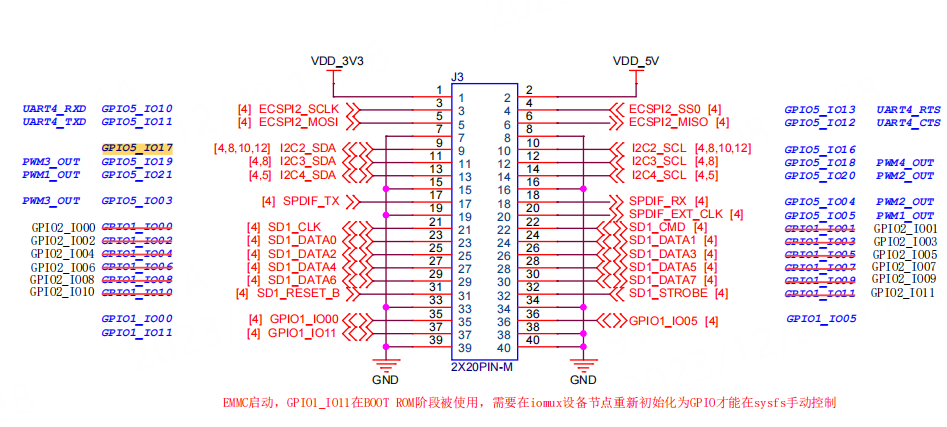
以野火IMX8M MINI开发板上的GPIO5_IO17为例,使用GPIO sysfs接口控制IO
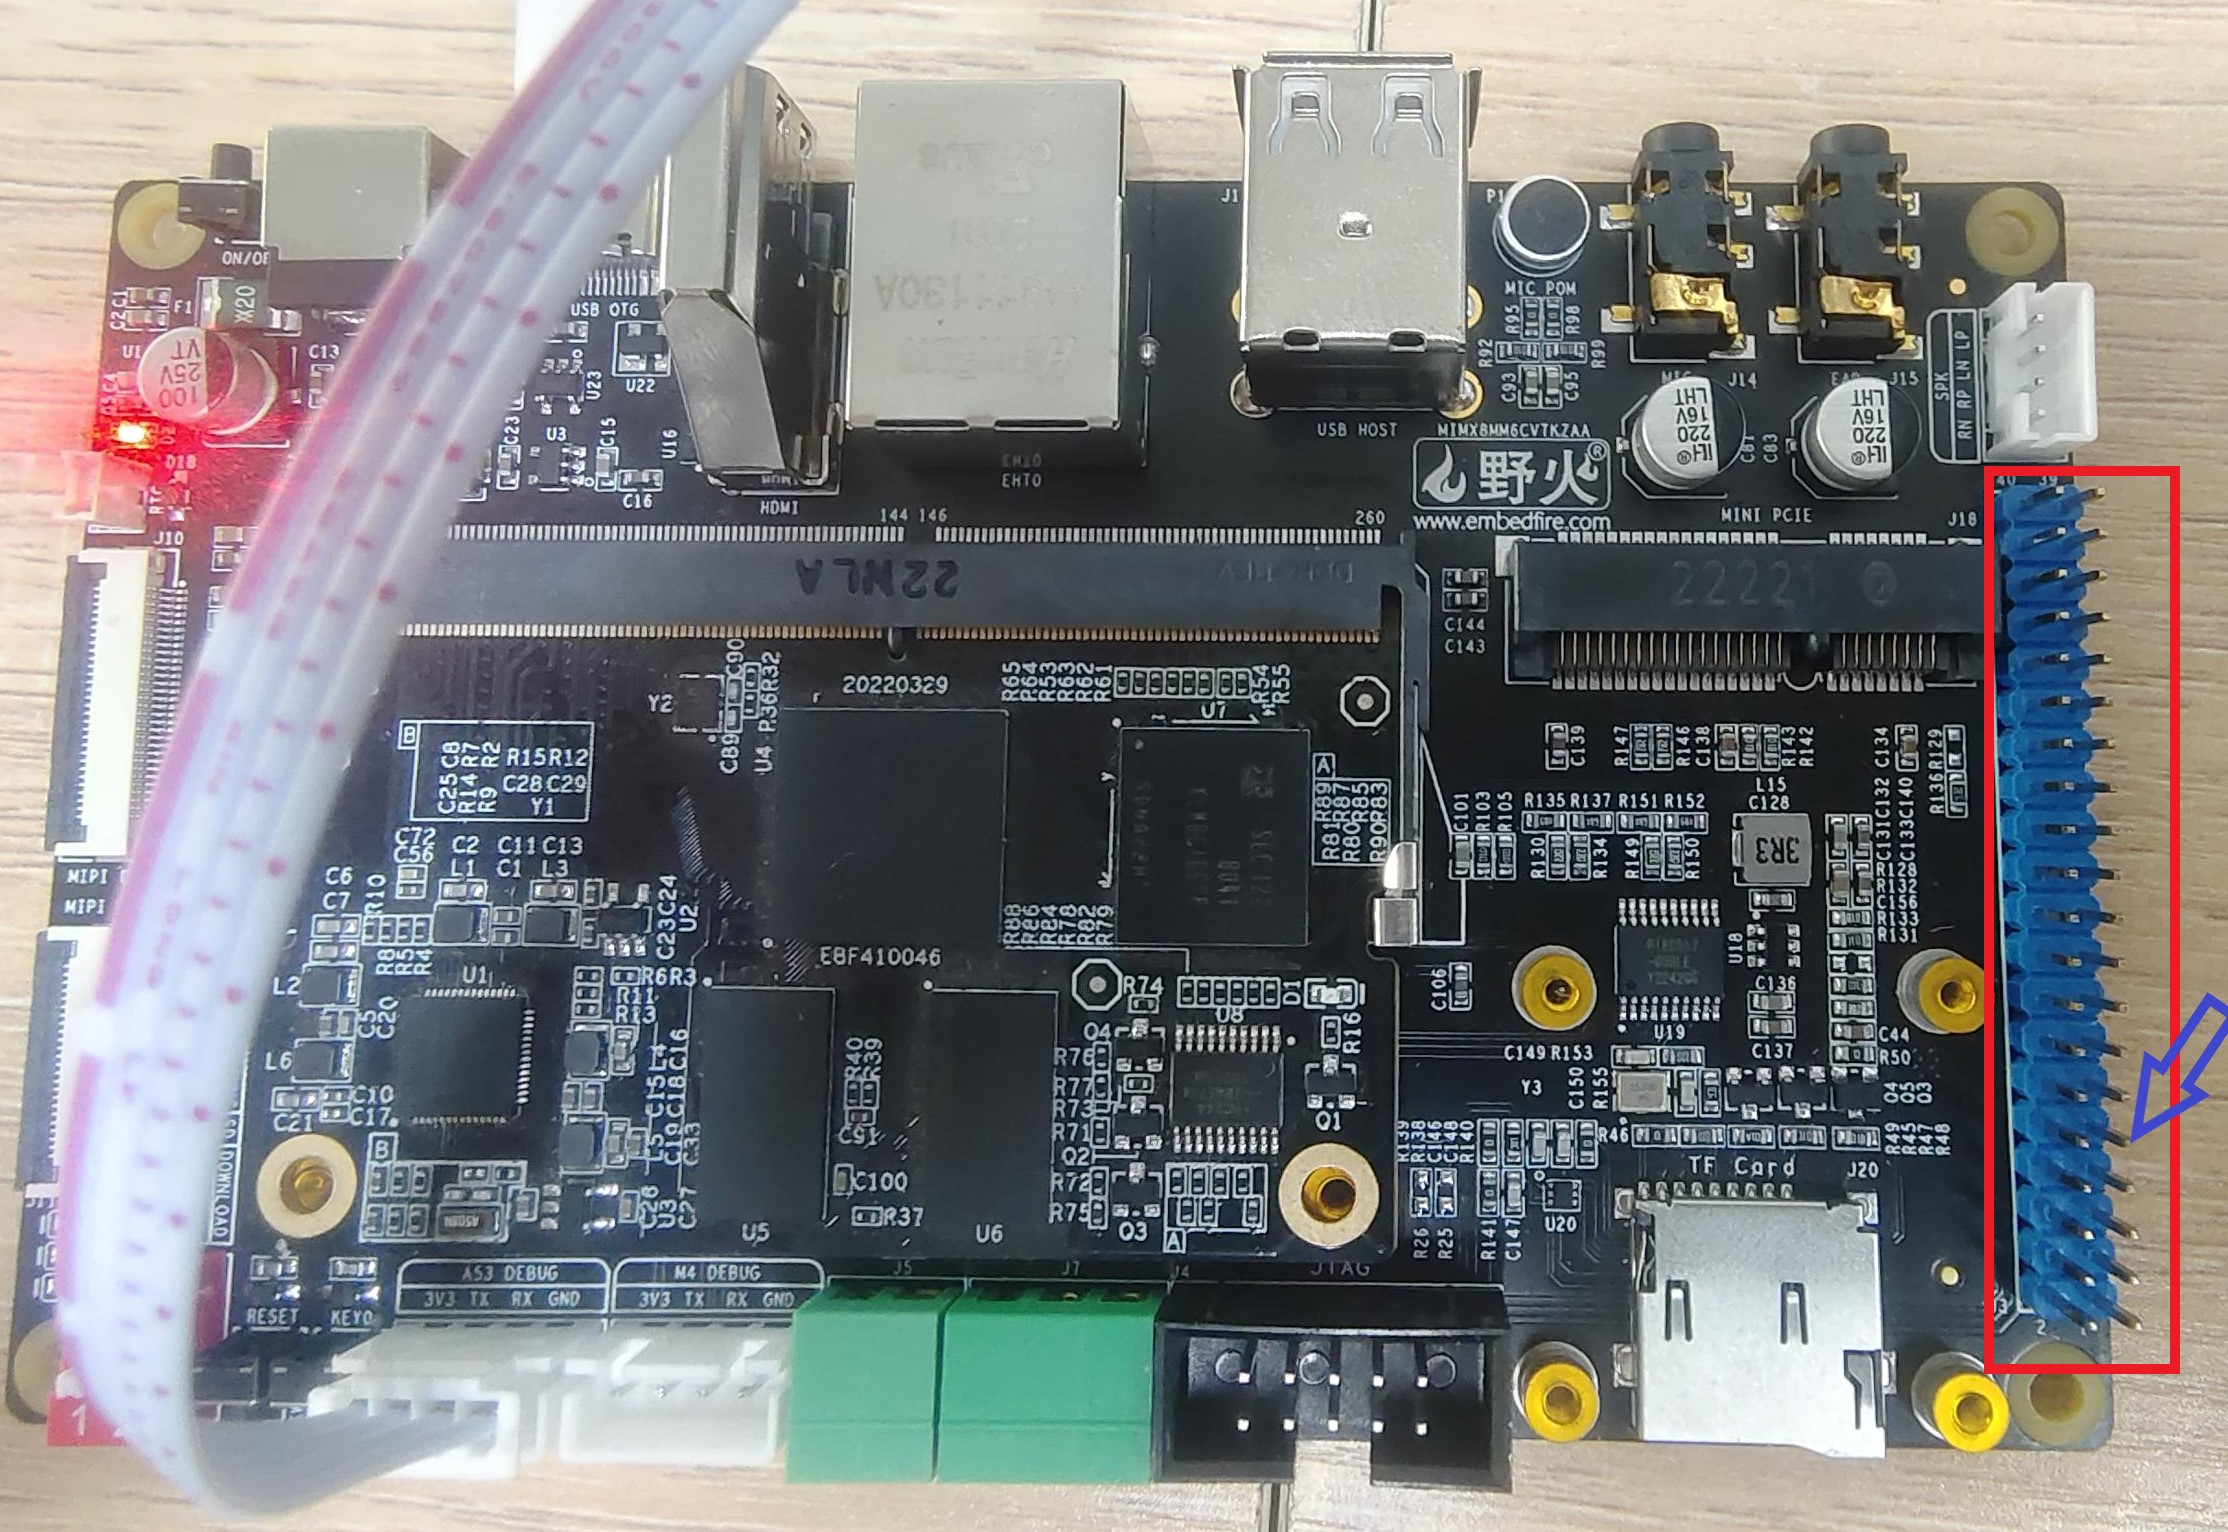
原理图
GPIO设备目录

export文件:导出GPIO,该文件只能写不能读,用户向该文件写 入GPIO的编号N可以向内核申请将该编号的GPIO导出到用户空间, 若内核本身没有把该GPIO用于其它功能,那么在/sys/class/gpio 目录下会新增一个对应编号的gpioN目录。
unexport文件:export的相反操作,取消导出GPIO,该文件同样只能写不能读。
gpiochipX目录:该目录是指GPIO控制器外设,Ubuntu主机上默认没有这样的功能。
gpioN目录:通过export导出的具体GPIO引脚的控制目录。
引脚编号转换
IMX8M MINI芯片GPIO引脚名格式通常为GPIOn_IOx,如此处的GPIO5_IO17, 其中n是端口号,x为该组端口的引脚号。
本开发板中export文件使用的编号index与GPIO引脚名的转换关系如下: index = GPIOn_IOx = (n-1)*32 + x
例如GPIO5_IO17使用的引脚编号为:index = GPIO5_IO17 = (5-1)*32 +17 = 145。
要注意并不是所有的引脚都能通过export文件导出到用户空间的。
操作流程
1 2 3 4 5 6 7 8 9 10 11 12 | #以下命令在开发板上执行
#导出GPIO使用的GPIO到用户空间
echo 145 > /sys/class/gpio/export
#确认出现了gpio145设备目录
ls /sys/class/gpio/
#控制gpio145方向为输出
echo out > /sys/class/gpio/gpio145/direction
#实验时可使用电压表检测对应引脚的电平输出。
#控制gpio145输出高电平
echo 1 > /sys/class/gpio/gpio145/value
#控制gpio145输出低电平
echo 0 > /sys/class/gpio/gpio145/value
|
8.2. 控制gpio(系统调用)
类似地,也可以通过系统调用的文件操作方式操作GPIO。
相关的源码如下
1 2 3 4 5 6 7 8 9 10 11 12 13 14 15 16 17 18 19 20 21 22 23 24 25 26 27 28 29 30 31 32 33 34 35 36 37 38 39 40 41 42 43 44 45 46 47 48 49 50 51 52 53 54 55 56 57 58 59 60 61 62 63 64 65 66 67 68 69 70 71 72 73 74 75 76 77 78 79 80 81 82 83 84 85 86 87 88 89 90 91 92 93 94 95 96 97 98 99 100 101 102 | #include <string.h>
#include <sys/stat.h>
#include <unistd.h>
#include <fcntl.h>
int gpio_init(void)
{
int fd;
fd = open("/sys/class/gpio/export", O_WRONLY);
if(fd < 0){
printf("gpio_init open export failed\n");
return 1 ;
}
write(fd,"145", strlen("145"));
close(fd);
//direction config
fd = open("/sys/class/gpio/gpio145/direction", O_WRONLY);
if(fd < 0){
printf("gpio_init open direction failed\n");
return 2;
}
write(fd, "out", strlen("out"));
close(fd);
return 0;
}
int gpio_deinit(void)
{
int fd;
fd = open("/sys/class/gpio/unexport", O_WRONLY);
if(fd < 0){
printf("gpio_deinit open unexport failed\n");
return 1;
}
write(fd,"145", strlen("145"));
close(fd);
return 0;
}
int gpio_on(void)
{
int fd;
fd = open("/sys/class/gpio/gpio145/value", O_WRONLY);
if(fd < 0){
printf("gpio_on open value failed\n");
return 1;
}
write(fd, "1", 1);
close(fd);
return 0;
}
int gpio_off(void)
{
int fd;
fd = open("/sys/class/gpio/gpio145/value", O_WRONLY);
if(fd < 0){
printf("gpio_off open value failed\n");
return 1;
}
write(fd, "0", 1);
close(fd);
return 0;
}
int main(int argc, char *argv[])
{
char buf[10];
int res;
printf("This is the gpio_syscall demo\n");
res = gpio_init();
if(res){
printf("gpio_init error,code = %d\n",res);
return 0;
}
while(1){
printf("Please input the value : 0--off 1--on q--exit\n");
scanf("%10s", buf);
switch (buf[0]){
case '0':
gpio_off();
break;
case '1':
gpio_on();
break;
case 'q':
gpio_deinit();
printf("Exit\n");
return 0;
default:
break;
}
}
}
|
该代码说明如下:
gpio_init函数:它使用了open、write、close等函数修改export和gpioN/direction文件, 初始化gpio使用的引脚为输出模式。
gpio_deinit函数:向unexport文件写入编号,取消导出。
gpio_on和gpio_off函数:往gpioN/value文件写入1和0,控制引脚输出高低电平。
本代码要特别注意的是export和unexport文件是只有写权限的,所以通过open打开时要 使用“O_WRONLY”标志以写入方式打开,不能使用“O_RDWR”等带读模式的标志。
8.3. libgpiod控制IO
使用以下命令安装libgpiod库
1 2 | sudo apt update
sudo apt install libgpiod-dev
|
开发板安装ligpiod-dev后,可以通过以下命令找到具体的头文件和库文件:
1 2 3 4 5 6 | # 在开发板上查找libgpiod库
dpkg -L libgpiod-dev
# 以下是输出
/usr/include/gpiod.h
/usr/lib/aarch64-linux-gnu/libgpiod.a
/usr/lib/aarch64-linux-gnu/libgpiod.so
|
查找结果中的gpiod.h、libgpiod.so和libgpiod.a就是开发板使用的头文件、动态和静态链接库, 它是debian 10 buster默认apt安装的版本。
常用的libgpiod API(C库)如下所示:
1 2 3 4 5 6 7 8 9 10 11 12 13 14 15 16 17 18 19 20 21 22 23 24 25 26 27 | //成员变量
struct gpiod_chip; //GPIO组句柄
struct gpiod_line; //GPIO引脚句柄
//获取GPIO控制器(GPIO组)
struct gpiod_chip *gpiod_chip_open(const char *path);
//获取GPIO引脚
struct gpiod_line * gpiod_chip_get_line(struct gpiod_chip *chip, unsigned int offset);
//设置引脚方向为输入模式
int gpiod_line_request_input(struct gpiod_line *line,const char *consumer);
//设置引脚为输出模式
int gpiod_line_request_output(struct gpiod_line *line,const char *consumer, int default_val)
//设置引脚的高低电平
int gpiod_line_set_value(struct gpiod_line *line, int value);
//读取引脚状态
int gpiod_line_get_value(struct gpiod_line *line);
//释放GPIO引脚
void gpiod_line_release(struct gpiod_line *line);
//关闭GPIO组句柄并释放所有分配的资源。
void gpiod_chip_close(struct gpiod_chip *chip);
|
我们可以直接在开发板上进行创建c文件来编译。
1 | vim libgpio_demo.c
|
我们将控制gpio的程序(引脚为GPIO5_IO17)复制进去,其源码如下:
1 2 3 4 5 6 7 8 9 10 11 12 13 14 15 16 17 18 19 20 21 22 23 24 25 26 27 28 29 30 31 32 33 34 35 36 37 38 39 40 41 42 43 44 45 46 47 48 49 50 51 52 53 54 55 56 | #include <gpiod.h>
#include <stdio.h>
#include <unistd.h>
#include <stdlib.h>
int main(int argc, char **argv)
{
int i;
int ret;
struct gpiod_chip * chip; //GPIO控制器句柄
struct gpiod_line * line; //GPIO引脚句柄
/*获取GPIO控制器*/
chip = gpiod_chip_open("/dev/gpiochip4");
if(chip == NULL)
{
printf("gpiod_chip_open error\n");
return -1;
}
/*获取GPIO引脚*/
line = gpiod_chip_get_line(chip, 17);
if(line == NULL)
{
printf("gpiod_chip_get_line error\n");
goto release_line;
}
/*设置GPIO为输出模式*/
ret = gpiod_line_request_output(line,"gpio",0);
if(ret < 0)
{
printf("gpiod_line_request_output error\n");
goto release_chip;
}
for(i = 0;i<10;i++)
{
gpiod_line_set_value(line,1);
usleep(2000000); //延时2s
gpiod_line_set_value(line,0);
usleep(2000000);
}
release_line:
/*释放GPIO引脚*/
gpiod_line_release(line);
release_chip:
/*释放GPIO控制器*/
gpiod_chip_close(chip);
return 0;
}
|
编译程序时需指定libgpiod库及路径头文件路径(不使用交叉编译时并不需要指定路径)。
然后我们在开发板上执行方式一
1 2 3 | sudo aarch64-linux-gnu-gcc libgpio_demo.c -lgpiod -L./libgpiod/ -I./libgpiod/ -o libgpio_demo
sudo chmod 777 libgpio_demo
./libgpio_demo
|
此时我们的测量电压可以发现电压变化。