3. 添加系统自启动服务
本章总结两种自启动方式,分别通过Systemd服务以及桌面系统自带的自启动方式实现程序的自启动。
本章节适用于已经将镜像烧录到板卡并正常启动系统的情况。
3.1. Systemd方式
创建hello.service服务的过程已经在 探索Systemd 讲解过了,这里我们只对实现自启动的方式进行讲解,更多Systemd相关内容请查看 探索Systemd 章节。
3.1.1. 编写脚本
cd进入/opt目录下,使用vim编写一个hello.sh脚本。
1 2 3 4 5 6 7 | #!/bin/bash
while true
do
echo Hello Lubancat >> /tmp/hello.log
sleep 3
done
|
该脚本实现的功能是每隔3秒就打印“Hello Lubancat”字符串到/tmp/hello.log文件中。 编写好后记得赋予hello.sh可执行权限。
sudo chmod 0755 hello.sh
3.1.2. 创建配置文件
在/etc/systemd/system/目录下创建一个hello.service配置文件,内容如下。
1 2 3 4 5 6 7 8 9 10 | [Unit]
Description = hello daemon
[Service]
ExecStart = /opt/hello.sh
Restart = always
Type = simple
[Install]
WantedBy = multi-user.target
|
其中ExecStart字段定义了hello.service服务的自启动脚本为/opt/hello.sh, 当我们使能了hello.service开机自启功能,在开机后便会执行/opt/hello.sh。 Restart = always表示指进程或服务意外故障的时候可以自动重启的模式。 Type = simple为默认的,可以不填。WantedBy指定服务由谁启动,WantedBy = multi-user.target 表示 在系统启动到多用户模式时就会把这个服务添加到启动顺序中。如果需要在图形用户界面后再启动,需要设置为 WantedBy = graphical.target,表示需要在系统进入图形用户界面模式时启动。
也就是说,WantedBy参数对于服务是否需要桌面环境十分重要,如果服务需要桌面环境,然而设置WantedBy = multi-user.target 在桌面启动前就调用自己的启动脚本,将会导致服务启动失败!
1 2 3 4 5 6 | #在桌面前就启动服务
WantedBy = multi-user.target
#进入桌面后启动服务
WantedBy = graphical.target
|
3.1.3. 使能hello.service开机自启功能
输入命令“sudo systemctl list-unit-files –type=service | grep hello” 查看hello.service是否被添加到了服务列表。
sudo systemctl list-unit-files --type=service | grep hello

可以看到hello.service处于disable状态,如果你输入上面命令后没有任何显示, 那你创建的服务就处理问题,需要仔细排查。我们输入下面命令使hello.service开机自启动。
sudo systemctl enable hello
sudo systemctl start hello
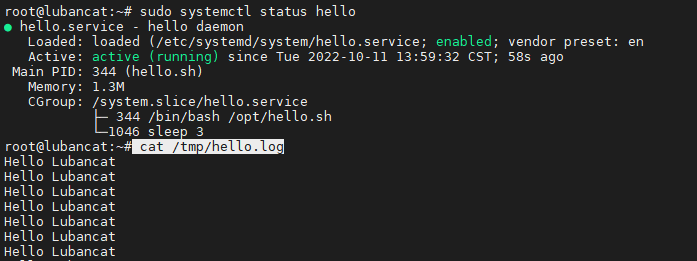
然后使用reboot命令重启系统, 启动系统后输入“sudo systemctl status hello”命令即可看到hello.service处于运行状态。
sudo systemctl status hello

cat /tmp/hello.log
3.2. 桌面系统方式
如果使用带桌面环境的镜像,例如xfce、xfce-full、gnome版本的镜像,可以通过桌面系统自带的自启动服务实现,也十分建议桌面用户使用此种方式。
3.2.1. 编写自启动配置脚本
在桌面登录用户的家目录下创建启动文件:
#以cat用户为例
mkdir /home/cat/.config/autostart

#创建配置文件
vim /home/cat/.config/autostart/xfce-terminal.desktop
在xfce-terminal.desktop文件中添加以下内容:
[Desktop Entry]
Type=Application
Exec=/opt/test.sh
Hidden=false
NoDisplay=false
X-GNOME-Autostart-enabled=true
Name=My App
Comment=Start My App on login
该配置文件的内容说明如下:
Type=Application:指定类型为应用程序。
Exec=/opt/test.sh:指定要执行的命令或脚本的路径。
Hidden=false:不隐藏该自启动项。
NoDisplay=false:在桌面环境的启动器中显示该自启动项。
X-GNOME-Autostart-enabled=true:启用桌面环境下的自启动功能。
Name=My App:给自启动项指定一个名称。
Comment=Start My App on login:自启动项的注释,描述其在登录时启动的作用。
通过这个配置文件,当用户登录桌面环境时,系统会自动执行/opt/test.sh脚本并启动相应的应用程序。
3.2.2. 编写自启动脚本
根据上面的自启动配置,创建自启动脚本,cd进入/opt目录下,编写一个test.sh脚本。
1 2 3 4 | #!/bin/bash
#打开桌面终端窗口
xfce4-terminal
|
以上脚本实现的功能是在桌面中打开一个终端窗口,编写完成后需要赋予权限。
sudo chmod 777 /opt/test.sh
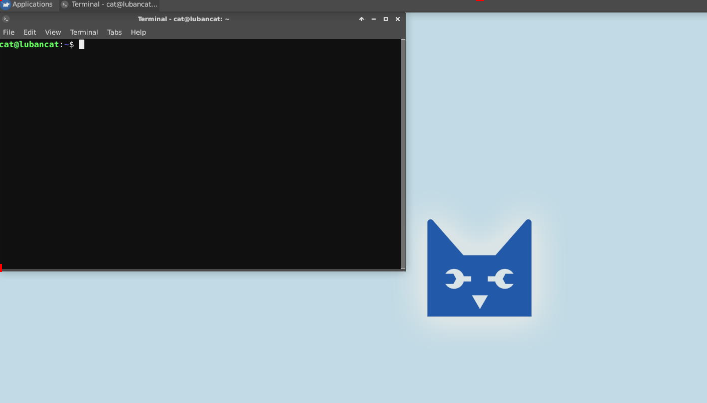
完成以上操作后,重启开发板即可,进入桌面后会自动打开一个终端,如下图: