
12. Buildroot根文件系统的构建
错误
本教程文档不提供技术支持,仅供有能力自行开发的用户使用!!!
本教程文档不提供技术支持,仅供有能力自行开发的用户使用!!!
本教程文档不提供技术支持,仅供有能力自行开发的用户使用!!!
12.1. 什么是Buildroot?
Buildroot是Linux平台上一个开源的嵌入式Linux系统自动构建框架。整个Buildroot是由Makefile脚本和Kconfig配置文件构成的。你可以和编译Linux内核一样,通过buildroot配置,menuconfig修改,编译出一个完整的可以直接烧写到机器上运行的Linux系统软件。
Buildroot 有以下⼏点优势:
通过源码构建,有很⼤的灵活性;
⽅便的交叉编译环境,可以进⾏快速构建;
⽅便各系统组件配置及定制开发。
使⽤ Buildroot最出名的项目就是Openwrt,由它制作出的镜像可以跑在搭载16Mb SPI Flash的路由器上, 系统基本没包含多余的东西。得益于Buildroot的简单化,整个Buildroot project 可以在⼀个git仓库维护。 Buildroot使⽤kconfig和make,⼀个defconfig配置代表⼀种BSP⽀持。
12.2. 安装一些依赖文件
1 | sudo apt-get install zlib1g-dev unzip gcc g++ aptitude lib32stdc++6-4.8-dbg make build-essential libncurses5 libncurses5-dev u-boot-tools traceroute -y
|
12.3. Buildroot构建
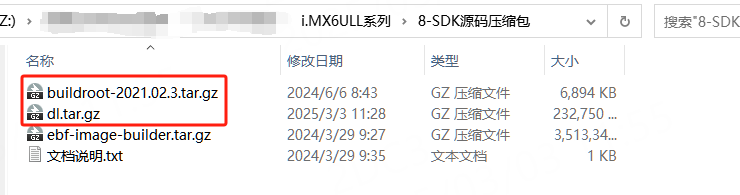
本教程使用的是buildroot版本为: buildroot-2021.02.3
可以访问资料网盘/8-SDK源码压缩包/buildroot-2021.02.3.tar.gz,进行下载。
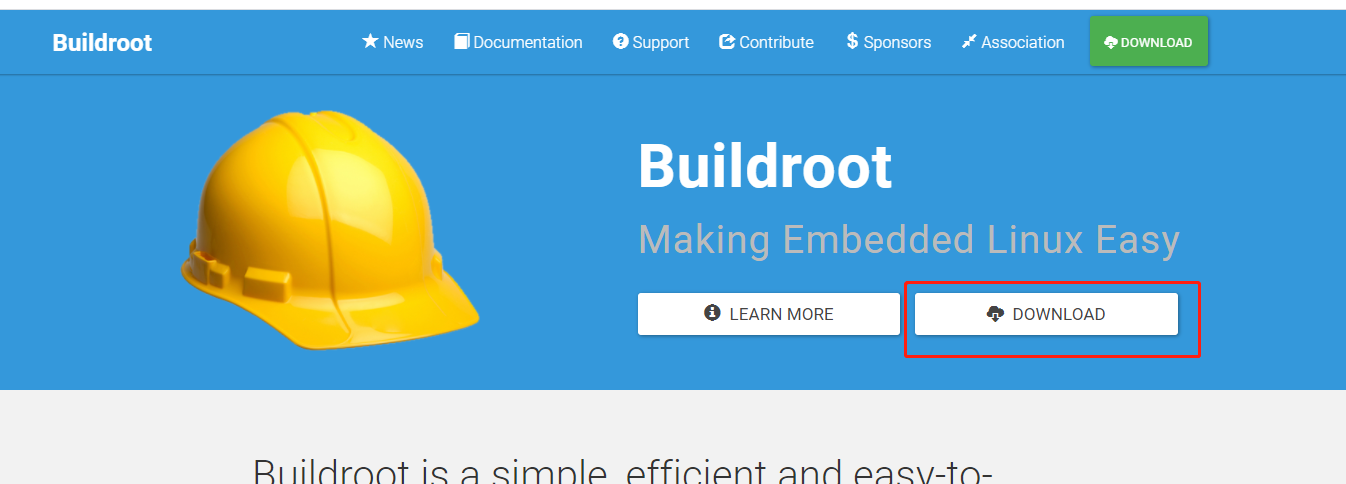
如果需要使用新版本可以到官网地址下载:https://buildroot.org/ 打开后如图
选择DOWNLOAD
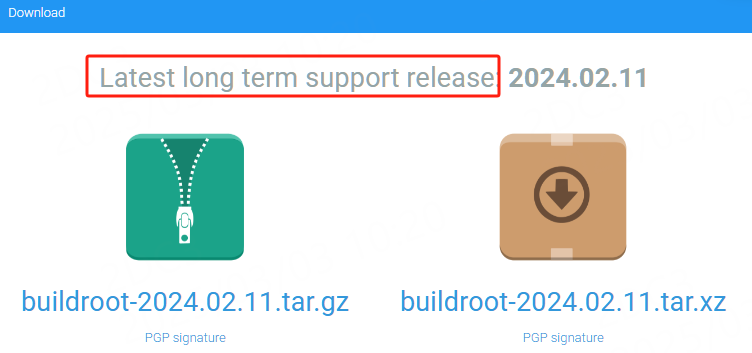
选择长期支持版本(LTS),两个压缩格式,选择其中一个即可
或者访问buildroot官方的gitlab仓库进行下载: buildroot仓库
注意
如果使用新版本一些配置项可能发生改变,如果没有特殊需求建议使用教程相同版本。
12.3.1. 解压源码包和交叉编译工具链
以buildroot-2021.02.3版本为例,构建根文件系统。
1 2 | #解压buildroot源码包
tar -vxf buildroot-2021.02.3.tar.gz
|
交叉编译工具链使用资料网盘/6-开发软件/交叉编译工具链/gcc-arm-8.3-2019.03-x86_64-arm-linux-gnueabihf.tar.xz
将gcc-arm-8.3-2019.03-x86_64-arm-linux-gnueabihf.tar.xz解压到buildroot源码根目录。
1 2 3 4 5 6 7 8 9 | #解压交叉编译工具链到buildroot源码根目录
tar xvf gcc-arm-8.3-2019.03-x86_64-arm-linux-gnueabihf.tar.xz -C buildroot-2021.02.3/
#查看buildroot源码根目录
ls buildroot-2021.02.3/
arch Config.in DEVELOPERS gcc-arm-8.3-2019.03-x86_64-arm-linux-gnueabihf output system
board Config.in.legacy linux package toolchain
boot configs docs Makefile README utils
CHANGES COPYING fs Makefile.legacy support
|
其中gcc-arm-8.3-2019.03-x86_64-arm-linux-gnueabihf目录就是我们要使用的交叉编译工具链目录。
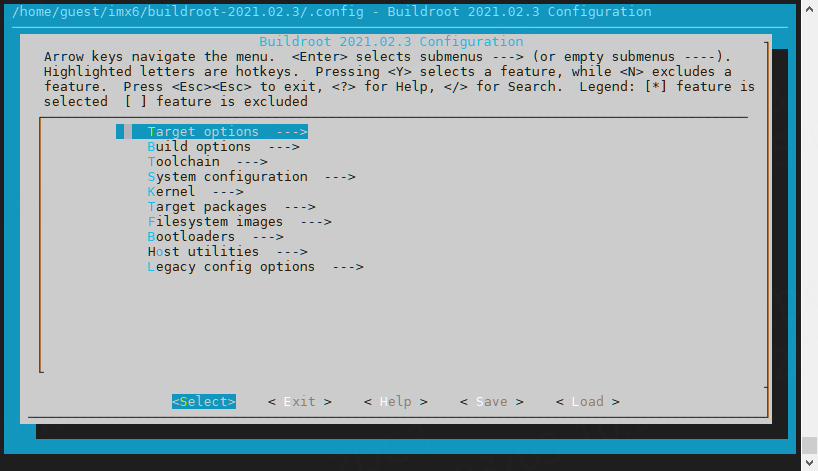
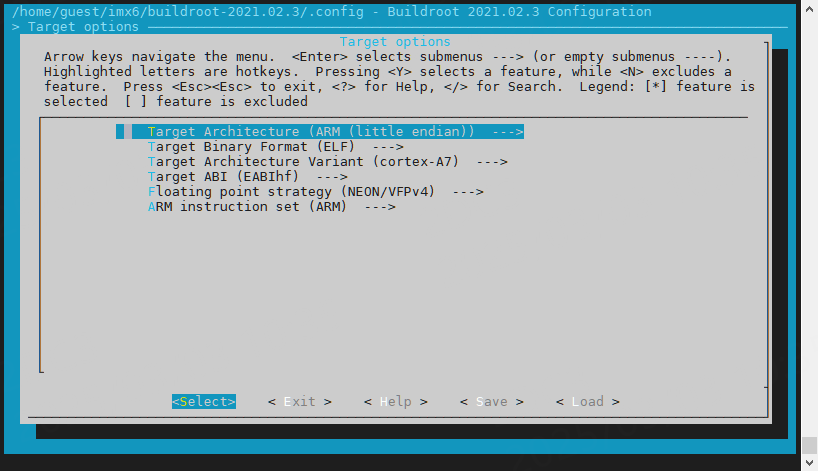
12.3.3. 配置Target options
进入Target options配置项,修改为以下配置:
1 2 3 4 5 6 7 | Target options
-> Target Architecture = ARM (little endian)
-> Target Binary Format = ELF
-> Target Architecture Variant = cortex-A7
-> Target ABI = EABIhf
-> Floating point strategy = NEON/VFPv4
-> ARM instruction set = ARM
|
设置完如下图所示:
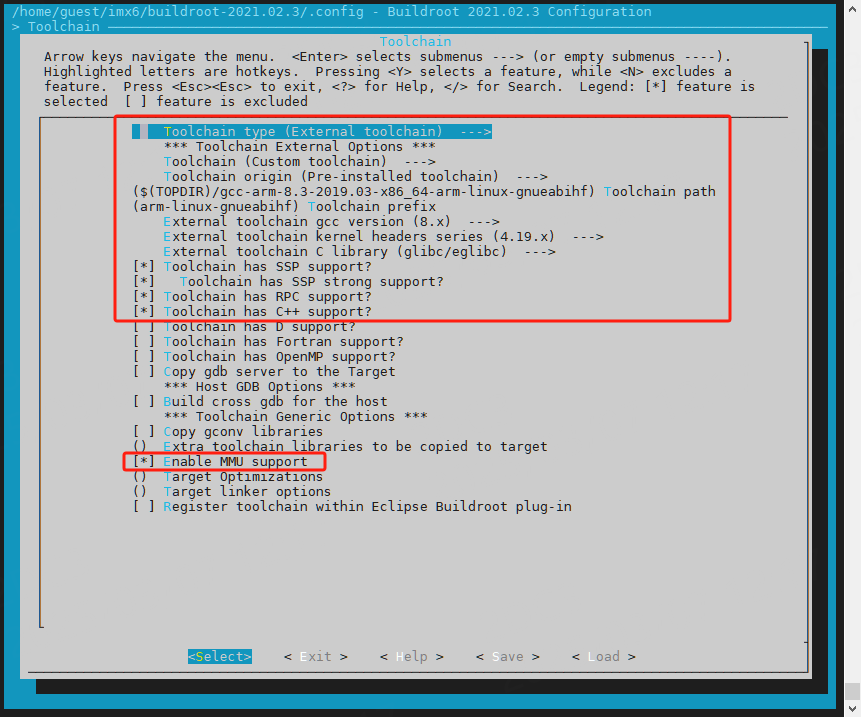
12.3.4. 配置Toolchain
进入Toolchain配置项,修改为以下配置:
1 2 3 4 5 6 7 8 9 10 11 12 13 | Toolchain
-> Toolchain type = External toolchain
-> Toolchain = Custom toolchain //选择用户的交叉编译器
-> Toolchain origin = Pre-installed toolchain
-> Toolchain path = $(TOPDIR)/gcc-arm-8.3-2019.03-x86_64-arm-linux-gnueabihf //这里填入交叉编译器路径,$(TOPDIR)是buildroot源码根目录
-> Toolchain prefix = arm-linux-gnueabihf //交叉编译链前缀
-> External toolchain gcc version = 8.x //交叉编译链版本
-> External toolchain kernel headers series = 4.19.x //交叉编译链LINUX_VERSION_CODE版本
-> External toolchain C library = glibc/eglibc
-> [*] Toolchain has SSP support? (NEW) //选中
-> [*] Toolchain has RPC support? (NEW) //选中
-> [*] Toolchain has C++ support? //选中
-> [*] Enable MMU support (NEW) //选中
|
设置完如下图所示:
12.3.5. 配置System configuration
进入System configuration配置项,修改为以下配置:
1 2 3 4 5 6 7 | System configuration
-> (buildroot) System hostname = buildroot //主机名字
-> (Welcome to Buildroot) System banner = Welcome to Buildroot //欢迎语
-> Init system (BusyBox) = BusyBox //使用 busybox
-> /dev management = Dynamic using devtmpfs + mdev //使用mdev
-> [*] Enable root login with password //使能root密码登录
-> () Root password //可设置登录密码
|
设置完如下图所示:
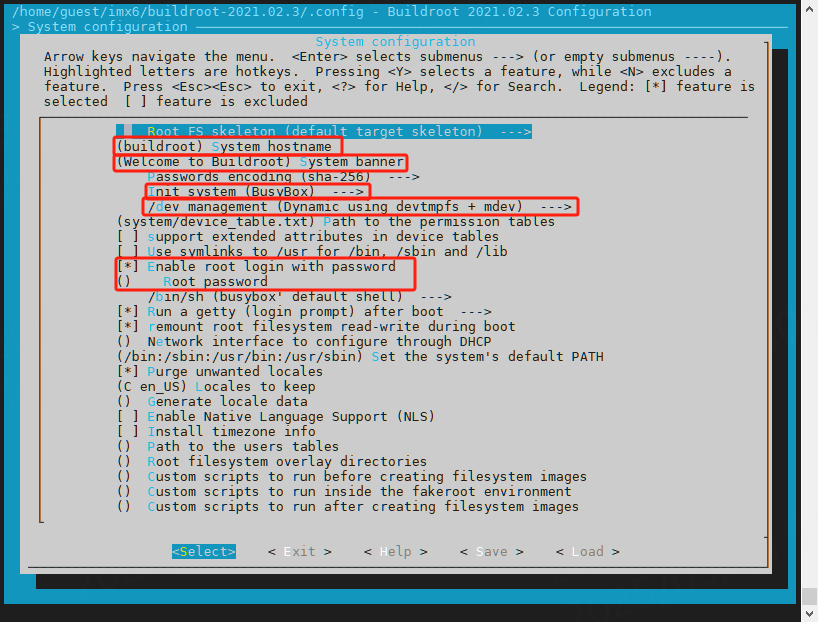
以上Root password选项可设置root密码,如果需要使用密码进行登录,可自行设置,如果密码为空则root登录时不需要输入密码。
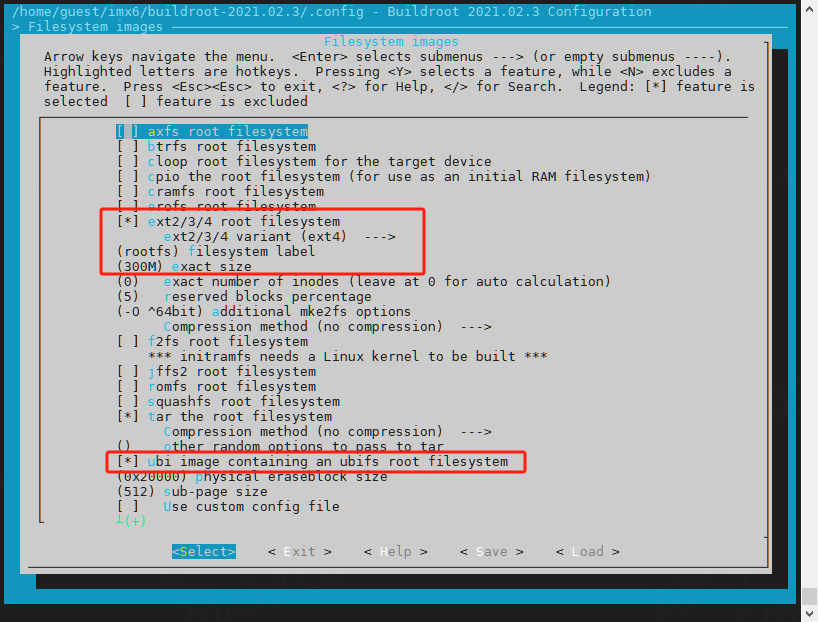
12.3.6. 配置Filesystem images
进入Filesystem images配置项,这个选项是配置将编译生成什么格式的根文件系统,可以做如下配置:
1 2 3 4 5 | -> Filesystem images
-> [*] ext2/3/4 root filesystem //EMMC或SD卡使用ext3/ext4格式
-> ext2/3/4 variant = ext4 //选择ext4格式
-> (300M)exact size //设置文件系统大小
-> [*] ubi image containing an ubifs root filesystem //NAND使用ubi格式
|
设置完如下图所示:
12.3.7. 关闭kernel和uboot的编译
Buildroot不仅能构建根文件系统,还可以编译kernel和uboot,但是这些源码是从官网下载的,很可能是没包含各芯片厂商的驱动文件,所以我们关闭kernel和uboot编译即可。
进入Kernel配置项,确认没有使能Linux Kernel配置项。
1 2 | -> Kernel
-> [ ] Linux Kernel
|
进入Bootloaders配置项,确认没有使能U-Boot配置项。
1 2 | -> Bootloaders
-> [ ] U-Boot
|
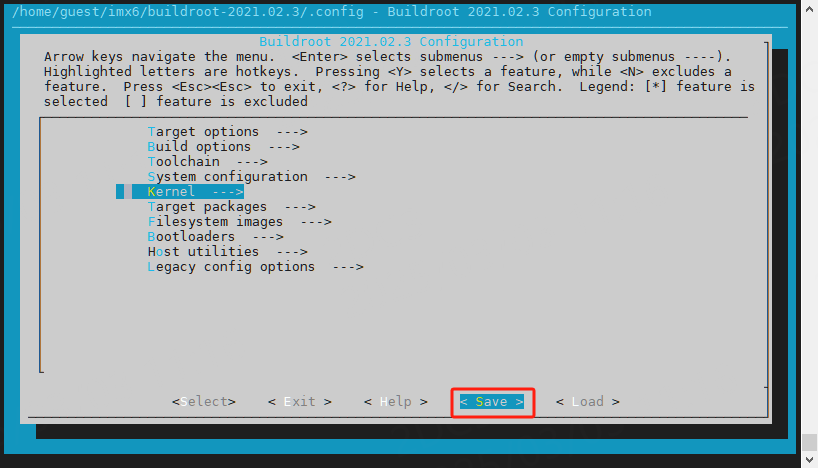
12.3.8. 保存配置文件
修改完成后选择右下角<Save>进行保存,默认保存为buildroot顶层目录下的.config即可。
因为默认保存的不是精简配置文件,而是包含全部配置项的文件,不利于后续观察和配置,因此需要生成精简的配置文件,并保存到configs/目录下。
1 2 3 4 5 6 7 8 9 10 11 12 13 14 15 16 17 18 19 20 21 22 23 24 25 | #根据.config生成defconfig精简配置
make savedefconfig
#保存到configs目录下
cp -f defconfig configs/imx6ullfire_defconfig
#查看生成的配置
cat configs/imx6ullfire_defconfig
#信息输出如下
BR2_arm=y
BR2_cortex_a7=y
BR2_ARM_FPU_NEON_VFPV4=y
BR2_TOOLCHAIN_EXTERNAL=y
BR2_TOOLCHAIN_EXTERNAL_CUSTOM=y
BR2_TOOLCHAIN_EXTERNAL_PATH="$(TOPDIR)/gcc-arm-8.3-2019.03-x86_64-arm-linux-gnueabihf"
BR2_TOOLCHAIN_EXTERNAL_CUSTOM_PREFIX="arm-linux-gnueabihf"
BR2_TOOLCHAIN_EXTERNAL_GCC_8=y
BR2_TOOLCHAIN_EXTERNAL_HEADERS_4_19=y
BR2_TOOLCHAIN_EXTERNAL_CUSTOM_GLIBC=y
BR2_TOOLCHAIN_EXTERNAL_CXX=y
BR2_ROOTFS_DEVICE_CREATION_DYNAMIC_MDEV=y
BR2_TARGET_ROOTFS_EXT2=y
BR2_TARGET_ROOTFS_EXT2_4=y
BR2_TARGET_ROOTFS_EXT2_SIZE="300M"
BR2_TARGET_ROOTFS_UBI=y
|
imx6ullfire_defconfig中的内容就是我们前面的修改,当加载配置文件时会加载默认配置文件,然后再根据我们的配置文件覆盖默认配置生成.config。
12.3.9. 下载dl源码包
因为Buildroot编译时会拉取软件包源码存放到dl/目录下,如果访问外网困难则拉取的时间将会十分漫长,因此可以使用野火编译时拉取好的。
访问资料网盘/8-SDK源码压缩包/dl.tar.gz,进行下载。
将dl.tar.gz压缩包传到buildroot源码根目录,然后解压:
1 2 3 4 5 6 7 8 | #进入源码根目录
cd buildroot-2021.02.3
#解压
tar xvf dl.tar.gz
#查看源码包
ls dl/
|
以上压缩包仅适用于buildroot-2021.02.3版本,如果是其他版本则需编译时自行拉取。
12.3.10. 编译Buildroot
1 2 3 4 5 6 7 8 9 10 11 | #加载配置文件
make imx6ullfire_defconfig
#编译,使用16线程,根据自己的电脑性能而定
make -j16
#如果遇到编译错误,使用单线程编译,并添加编译详细输出
make -j1 V=s
#解决报错后再使用多线程编译
|
编译完成后文件在 buildroot源码/output/images 文件夹中,其中 rootfs.tar 为本教程需要的文件。
1 2 3 | #查看编译输出
ls output/images/
rootfs.ext2 rootfs.ext4 rootfs.tar rootfs.ubi rootfs.ubifs
|