16. 屏幕与触摸
LubanCat-P1板卡支持mipi屏的显示,屏幕适用野火MIPI屏幕,有5.5寸、7寸以及10.1寸MIPI屏幕。
屏幕资料: 野火MIPI屏幕
16.1. 屏幕显示
16.1.2. 初始化屏幕
不同屏幕的初始化序列不同,时序参数也不同,所以要在初始化的时候需要指定屏幕。
1 2 3 4 5 6 7 8 9 10 11 | #5.5寸mipi屏幕初始化
sudo /mnt/system/usr/bin/sample_dsi --panel=HX8399_1080P
#7寸mipi屏幕初始化
sudo /mnt/system/usr/bin/sample_dsi --panel=EK79007
#10.1寸mipi屏幕初始化
sudo /mnt/system/usr/bin/sample_dsi --panel=ILI9881C
#加载fb驱动
sudo insmod /mnt/system/ko/soph_fb.ko
|
16.1.3. 测试屏幕
16.1.3.1. 屏幕自测
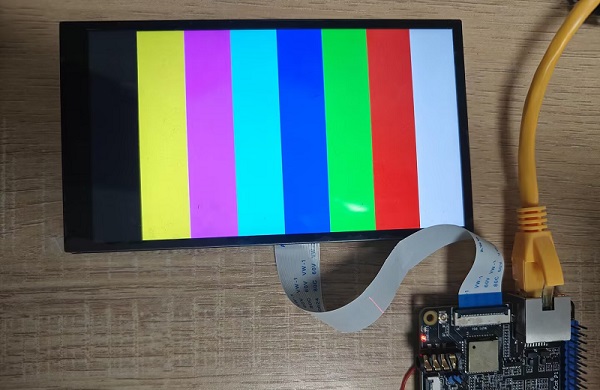
算能sg200x修改内部寄存器可以进行屏幕自测,执行以下命令:
1 2 | sudo devmem 0x0a088000 32 0xC0
sudo devmem 0x0a088094 32 0x0701000a
|
效果如下:

16.1.3.2. 屏幕刷屏
使用framebuffer编写测试程序。
1 2 3 4 5 6 7 8 9 10 11 12 13 14 15 16 17 18 19 20 21 22 23 24 25 26 27 28 29 30 31 32 33 34 35 36 37 38 39 40 41 42 43 44 45 46 47 48 49 50 51 52 53 54 55 56 57 58 59 60 61 62 63 64 65 66 67 68 69 70 71 72 73 74 75 76 77 78 79 80 81 82 83 84 85 86 87 88 89 90 91 92 93 94 95 96 97 98 99 100 101 102 103 104 105 106 107 108 109 110 111 112 113 114 115 116 117 118 119 120 121 122 123 124 125 126 127 128 129 130 131 132 133 134 135 136 137 138 139 140 141 142 143 144 145 146 147 148 149 150 151 152 153 154 155 156 157 158 159 160 161 162 163 164 165 166 167 168 169 170 171 172 173 174 175 176 177 178 | #include <unistd.h>
#include <stdio.h>
#include <fcntl.h>
#include <linux/fb.h>
#include <sys/mman.h>
#include <stdlib.h>
#include <string.h>
#include <stdint.h>
#include <sys/ioctl.h>
#include <errno.h>
#define ARGB8888
#define PAUSE() \
do { \
printf("---------------press Enter key to continue!---------------\n"); \
getchar(); \
} while (0)
#if defined(ARGB8888) // 32bits
#define RED 0xFFFF0000
#define GREEN 0xFF00FF00
#define BLUE 0xFF0000FF
#define YELLOW 0xFFFFFF00
#define WHITE 0xFFFFFFFF
#define BLACK 0xFF000000
void fill_color(uint32_t *fb_addr, uint32_t bit_map, int psize)
{
int i;
int pix_count = psize / 4;
for(i=0; i<pix_count; i++) {
*fb_addr = bit_map;
fb_addr++;
}
}
#else // 16bits
#define RED 0xFC00
#define GREEN 0x83E0
#define BLUE 0x801F
#define YELLOW 0xFFE0
#define WHITE 0xFFFF
#define BLACK 0x8000
void fill_color(short *fb_addr, short bit_map, int psize)
{
int i;
for(i=0; i<psize; i++) {
*fb_addr = bit_map;
fb_addr++;
}
}
#endif
void _fb_get_info(int fp, struct fb_fix_screeninfo *finfo, struct fb_var_screeninfo *vinfo)
{
long screensize=0;
if(ioctl(fp, FBIOGET_FSCREENINFO, finfo)){
printf("Error reading fixed information/n");
exit(2);
}
if(ioctl(fp, FBIOGET_VSCREENINFO, vinfo)){
printf("Error reading variable information/n");
exit(3);
}
screensize = finfo->line_length * vinfo->yres;
printf("The ID=%s\n", finfo->id);
printf("The phy mem = 0x%x, total size = %d(byte)\n", finfo->smem_start, finfo->smem_len);
printf("line length = %d(byte)\n", finfo->line_length);
printf("xres = %d, yres = %d, bits_per_pixel = %d\n", vinfo->xres, vinfo->yres, vinfo->bits_per_pixel);
printf("xresv = %d, yresv = %d\n", vinfo->xres_virtual, vinfo->yres_virtual);
printf("vinfo.xoffset = %d, vinfo.yoffset = %d\n", vinfo->xoffset, vinfo->yoffset);
printf("vinfo.vmode is :%d\n", vinfo->vmode);
printf("finfo.ypanstep is :%d\n", finfo->ypanstep);
printf("vinfo.red.offset=0x%x\n", vinfo->red.offset);
printf("vinfo.red.length=0x%x\n", vinfo->red.length);
printf("vinfo.green.offset=0x%x\n", vinfo->green.offset);
printf("vinfo.green.length=0x%x\n", vinfo->green.length);
printf("vinfo.blue.offset=0x%x\n", vinfo->blue.offset);
printf("vinfo.blue.length=0x%x\n", vinfo->blue.length);
printf("vinfo.transp.offset=0x%x\n", vinfo->transp.offset);
printf("vinfo.transp.length=0x%x\n", vinfo->transp.length);
printf("Expected screensize = %d(byte), using %d frame\n", screensize, finfo->smem_len/screensize);
}
int main ()
{
int fp=0;
struct fb_var_screeninfo vinfo;
struct fb_fix_screeninfo finfo;
void *fbp = NULL;
uint32_t *test_fbp = NULL;
int x = 0, y = 0;
long location = 0;
int i;
int num = 1;
int pix_size=0;
fp = open("/dev/fb0", O_RDWR);
if(fp < 0) {
printf("Error : Can not open framebuffer device/n");
exit(1);
}
printf("-- Default fb info --\n");
_fb_get_info(fp, &finfo, &vinfo);
#if !defined(ARGB8888)
vinfo.xres = 720;
vinfo.yres = 1280;
vinfo.xres_virtual = 720;
vinfo.yres_virtual = 2560;
vinfo.bits_per_pixel = 16;
if(ioctl(fp, FBIOPUT_VSCREENINFO, &vinfo)){
printf("Error putting variable information/n");
exit(3);
}
printf("-- Updated fb info --\n");
_fb_get_info(fp, &finfo, &vinfo);
#endif
fbp = mmap(0, finfo.smem_len, PROT_READ | PROT_WRITE, MAP_SHARED, fp, 0);
if (fbp == MAP_FAILED)
{
printf ("Error: failed to map framebuffer device to memory.\n");
exit (4);
}
printf("Get virt mem = %p\n", fbp);
pix_size = finfo.line_length * vinfo.yres;
/* using first frame, for FBIOPAN_DISPLAY
* 当刷新需要调用FBIOPAN_DISPLAY, 要告知驱动刷哪块帧, 用到下面两个参数
* 如果使用第二帧buffer -> vinfo.xoffset = 0; vinfo.yoffset = vinfo.yres;
*/
vinfo.xoffset = 0;
vinfo.yoffset = 0;
/* show color loop */
while(num--) {
printf("\ndrawing YELLOW......\n");
vinfo.xoffset = 0;
vinfo.yoffset = 0;
fill_color(fbp, YELLOW, pix_size);
if (ioctl(fp, FBIOPAN_DISPLAY, &vinfo) != 0) {
printf("\nPAN_DISPLAY err(%d)\n", errno);
}
sleep(1);
printf("\ndrawing BLUE......\n");
vinfo.xoffset = 0;
vinfo.yoffset = 0;
fill_color(fbp, BLUE, pix_size);
if (ioctl(fp, FBIOPAN_DISPLAY, &vinfo) != 0) {
printf("\nPAN_DISPLAY err(%d)\n", errno);
}
sleep(1);
printf("\ndrawing RED......\n");
vinfo.xoffset = 0;
vinfo.yoffset = 0;
fill_color(fbp, RED, pix_size);
if (ioctl(fp, FBIOPAN_DISPLAY, &vinfo) != 0) {
printf("\nPAN_DISPLAY err(%d)\n", errno);
}
sleep(1);
PAUSE();
}
munmap(fbp, finfo.smem_len); /*解除映射*/
close (fp);
return 0;
}
|
编译测试程序
1 2 3 4 5 6 7 8 | #板卡本地编译
gcc fb_test.c -o fb_test
#交叉编译
riscv64-unknown-linux-musl-gcc fb_test.c -o fb_test -march=rv64imafdcvxthead -mcmodel=medany -mabi=lp64d
#运行测试
sudo ./fb_test
|
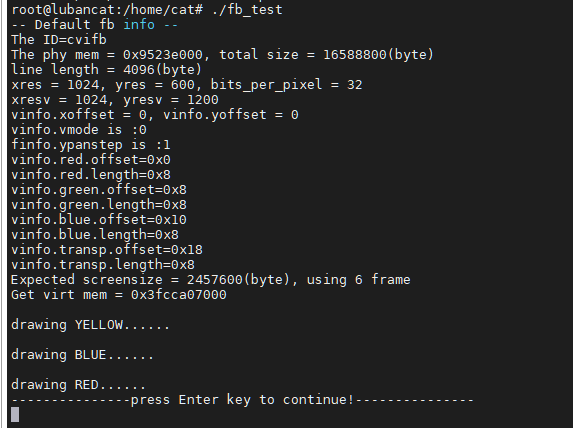
串口信息如下:

可以看到打印显示设备ID、显存起始地址和大小、屏幕分辨率、虚拟分辨率、显示模式等信息。
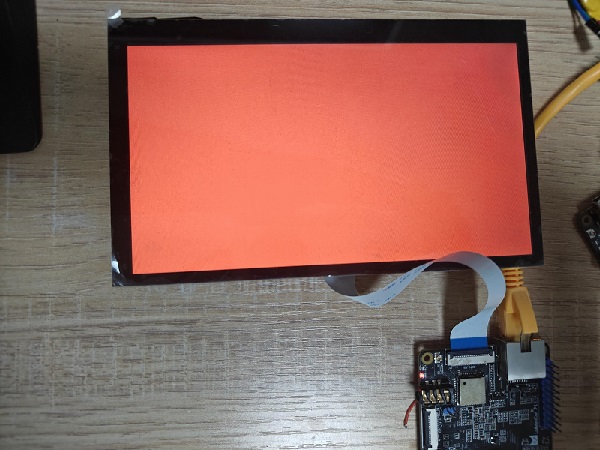
屏幕效果:
依次黄、蓝、红依次刷新,按下回车后退出。

16.2. 屏幕调试方法
资料更新中
16.3. 触摸
野火mipi使用的触摸芯片为gt911/gt928,系统启动时会加载gt9xx的驱动,以下是7寸mipi屏幕启动打印的触摸信息。

可从以上信息可知触摸芯片是gt911,i2c的通信地址14,触摸面板的大小1024*600以及工作模式等。
触摸屏属于input输入子系统的设备,会在/dev/input下注册想用的事件, 执行dmesg | grep input 以及 ls -l /dev/input 的确定对应的事件编号
1 2 3 4 5 6 7 8 9 | root@lubancat:/home/cat# ls -l /dev/input
total 0
drwxr-xr-x 2 root root 60 Nov 22 04:57 by-path
crw-rw---- 1 root input 13, 64 Nov 22 04:57 event0
crw-rw---- 1 root input 13, 65 Nov 22 04:57 event1
root@lubancat:/home/cat# dmesg | grep input
[ 1.858676] input: sgpio-keys as /devices/platform/sgpio-keys/input/input0
[ 21.153372] input: goodix-ts as /devices/virtual/input/input1
root@lubancat:/home/cat#
|
可知触摸对应的事件为/dev/input/event1。
注意
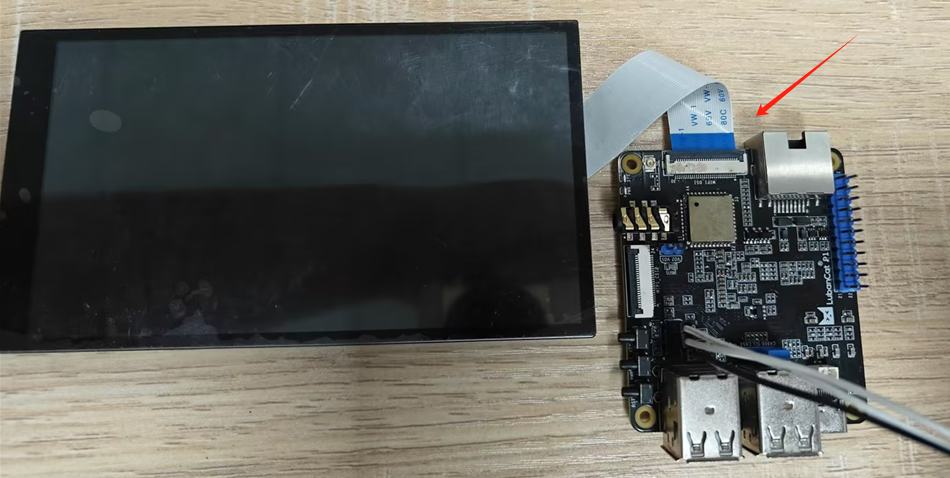
使用屏幕时,请确认屏幕的连接是正确的,没有接屏幕也会有input的设备产生,但是会没有数据的生成。
16.3.1. 使用evtest测试触摸
在终端上执行evtest命令并选择触摸屏进行测试。
1 2 3 4 5 6 7 8 | #执行evtest命令
sudo evtest
No device specified, trying to scan all of /dev/input/event*
Available devices:
/dev/input/event0: sgpio-keys
/dev/input/event1: goodix-ts
Select the device event number [0-1]:
|
sgpio-keys为用户按键和pwr按键,对应事件event0
goodix-ts为屏幕触摸,对应事件event1
输入数字1,测试屏幕触摸。
1 2 3 4 5 6 7 8 9 10 11 12 13 14 15 16 17 18 19 20 21 22 23 24 25 26 27 28 29 30 31 32 33 34 35 36 37 | cat@lubancat:~$ sudo evtest
No device specified, trying to scan all of /dev/input/event*
Available devices:
/dev/input/event0: sgpio-keys
/dev/input/event1: goodix-ts
Select the device event number [0-1]: 1
Input driver version is 1.0.1
Input device ID: bus 0x18 vendor 0xdead product 0xbeef version 0x28bb
Input device name: "goodix-ts"
Supported events:
Event type 0 (EV_SYN)
Event type 1 (EV_KEY)
Event code 330 (BTN_TOUCH)
Event type 3 (EV_ABS)
Event code 48 (ABS_MT_TOUCH_MAJOR)
Value 0
Min 0
Max 255
Event code 50 (ABS_MT_WIDTH_MAJOR)
Value 0
Min 0
Max 255
Event code 53 (ABS_MT_POSITION_X)
Value 0
Min 0
Max 1024
Event code 54 (ABS_MT_POSITION_Y)
Value 0
Min 0
Max 600
Event code 57 (ABS_MT_TRACKING_ID)
Value 0
Min 0
Max 255
Properties:
Property type 1 (INPUT_PROP_DIRECT)
Testing ... (interrupt to exit)
|
输入后会把基本的输入信息打印出来,可以根据这些信息,获取触摸屏的基本信息。
点击屏幕,将会有信息打印。
1 2 3 4 5 6 7 8 9 10 11 12 13 14 15 16 17 18 19 | Property type 1 (INPUT_PROP_DIRECT)
Testing ... (interrupt to exit)
Event: time 1700602231.652645, type 1 (EV_KEY), code 330 (BTN_TOUCH), value 1
Event: time 1700602231.652645, type 3 (EV_ABS), code 53 (ABS_MT_POSITION_X), value 205
Event: time 1700602231.652645, type 3 (EV_ABS), code 54 (ABS_MT_POSITION_Y), value 300
Event: time 1700602231.652645, type 3 (EV_ABS), code 48 (ABS_MT_TOUCH_MAJOR), value 15
Event: time 1700602231.652645, type 3 (EV_ABS), code 50 (ABS_MT_WIDTH_MAJOR), value 15
Event: time 1700602231.652645, type 3 (EV_ABS), code 57 (ABS_MT_TRACKING_ID), value 0
Event: time 1700602231.652645, ++++++++++++++ SYN_MT_REPORT ++++++++++++
Event: time 1700602231.652645, -------------- SYN_REPORT ------------
Event: time 1700602231.662620, type 3 (EV_ABS), code 53 (ABS_MT_POSITION_X), value 205
Event: time 1700602231.662620, type 3 (EV_ABS), code 54 (ABS_MT_POSITION_Y), value 300
Event: time 1700602231.662620, type 3 (EV_ABS), code 48 (ABS_MT_TOUCH_MAJOR), value 15
Event: time 1700602231.662620, type 3 (EV_ABS), code 50 (ABS_MT_WIDTH_MAJOR), value 15
Event: time 1700602231.662620, type 3 (EV_ABS), code 57 (ABS_MT_TRACKING_ID), value 0
Event: time 1700602231.662620, ++++++++++++++ SYN_MT_REPORT ++++++++++++
Event: time 1700602231.662620, -------------- SYN_REPORT ------------
Event: time 1700602231.672945, type 1 (EV_KEY), code 330 (BTN_TOUCH), value 0
Event: time 1700602231.672945, -------------- SYN_REPORT ------------
|
第3行:按键事件(EV_KEY),按钮代码(code 330)代表触摸(BTN_TOUCH),其值(value)为1,表示触摸屏被触摸。
第4行:绝对坐标事件(EV_ABS),代码(code 53)代表触摸点的X轴位置(ABS_MT_POSITION_X),其值为205。
第5行:绝对坐标事件(EV_ABS),代码(code 54)代表触摸点的Y轴位置(ABS_MT_POSITION_Y),其值为300。
第6行:触摸点的主要接触区域(ABS_MT_TOUCH_MAJOR),值为15
第7行:触摸点的主要宽度(ABS_MT_WIDTH_MAJOR),值为15。
第8行:触摸点的追踪ID(ABS_MT_TRACKING_ID),值为0。
第9、10行:第一条是多点触摸报告同步开始,第二条是输入事件同步报告。
第18行:按键事件,按钮代码为触摸(BTN_TOUCH),其值为0,表示触摸屏停止触摸。
16.3.2. 使用libts工具重新校准电容屏
电容屏是不需要重新校准的,读取出来的原始数据就是坐标值了, libts是一种实用的触摸工具,能够用于触摸屏的校准,将触摸位置与屏幕显示位置统一起来。
通过以下命令下载libts-bin工具
1 | sudo apt install libts-bin
|
校准前需要初始化屏幕,使用以下命令进行屏幕校准,执行以下两条命令之后,显示屏将会显示需要点击的位置, 依次点击完成后完成屏幕:
1 2 3 4 5 6 7 8 9 10 11 12 13 14 15 16 17 18 19 20 | #设置环境变量,/dev/input/event1为实际触摸输入设备对应的事件
export TSLIB_TSDEVICE=/dev/input/event1
#进行屏幕校准
sudo ts_calibrate
xres = 1024, yres = 600
Took 8 samples...
Top left : X = 963 Y = 566
Took 10 samples...
Top right : X = 58 Y = 556
Took 10 samples...
Bot right : X = 44 Y = 61
Took 11 samples...
Bot left : X = 959 Y = 62
Took 12 samples...
Center : X = 509 Y = 302
1020.825867 -1.015453 0.018107
606.596680 0.005992 -1.000751
Calibration constants: 66900844 -66548 1186 39753920 392 -65585 65536
|
生成的校准文件在/etc/pointercal,如果使用qt可指定使用该文件。
执行ts_print命令后触摸触摸屏将会打印出相对应的坐标,如下所示
1 2 3 4 5 6 7 8 9 10 11 | #执行命令
sudo ts_print
#触摸触摸屏将打印信息
1721266656.674860: 593 146 255
1721266656.685285: 593 146 255
1721266656.695758: 593 146 255
1721266656.705726: 593 146 255
1721266656.715641: 593 146 0
1721266657.268220: 147 369 255
1721266657.278639: 147 369 255
|
执行ts_test对触摸屏进行测试,执行命令弹出的界面有3个选项,第一个选项是画点,第二个选项是画线,第三个选项是退出测试。
1 2 | #执行命令
sudo ts_test
|
关于libts工具使用的详细说明可参考以下链接: https://github.com/libts/tslib

